Sharpening Systems (6 Features of a GREAT system)
Today there are numerous sharpening systems available on the market including: water cooled systems, dry sharpening systems, aluminum oxide wheels, diamond wheels, CBN (Cubic Boron Nitride) grinding wheels, jigs, gadgets, tool rests, etc. to help you hold and sharpen your tools. Personally, I have used numerous approaches, all with success to help sharpen tools (e.g., woodworking, woodturning, knives, chisels, etc.) However, you will quickly find some of these sharpening systems can be expensive and somewhat time consuming to set up and use. Below are a few features, I feel a good sharpening system should include.
")
A good sharpening system:
1. Allows for quick setup.
2. Includes an adjustable heavy-duty tool rest.
3. Provides quick, consistent, repeatable results.
4. Allows you to incorporate jigs.
5. Includes or incorporates adequate lighting.
6. Allows you to sharpen replaceable cutters.
1. Allows for quick setup.
A good sharpening system should allow you to setup and begin sharpening your woodworking, woodturning, and carving tools in just a few seconds. If you find yourself spending minutes just setting up your system, it might be time to look into a new sharpening system or ways to shorten the setup time. Below are a few ways to reduce setup time.
A. Use tool rests and jigs that you can adjust and secure without tools.
B. Consider using the same bevel angle on multiple tools to minimize setup time.
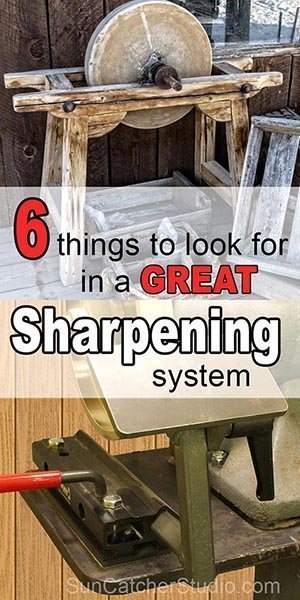
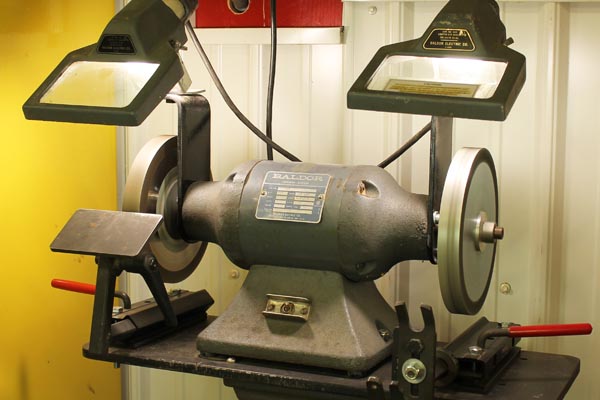
C. Consider buying a system that allows for more than one setup. For example, you can create a dual setup easily on two-wheel bench grinders as shown below. One side might be setup with a coarse grit wheel for more aggressive shaping, and the other side might be setup with a higher grit for sharpening. Likewise, one side might be setup for sharpening one set of tools, and the other side might be setup for sharpening a second set of tools. Similarly, the Tormek Sharpening System shown below makes it very easy to go from sharpening to honing.
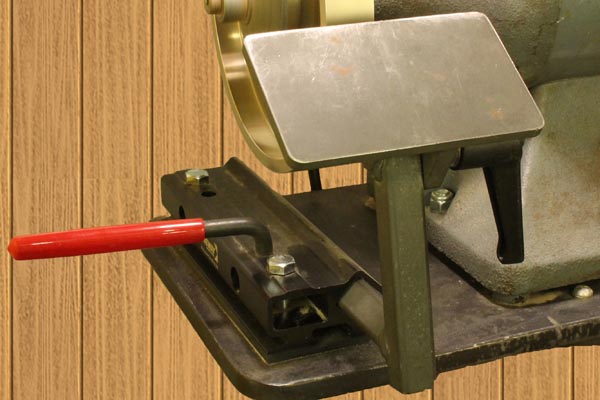
D. Consider installing clamps or stops on jigs.
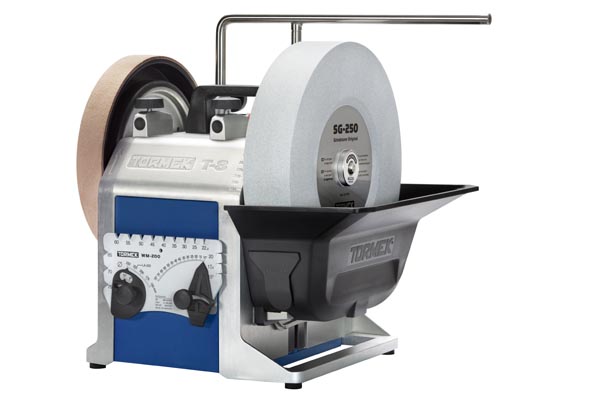
Installing clamps or stops on your jigs will allow you to reinstall jigs back in their original location. As shown below, I have attached a two-piece shaft collar on the sliding arm that holds my bowl-grinding jig (i.e., Oneway Wolverine Vari-Grind 2 Jig). In particular, this 1” (2.54cm) collar securely fastens around the 3/4″ (1.9cm) sliding arm – allowing me to precisely reinstall the sliding arm in its previous location minimizing setup time. Now I can change back and forth from a jig that I use for fingernail grinds to a jig for regular grinds in just seconds.

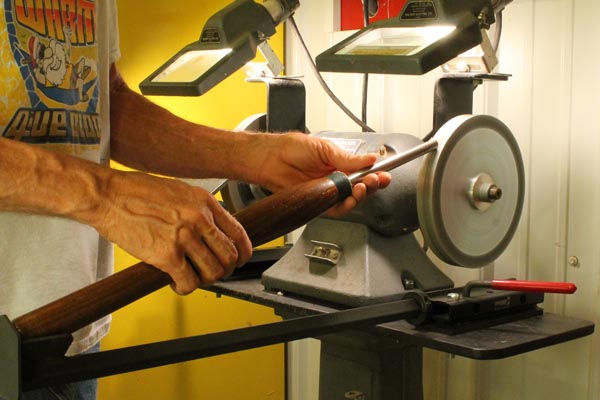
2. Includes an adjustable heavy duty tool rest.
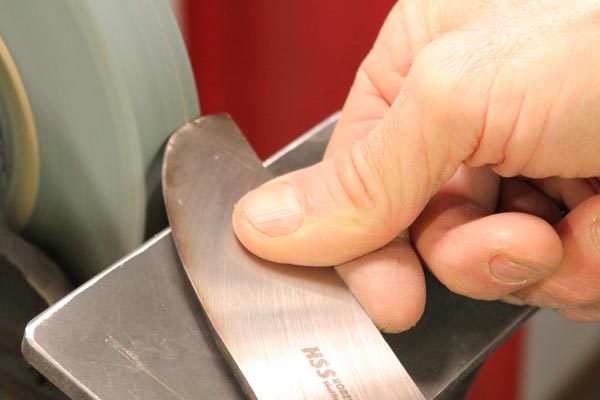
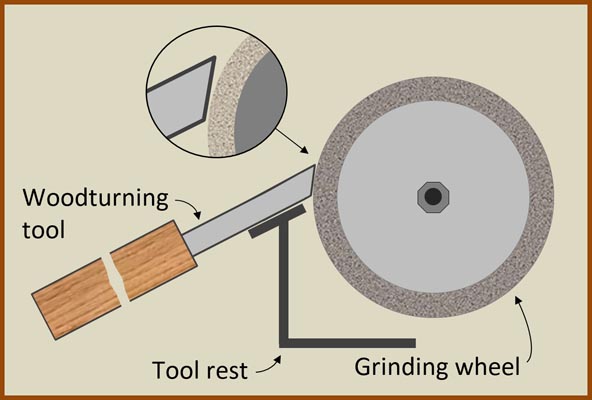
An adjustable heavy-duty tool rest should be a part of any good sharpening system. The tool rests which come with some sharpening systems are simply thin metal brackets that can flex easily. These brackets require the user to tighten wing nuts to hold them in place. Consequently, these brackets are difficult to fasten securely. As shown below, I have upgraded the tool rest on my sharpening system to include a heavy duty 3” x 5” (8cm x 13cm) platform. This tool rest uses a release ratchet handle to adjust the tilt and a cam-locking device on the base. This allows it to be slid in and out. In both cases, a half turn of a handle will tighten or loosen the adjustment mechanism.
As shown below, a tool rest works great for sharpening scrapers, parting tools, and chisels. When sharpening scrapers, swing the handle side to side while applying press to the flat part of the scraper. Whereas with the parting tool and skew chisel, sharpen one side, then flip and sharpen the other side. A burr should extend along the entire cutting edge. Optionally, hone as discussed below.
When sharpening with an aluminum oxide grinding wheel, you will know the edge is sharp when sparks start appearing over the edge. At the same time, there is typically a small change in color along the cutting edge. However, when sharpening tools with CBN grinding wheels or wet cooling systems, you will notice very few sparks (if any).
3. Provides quick, consistent, repeatable results.
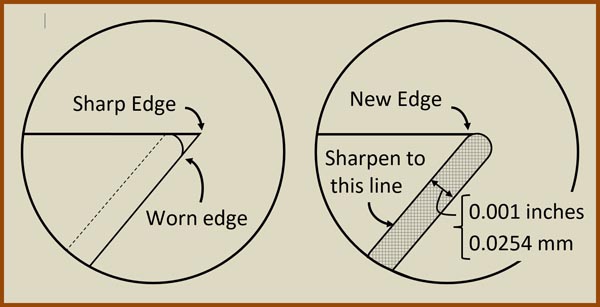
A good sharpening system should provide quick, consistent and repeatable results. A sharp cutting edge is the intersection of two planes – where the width is as close to zero as possible as shown below. As the tool becomes dull, this cutting edge will round over. When this rounded edge reaches about 0.0005 inches (0.0127 mm) the tool starts to exhibit signs of dullness that might include more force required to use the tool and more tear-out. When the width of this rounded edge reaches about 0.001 inches (0.0254 mm), it is time to sharpen the tool.

You can achieve the quickest results in a sharpening system by removing the least amount of material. As shown below, you can typically produce a new sharp cutting edge by removing 0.001 inches (0.0254 mm). This implies a typically tool can be sharpened 1000 times per inch (39 times per mm). Hence, you should be able to sharpen a typically tool several thousand times, before throwing it away.
How to Determine When Your Tool Has Been Sharpened.
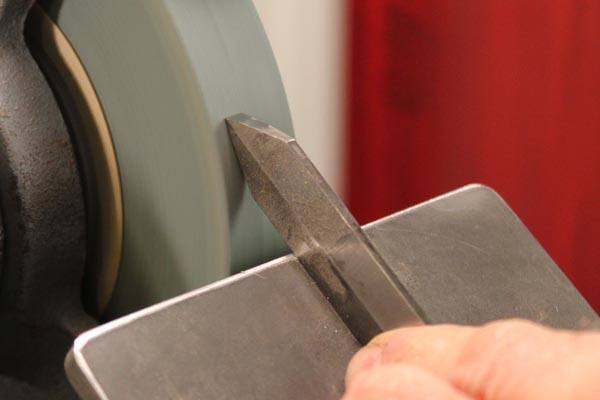
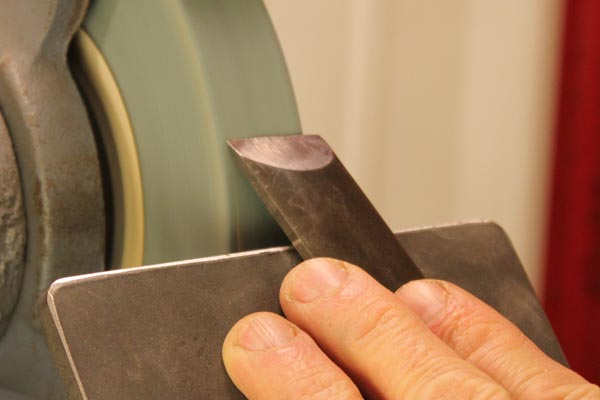
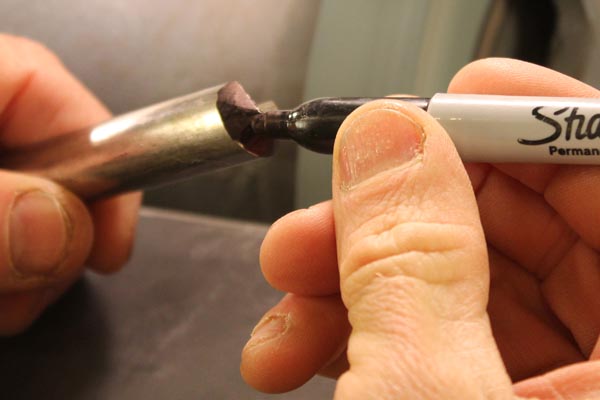
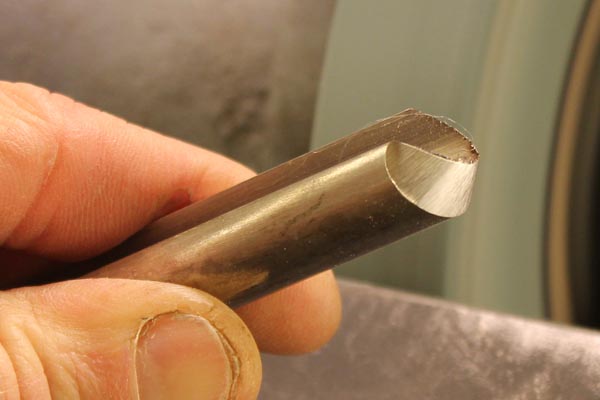
One way to help you see where the tool is being sharpened and to help you determine if you are removing too much material is to blacken the bevel as shown below. Now when you touch the bevel to your sharpening system, you will be able to see where the sharpening is occurring. If you are using a jig or platform, by blackening the bevel, it will help you in adjusting the angle. Ideally, within just a few seconds you should be removing all of the blacken surface on the bevel as shown below.
When free hand sharpening, as shown below, make sure, the tool rest is at the correct angle before you begin to sharpen the cutting edge. Otherwise, you will remove excess material.
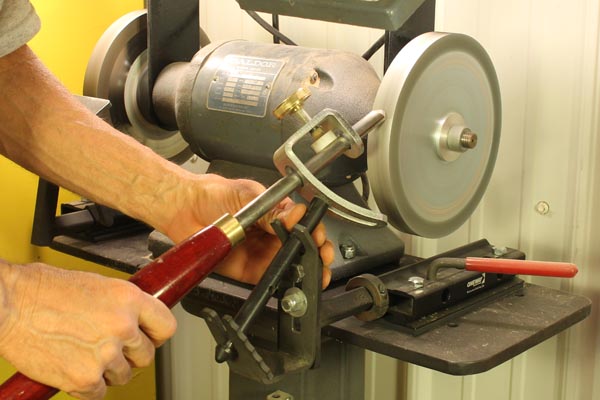
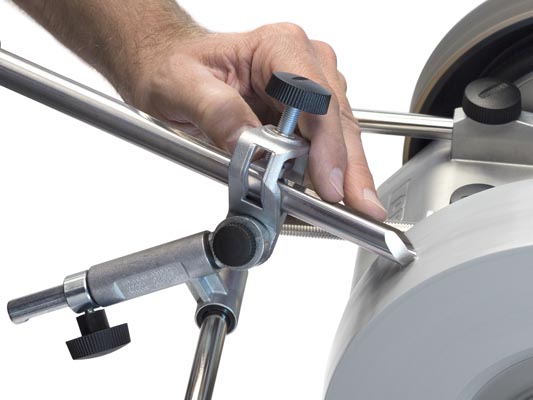
4. Allows jigs to be incorporated.
You currently might prefer a free-hand approach to sharpening your turning tools. However, there may come a time when you would like to try using a jig. At such time, it is helpful if your sharpening system allows you to incorporate jigs. Personally, I have found jigs can sharpen my tools quickly and consistently. On my sharpening system, I have incorporated a “V” arm attachment as shown below. This attachment works great for sharpening regular grinds on gouges. You can also use it to sharpen skew chisels, parting tools, and carving tools.
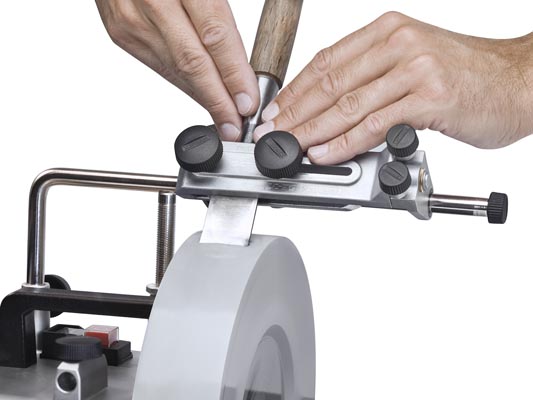
Similarly, I utilize a gouge-grinding jig for maintaining fingernail grinds on gouges. Once I have positioned a gouge in this jig, I can create a perfectly sharp and consistent cutting edge in seconds. In effect removing the black marker on a bevel as discussed earlier. This is because the jig eliminates the chance of the tool slipping off the wheel’s edges, while perfectly matching the profile on the gouge.
Other systems like the Tormek sharpening system also allow you to incorporate jigs. For example, the two figures below show how you can use jigs to sharpen a gouge and a chisel.
5. Includes or incorporates adequate lighting.
In many shops I have visited over the years, I have found numerous woodworkers place their sharpening system in some corner or along a wall – where the lighting is not the best. This may explain why one of the biggest complaints about bench grinders and other sharpening systems is inadequate lighting. Read the reviews from almost any grinder or sharpening system and you will find quotes like “I wish it included a flexible working light” or “I wish it had better lighting.”
Consequently, I recommend either (1) purchasing a sharpening system that includes adequate lighting, (2) placing the sharpening system in a well-lit area, or (3) adding supplemental lighting to your sharpening system.

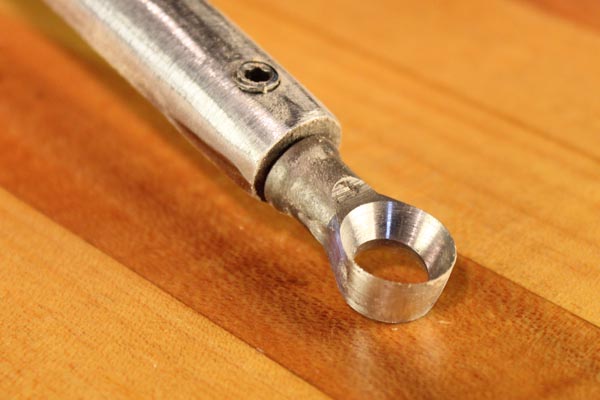
6. Allows replaceable cutters to be sharpened.
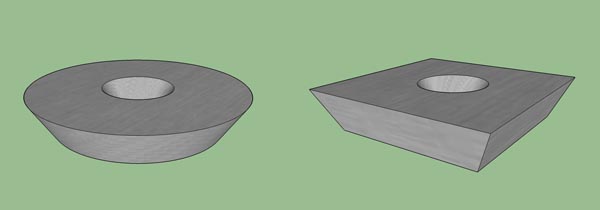
One of the first turning tools I recommend beginners purchase are tools with replaceable cutters as shown in the image below. I especially recommend these tools to (1) beginners trying to learn by themselves, or (2) woodturners hesitant about spending money on a sharpening system. Most beginners find the carbide cutters are easier to use than other turning tools and allow them to experience a sharp tool – at least for several hours. Enough time to build up their confidence and allow them to evaluate woodturning before investing money in a sharpening system.
Why It is Important to Be Able to Sharpen Carbide Cutters
Manufactures market turning tools with replaceable carbide cutters as “No need to worry about sharpening. When the cutter becomes dull, just buy another one.” While initially this sounds convenient, there are two reasons I am not a supporter of the “use until dull and then discard” approach recommended by manufactures of carbide cutting tools.
A. The cutters do not remain perfectly sharp and then instantly go dull. Like all tools, they go on a continuum from sharp to dull. Maybe in as few as a couple hours or less, you can already begin experiencing a big difference. The tool may still cut, but not as fast. Once you have experienced a sharp tool, even a “somewhat” sharp tool may be disappointing.
B. The cost of some of these replaceable cutters can quickly add up. If you have cutters that cannot be sharpened, then carbide tip tools can quickly become the most expensive tools in your shop. Especially compared to HSS tools, which can be sharpened hundreds and hundreds of times before discarding. Before I learned from other woodturners how to sharpen my carbide cutters, I actually purchased two carbide tools with square cutters and two carbide tools with round cutters. Why? Because I always wanted a sharp tool when doing finishing work. One square and one round carbide cutter was set aside and only used for finishing. Maybe this is exactly what manufactures of carbide cutting tools hope their customers do!
How to Sharp Carbide Cutters
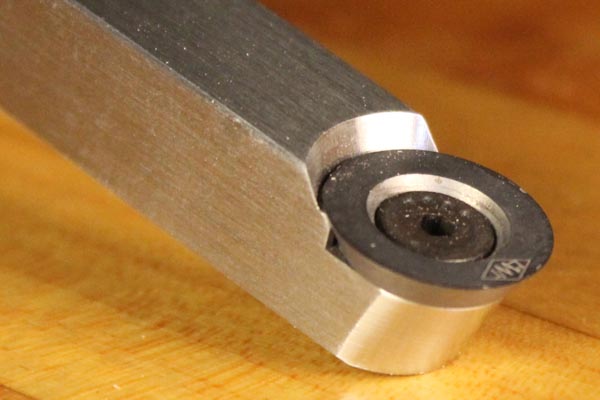
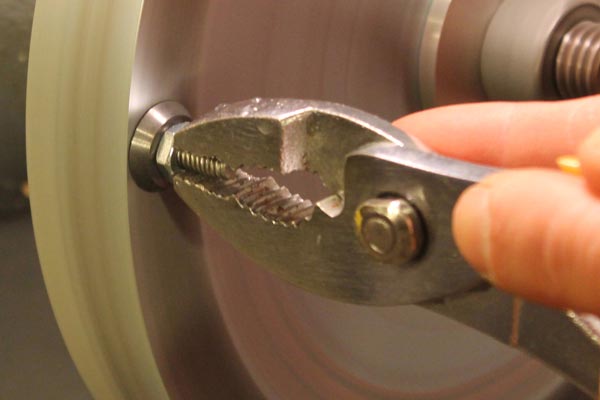
For the two reasons listed, I recommend purchasing tools with carbide tips that you can re-sharpen such as those below. Similarly, I recommend a sharpening system that can sharpen replaceable carbide cutters. Many of today’s CBN (Cubic Boron Nitride) grinding wheels include a grit on the side of the wheel. This “side grinding” allows carbide tip inserts to be re-sharpened.
To sharpen these replaceable carbide cutters, I insert a small bolt with a tapered head through the top hole on the cutter. The head on the bolt is recessed slightly below the top cutting edge of the cutter. I then hold this bolt with pliers, on the side of the CBN grinding wheel as shown below. Keep in mind you are sharpening carbide and not high speed steel (HSS). It may take a few seconds longer than you think before you have recreated a factory sharp edge.
CBN Grinding Wheels.
As mentioned in the previous section, some of today’s CBN (Cubic Boron Nitride) grinding wheels include a side grind which allow sharpening of replaceable cutters. Some of the other advantages of these wheels over aluminum oxide wheels include:
1. CBN wheels maintain a consistent diameter with use. So you do not need to continually reconfigure jigs as the wheel changes diameter. Rather jigs can be setup and configured once.
2. CBN wheels do not need to be dressed and will remain flat.
3. CBN wheels are typically perfectly balanced and run true.
4. CBN wheels will last forever for most woodturners
5. CBN wheels will not fall apart or crack when dropped.
Maintaining Aluminum Oxide Grinding Wheels
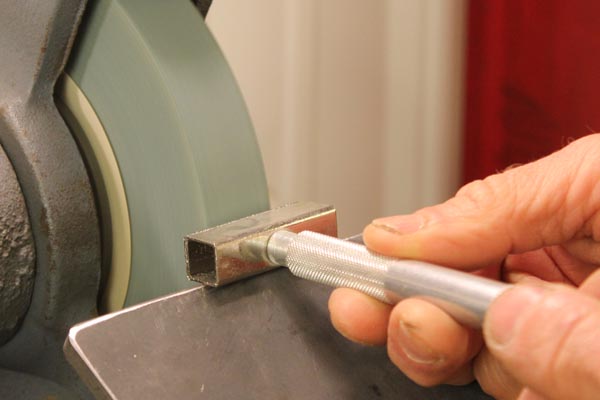
Aluminum oxide and other types of grinding wheels break away revealing fresh, sharp particles of abrasive. You have to maintain these grinding wheels so that the surface is flat and clean. A flat surface will help ensure you are sharpening the entire width of the tool. A clean surface (free of any clogged bits of metal) will help ensure the tools do not overheat when sharpening. You can use a diamond wheel dresser to help create this flat, clean surface. Simply place the dresser on your tool rest and contact the wheel. Then move the dresser across the face of your grinding wheel creating a flat, clean edge. The larger your wheel dresser, the easier it is to create a flat, clean edge. The dresser shown below is 0.5” (1.3cm) wide x 1.75” (4.4cm) long.
Honing.
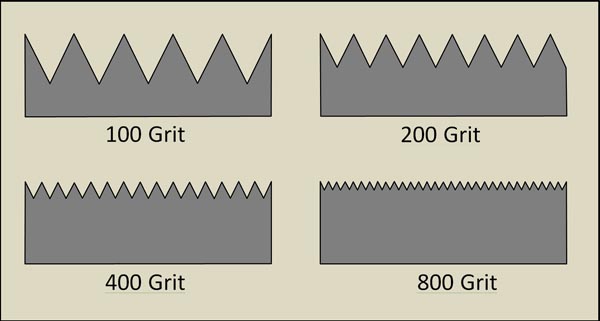
Honing is the process of removing 1) the coarse edge texture, and 2) the burr on a tool. Some woodworkers, woodturners, and carvers feel this step is critical and others feel it is not necessary. Regardless of your view, when viewed under high magnification, the cutting edge will have peaks and valleys. Ideally, this should be a straight line. The coarser the abrasive used for sharpening, the deeper the peaks and valleys that result. By using finer abrasives, you can reduce these peaks and valleys. However, these finer abrasives are also less productive at sharpening. The honing process can reduce this coarse edge texture to form a perfect line and hence achieve a keener, sharper edge. See the figure below for an example of how grit relates to scratch pattern.
Dual Setup Bench Grinder.
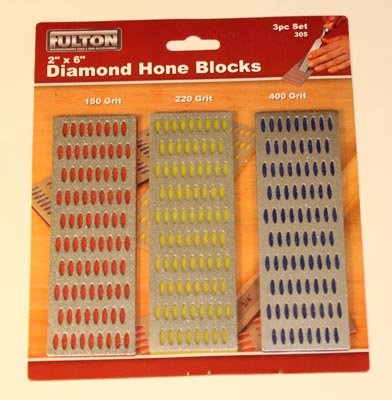
Many woodworkers and woodturners with bench grinders may install a coarse wheel (e.g., 60 grit) on one side and a finer wheel (e.g., 100 grit) on the other side. One side is better for reshaping (roughing out) the tool and the other side is better for finer sharpening. For belt sharpening systems, many stores and catalogs will carry belts that range from 60 to 3000 grit. Use belts with 60, 120, and 240 grits to sharpen turning tools. Use belts with 600, 1200, and 3000 grit to sharpen knives. Obviously, trying to hone a turning tool with 400-grit diamond hone after using a 600 grit sharpening system would be counter-productive.
Honing – Removing the Burr.
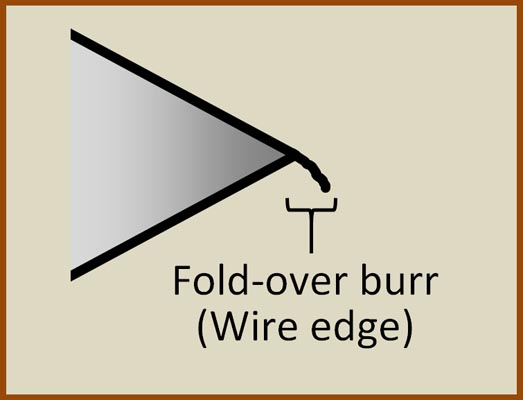
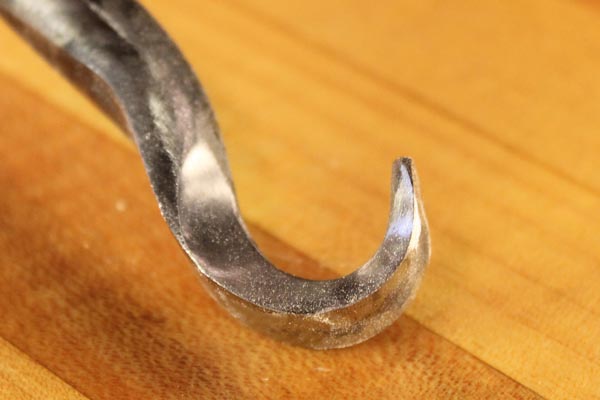
The second reason for honing is to remove the burr. During the sharpening process, a thin piece of metal called the “burr” or “wire” will buildup on the side opposite the one you are sharpening as shown in the image below. On some scrapers, this burr does the cutting and is left on. However, with the other turning tools (gouges, skew chisels, and parting tools), most people remove this burr to reveal a keener edge. The ability to detect a “fold-over” burr is key for any good sharpening technique. A burr that uniformly extends along the entire cutting edge indicates that the face is sharp. The burr can easily be detected by stroking a finger over the edge as shown in how to determine if your tools are sharp.
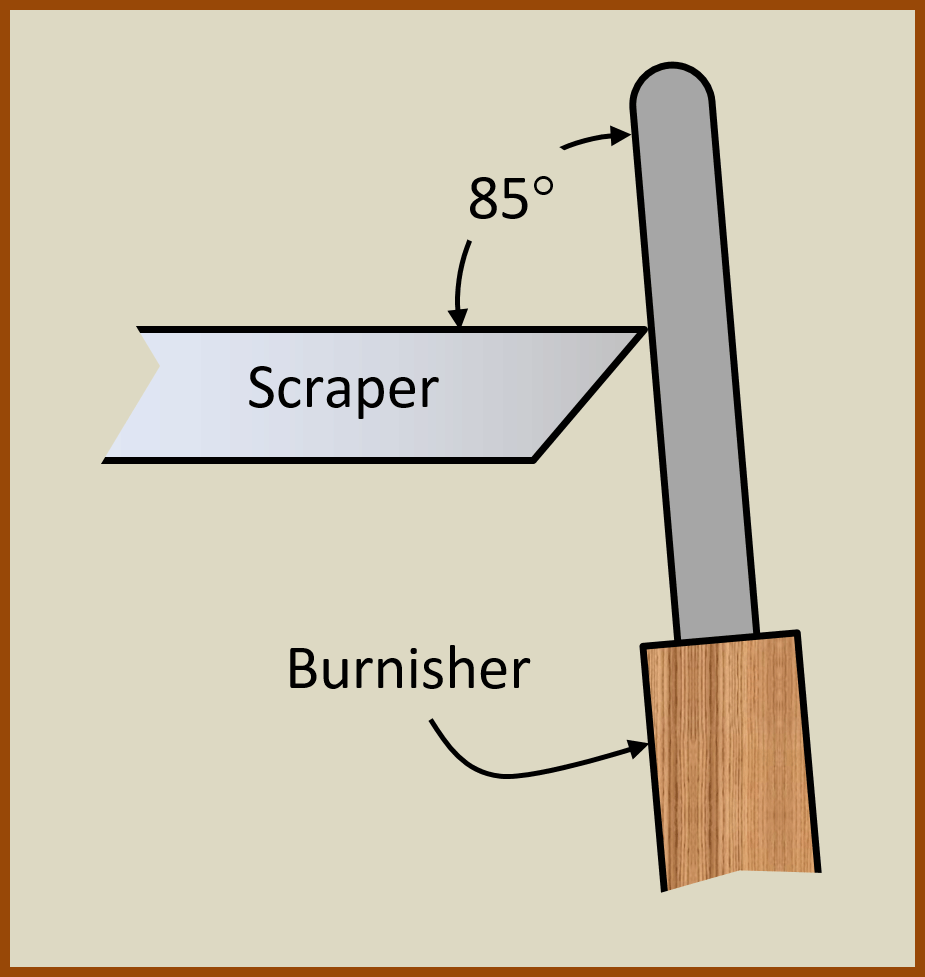
Burnishers.
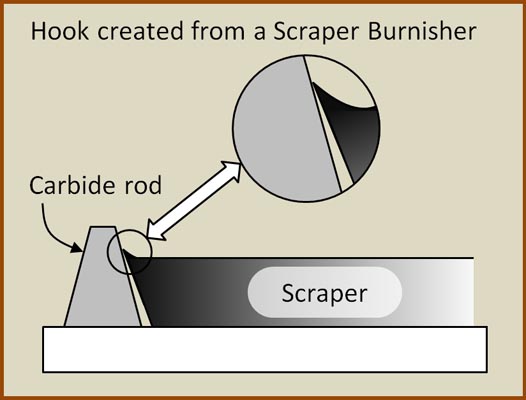
A sharp scraper has a small burr that can be felt by running your finger over the edge as shown in how to determine if your tools are sharp. This burr does the cutting. When straight from the grinder, this burr can be jagged and fragile. To help produce a stronger, more continuous burr, you can use a scraper burnisher. Scraper burnishers come in both hand held versions and stationary versions as shown below. You can use a vice to hold a stationary version or you can screw it to a worktable.

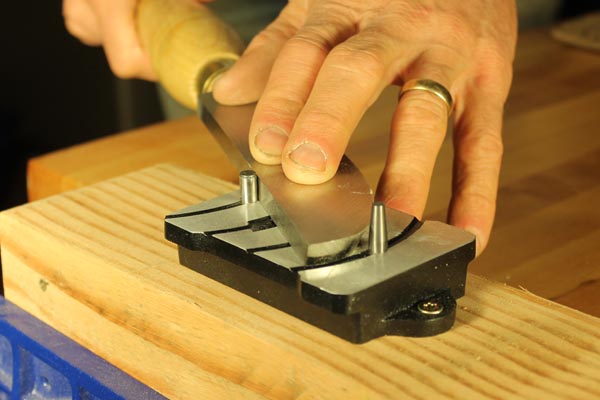
With hand held versions, you create a fresh burr by running the burnisher along the edge of the scraper at approximately 85 degrees as shown below. With stationary burnishers, you position the edge of the scraper against a carbide rod. The edge of the scraper is then drawn past the carbide rod, using the handle as a lever and the pivot pin as a fulcrum as shown below. With light pressure, you can produce a finer hook or burr. With heavy pressure, you can create a coarse hook or burr. Typically, you can raise a burr 3 to 5 times before you need to return to the grinder.
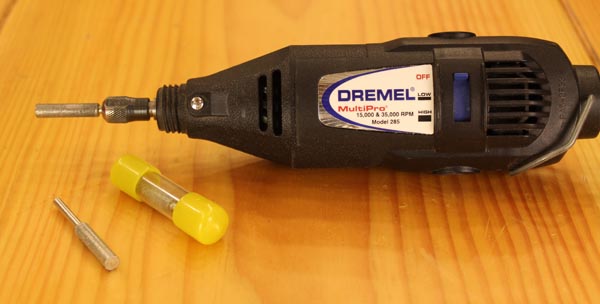
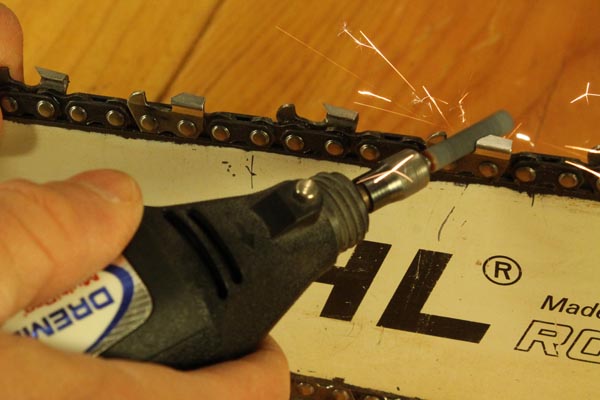
Rotary tools:
For sharpening hook tools and ring tools, I have found a rotary tool (Dremel) with a either (stone or diamond bit) works great for sharpening.
In addition to sharpening turning tools, I have found nothing beats a rotary tool for sharpening my chain saw as shown below. Once you start sharpening your tools, before long, you will also want to start sharpening your drill bits.
A few sharpening systems include: Bucktool, Grizzly, Happybug Web Grinder, Hapstone, Knife sharpener, Oneway, Rikon, Robert Sorby, Tormek, Work Sharp, Veritas MKII Power Sharpening System.
Wen,
Pin for later!