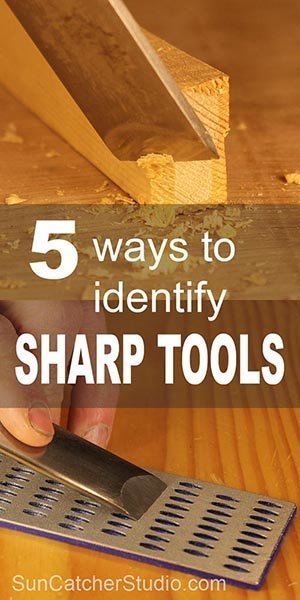
How to Tell if Your Tool is SHARP (chisels, knives, gouges)
A sharp tool is essential for safe and enjoyable woodworking and woodturning. Sharp tools enable you to create clean cuts and watch in satisfaction as long shaving of wood are removed. Whether the tool is a chisel, knife, or gouge, a sharp cutting edge is only temporary. Eventually all tools will become dull. So learning how to sharpen your tools is a necessary and beneficial skill. The first step in sharpening is learning how to test or determine a sharp tool from a dull tool. Once you can identify a sharp tool, you are ready to move on to sharpening.
")
“Give me six hours to chop down a tree and I will spend the first four sharpening the axe” – Abraham Lincoln
5 Ways to Determine if Your Tools Are Sharp.
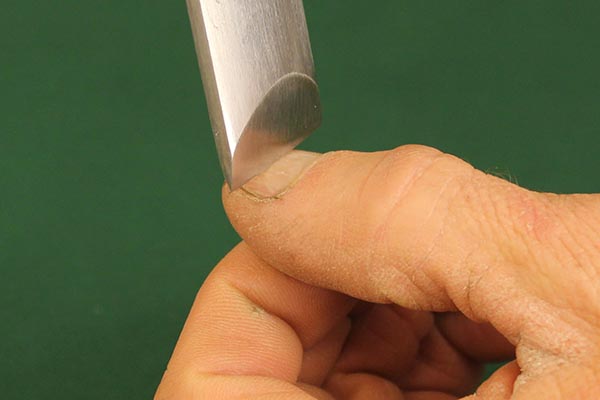
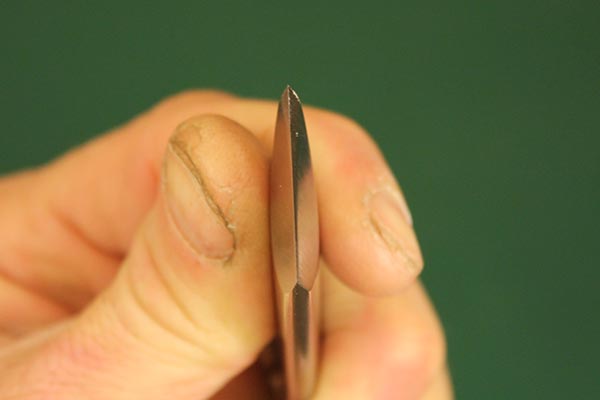
1. Fingernail test for tool sharpness.
Gently drag the edge of the tool over your fingernail. Fingernails have a tough, smooth substance called keratin. A dull cutting edge will simply glide over the fingernail. Whereas a sharp cutting edge will “stick” or bring up shavings as you pull it across the fingernail as shown below. Be careful with this test – use virtually no downward pressure and only move the cutting edge the smallest distance.
2. Thumb test for tool sharpness.
You can test scrapers by running your thumb over the burr. With scrapers, the burr does the cutting. If your scraper is sharp, you will feel a significant burr and your thumb will catch as you try to slide it “over the edge” as shown below. However, do not slide your finger “along the edge” unless you have a bandage ready!
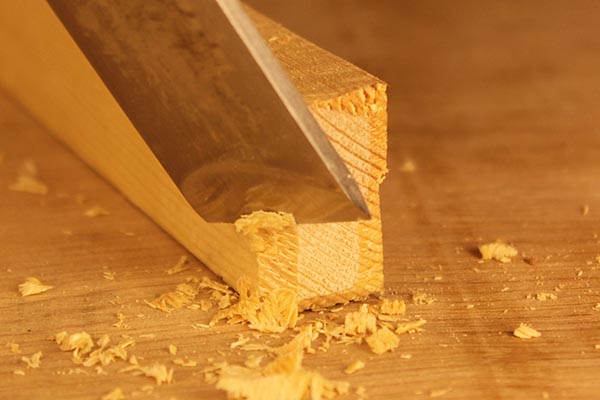
3. End grain test for tool sharpness.
Clamp a piece of soft wood (pine, spruce, or fir) onto a table. Try slicing off a piece of end grain. If the tool is dull, the cutting edge will only push down the grain and will not cut off shavings. If the tool is sharp, the cutting edge will cleanly cut the end grain producing shavings or ribbons as shown below. Keep in mind, even a dull tool can cut shavings going with the grain.
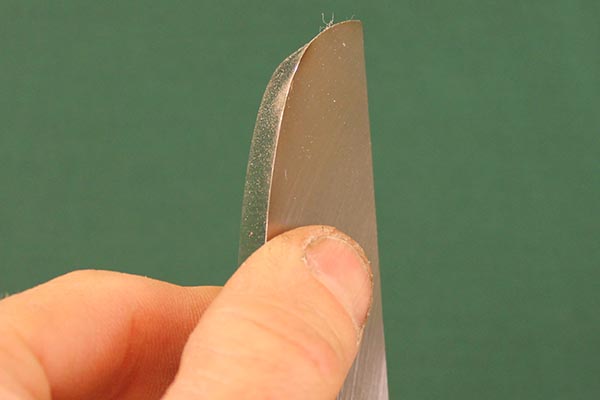
4. Light Test for tool sharpness.
Hold the tool under a strong light and examine the cutting edge. A magnifying glass will aid tremendously in this test. If you see any glimmer of light on the cutting edge, the tool is not sharp. This glimmer or reflection of light indicates there is a flat portion on the cutting edge, because the two planes of the tool do not meet perfectly. On the other hand, if you see no light, then the cutting edge will appear as a black line. This because the two planes of the tool meet to form a perfect line as shown below.
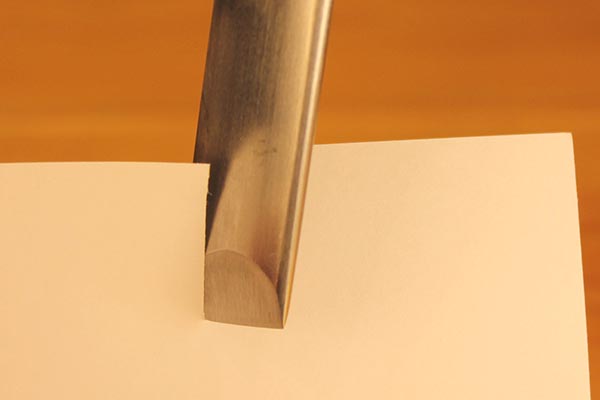
5. Paper test for tool sharpness.
Try slicing or cutting a piece of paper. A dull cutting edge will produce a rough, ragged cut and will require some pressure. On the other hand, a sharp cutting edge will cleanly slice the paper with minimal effort as shown below.
See sharpening systems for tips and pointers on how to sharpen your tools.
Shaping verses Sharpening
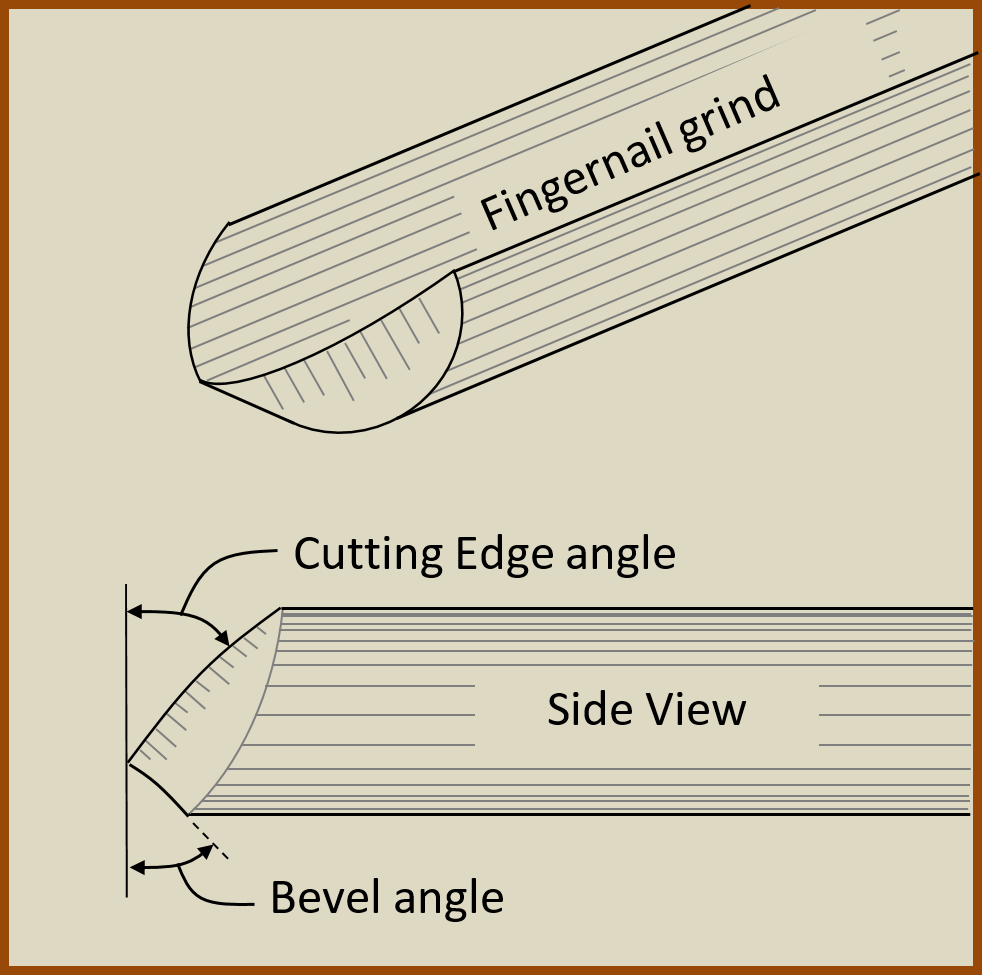
Some people use the terms shaping and sharpening interchangeably, possibly causing confusion. Shaping is creating the desired shape or profile on a tool. This includes establishing the angle of the bevel and the angle of the cutting edge as shown in the figure below. Sharpening is touching up an existing shape to renew the sharpness. It is the routine maintenance and refinement to keep a sharp edge on a tool.
One way to reduce sharpening is to use tools in both directions. For example, by learning to use gouges to cut both left to right and right to left can help avoid trips to the sharpener. Similarly, by rotating a gouge, you can expose a new sharp cutting edge.
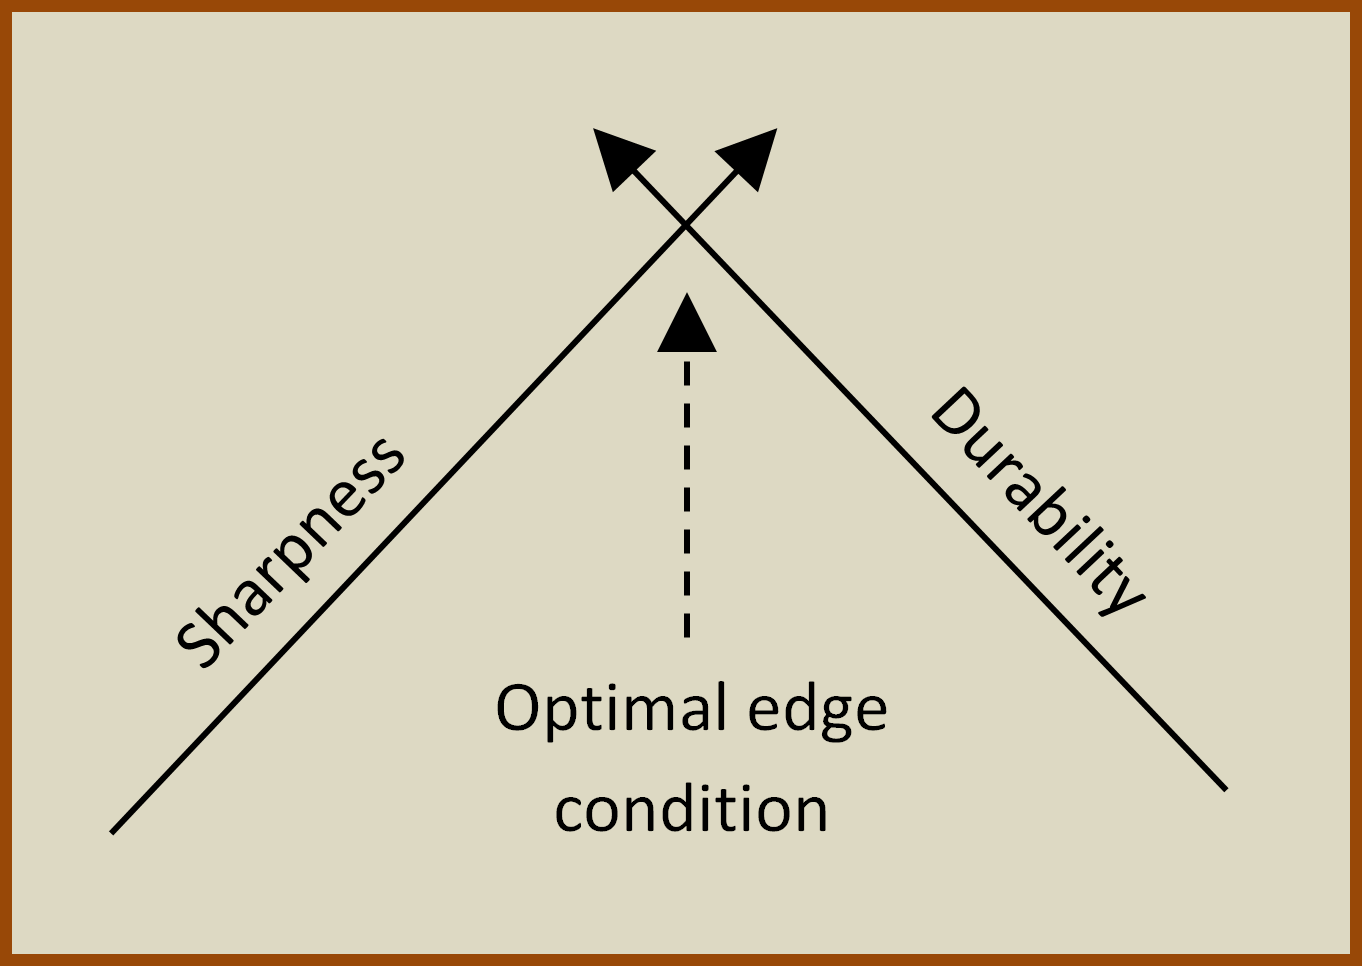
Sharpness versus Durability
You need to keep two factors in mind when sharpening tools. These factors are “sharpness” and “durability.” The optimal edge for a turning tool is the intersection of these two conditions as shown in the figure below. For example, while a razor blade used for shaving is extremely sharp, it would either break or bend almost immediately upon contact with a piece of wood spinning at 500 rpm on a lathe.
Keep in mind turning thin pieces typically requires a sharper tool than roughing out a piece. When turning bowls below 1/8” (3 mm) thick, the tool needs to be very sharp – requiring very little pressure. If you have to apply much pressure, the piece may explode or crack.
Common tools include: chisels (oval skew chisels), gouges (bowl gouge, detail gouge), parting tools, scrapers, knifes, blades, carbide cutters.
Pin for later!