Woodturning for Beginners (Why I Almost Sold My Lathe)
Experience some of the problems and challenges involved with turning wood. Learn from my mistakes, as you begin or continue your journey into woodturning.
I got into woodturning a little over ten years ago. I was at a local arts and crafts festival in early October where a vendor was selling handcrafted wooden bowls. As my wife and I were looking at the pieces, she hinted a few times “Wouldn’t it be nice if we had a lathe.” Even the vendor was trying to convince us that turning was a fun and rewarding hobby.

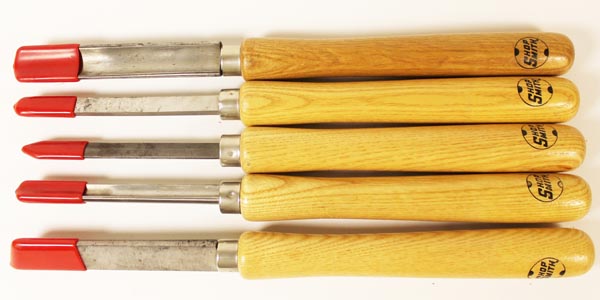
So a few days later, I bought a used lathe. It came with a set of 5 turning tools (roughing gouge, spindle gouge, skew chisel, round nose scraper, and a parting tool). The tools had individualized red protective covers as shown below. When I got the lathe home, I was anxious to try it. So, I looked around and found a small dry log from the woodpile. I mounted the log on the lathe in a parallel orientation. I then carefully removed the red protective cover on the gouge and turned on the lathe. The bark on the log removed easy. However, once I hit solid wood, it took much, much, much, longer than I had anticipated. Still, just removing the bark and a little wood, revealed the lush, vibrant colors that were hiding beneath the bark.
Time to Try Turning the Inside
Since the outside of the bowl was not going as planned, I decided it was time to try the inside. So, I moved the tool rest. Again, I carefully removed the red protective cover on the gouge and gently pressed the gouge into the turning wood. Nothing happened, maybe a little smoke. No problem. I just needed to be more aggressive. Consequently, I pushed the tool harder into the wood. Some wood particles came off. You might call the particles dust rather than chips or shavings. At this rate, it would take hours and hours to remove the inside of the bowl.
Since I was new to woodturning, I just figured I had the wrong tool. I carefully placed the red protective cover back on the gouge and grabbed the round nose scraper. Again, I carefully removed its red protective cover. Like the first time, I started gently. Before I knew it, I was pushing with a great deal of effort. A little more sawdust and a lot more smoke came off. I continued to press harder and harder, until a few seconds later, the screws holding the wood tore out, and the log came flying off the lathe.
Being inexperienced with woodturning, I just figured the screws were not long enough. Hence, I re-fastened the log with longer screws. This time I tried every tool. Same results. A little saw dust and a little smoke. Eventually, even with the longer screws, the log came flying off the lathe. I threw the log away, cleaned up a handful of dust in the shop, and thought about listing the lathe for sale.
Time to Research Woodturning
That night, I researched turning bowls. I had found the answer. Wood orientation. I read it was important to orient the wood in a perpendicular orientation. Therefore, the next day, I found another dry log off the woodpile. I created a blank as shown on the website and mounted the blank in perpendicular orientation. I had already had some luck turning the outside of a bowl, so I figured I would start with hollowing out the inside. Again, I carefully, removed the red protective cover off my bowl gouge and started with the inside. The same results smoke and dust. Although this time, my hole was just a little deeper before the blank went flying off the lathe. Again, I removed the blank, cleaned up a handful of dust in the shop, and thought about listing the lathe for sale.
Again, I researched turning bowls. This time I even watched several videos online. In the videos, the wood shavings were just flying off the lathe. Therefore, I knew it was possible to create a bowl in under a day. The videos kept mentioning proper technique and the importance of sharp tools. Hence, the next day, I remounted the blank from the previous day – again using a perpendicular orientation. I then carefully positioned the gouge at a 45-degree angle as mentioned in the videos. However, even with my tools at this magical angle I was having no luck.
Could my woodturning tools be dull?
In the back of my mind, there was still that final piece of information I had read about. The importance of sharp tools. With the protective red covers, could my tools be dull? I hated to ruin the tools, by trying to sharpening them. However, at this point, I really did not care. After all, I was ready to sell the lathe. Consequently, I took the round-nose scraper and sharpened it using a belt sander. I then went back to the lathe and tried it again. Yes, TADA – shavings. I had mastered the art of woodturning. I knew everything there was to know about this craft!
To my surprise, a few seconds later, the shaving started to disappear. Before I knew it, I was pressing as hard as I could and I was back to smoke and dust. Clearly, there was no way the tool could be dull already. After all, the blades for my chain saw can last hours between sharpening.
Now what is wrong?
For the next 15 minutes, I tried repositioning the tool in all different angles and directions. How did I get it to work earlier? Could it be there was still something else to learn about woodturning? Maybe there was some metal in the wood. I knew one little nail, could dull a chain saw blade. Maybe that is what happened to my round-nose scraper? While it seemed hopeless, I sharpened the scraper again. Back to the lathe and TADA – more shavings. Again, I had mastered the art of woodturning. There was nothing left to learn!
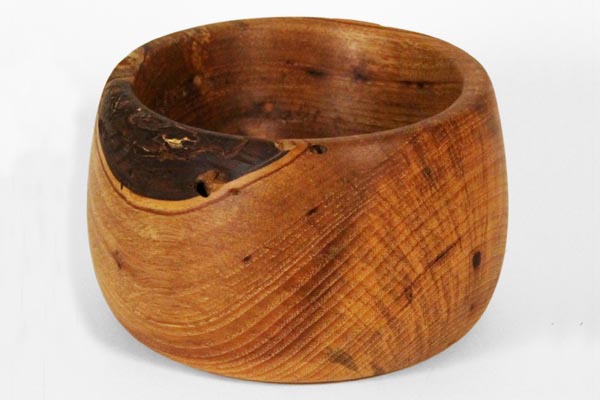
However, a few seconds later, the same thing. Smoke and dust. For the next 14 minutes, I tried repositioning the tool in all different directions. No luck. With no confidence, I sharpened the tool again and returned. TADA – shavings. After numerous times sharpening, I eventually finished my first bowl as shown below.
Woodturning for Beginners: Lessons Learned
I would eventually learn two important lessons. First, even tools that come with a beautiful cover can be dull. Secondly, turning tools can become dull very quickly. I should mention, that I would later realize that the tools that came with the lathe, were made from carbon steel. These tools can become dull in as short as 15-20 seconds. This is unlike today’s high-speed steel that can maintain a sharp cutting edge for 30 minutes or more. If you do a little math, you will find that a 10” (25cm) diameter bowl spinning at 900 rpm, results in a turning tool cutting in excess of 2 miles (3 kilometers) of wood in 5 minutes. With this amount of cutting, carbon steel will not stay sharp for any length of time.
Let the Cracking Begin
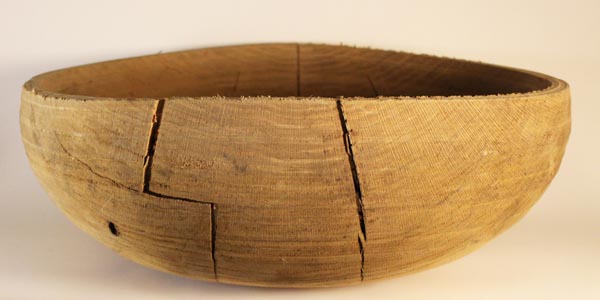
A few days later, I acquired some “green” oak wood from a friend who had just cut down a tree. I created a blank like my first bowl and mounted it on the lathe. Roughing out this piece seemed to go much faster than my first bowl. When finished, I brought the bowl in the house to sit proudly next to my first masterpiece.
Shortly after bringing the bowl in the house, I noticed a few small hairline cracks. With every passing hour, the cracks kept getting bigger and bigger. As the cracks were getting bigger, I was getting less and less interested in woodturning. Finally, about a week later, I took my masterpiece (shown below) outside and buried it behind our woodpile. Again, I thought about cleaning up my lathe and listing it for sale.
The Joys of Woodturning
Most of my initial learning about woodturning was – through trial and error. Looking back, I believe it was these challenges that kept me interested in woodturning. After all, how much fun is there in doing something that always turns out perfect? Another aspect of woodturning that has kept me interested over the years is free wood. Living in a rural community with access to a free green waste dump, means plenty of free wood.

Before getting into woodturning, I spent a lot of time working with metal. Fabricating everything from indoor and outdoor furniture, metal fences, smokers, etc. However, with metal, I was starting to realize I could typically buy the final product for less than I was spending on just the materials.
With woodturning, this was not the case. Almost all the pieces I have turned over the years started as free wood. With free wood, I could financially come out ahead. I have also come to enjoy the transformation and creativeness involved in converting a free log into a beautiful piece. Many of the pieces I have created over the years have found their way into the hands of family members and friends as Christmas presents, wedding presents, baby showers, etc. Many of my family members and friends now have “small collections” of my pieces.
I am now an “Expert” woodturner!
After creating my first bowl, I never would have thought there was so much to learn. After all, I already knew everything there was to know about woodturning! I would later read that mastery typically requires three to ten years (10,000 hours or more) of practice and reflection on performance. Even now, after turning wood for over 10 years, I still do not call myself a master turner. Instead, I now call myself an expert – using the following definition: “An expert is a person who has made all the mistakes which can be made in a very narrow field.”
With regards to mastery, I would also add that reading and talking to other experts in an area can speed up the process. For example, I recently was talking to a local wood carver who has been carving wood for about 5 years. He has won numerous awards and contests for his work. When I met him once in his shop, I asked if I could look at the tools that he used to create his intricate carvings. I was amazed. The only tools he had were from a local lumber store. His tools consisted of carpet cutters, utility knives, and pocketknives.
I then asked him if he ever attended any workshops on carving, subscribed to any wood carving magazines, etc. His answer was no. Hence, I gave him some of my catalogs on woodturning that also contained carving tools. The next time I visited his shop, sure enough he had a 12-piece set of palm handled carving tools. Instead of using carpet cutters, he was now using carving tools with various sweeps and profiles.
By the way, I did eventually sell my first lathe. However, it was not out of frustration with turning, but because I wanted a bigger lathe with variable speed.
About this Website
This website started out as a collection of notes and pictures. Over the years, it keeps growing as I discover, read, watch, and learn about different ideas and techniques for woodworking and woodturning. Because of my initial unfriendly experiences with wood orientation, creating clean cuts, wood cracking, and dull tools, I have written articles on each of these topics. I will be uploading these articles in the upcoming weeks.
In particular, one article focuses on wood orientation. More specifically, how you mount wood on the lathe. Is the grain running parallel to the lathe (i.e., parallel orientation) or is the grain running perpendicular to the lathe (i.e., perpendicular orientation)? This article also covers the advantages and disadvantages of both methods of wood orientation. Another article focuses on tool orientation, methods of cutting, and creating clean cuts.
Still another article provides an overview of wood, moisture, and cracking. This article also includes numerous methods to reduce or eliminate cracking. Other articles focus on sharpening tools. More specifically, methods to determine the sharpness of a tool, features of a good sharpening system, and how to sharpen various tools. Another article focuses on general woodturning ideas, tips, and trade secrets. It covers such areas as spalted wood, turning bigger and smaller pieces, adequate lighting, shop layout, signing your work, and other general woodturning tips.
I will also be including step-by-step instructions for creating some interesting and fun woodturning projects. These projects will literally show you how “turn” a block of wood into a unique piece of artwork or a useful household item. When woodturning, safety is important step. For this reason, you will find safety mentioned in numerous articles on this website.
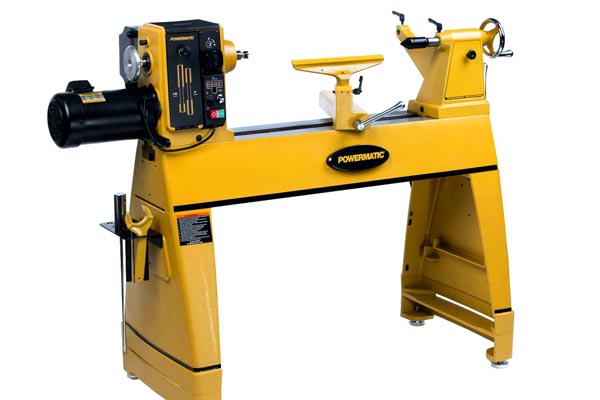
Parts of a Wood Lathe
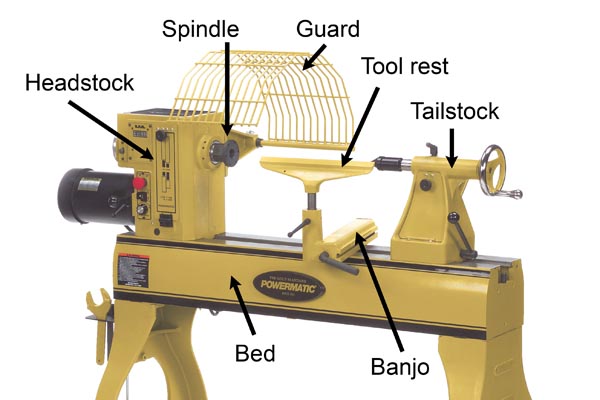
Banjo.
The banjo slides along the bed of the lathe and supports the toolrest. It allows you to adjust the toolrest and place in various locations, making it possible to hold the turning tool in the most convenient location for removing wood. Most modern lathes allow you to tighten and release the banjo quickly with a locking handle.
Bed.
The bed is the horizontal part of the lathe that joins the headstock and tailstock. The horizontal rails on the bed are the “ways”. On many lathes, you can position the headstock, tailstock, and banjo at any point on the bed.
Guard.
The steel mesh guard provides protection from flying chunks of wood and debris. You should always use the guard in operations that allow its use. You should wear a facemask when turning without a guard installed.
Headstock.
The headstock holds the material that you will turn. It transfers power from the motor (drive mechanism) to the workpiece. Typically, the motor is below or to the side of the headstock and powers the spindle with a belt.
Spindle.
The spindle is the shaft in the headstock. This shaft is supported on both ends by thrust bearings that allow the spindle to rotate, yet prevents the shaft from moving in and out. The spindle typically has threads on the end which allow various attachments (e.g., a faceplate, a scroll chuck, or a vacuum chuck) to be mounted. On the inside of the spindle, there is typically a Morse taper. This Morse taper can securely hold various attachments such as a drive center or a pen mandrel.
Tailstock.
The tailstock slides along the bed in alignment with the headstock. You can use the tailstock to help support the workpiece. This is especially helpful when the workpiece is either long or slender. You can also use the tailstock to hold drilling and boring tools for machining a hole.
Tool rest.
The tool rest supports the turning tool as an operator cuts into the wood. You can adjust the tool rest for height and angle to the work. Most modern lathes allow you to tighten or release the toolrest quickly with a locking handle. There are many different sizes and shapes of toolrest available. For example, some toolrests are straight, some toolrests have a curve to assist with turning the interior of a bowl, and other toolrests have a curve to assist with turning the exterior of a bowl.
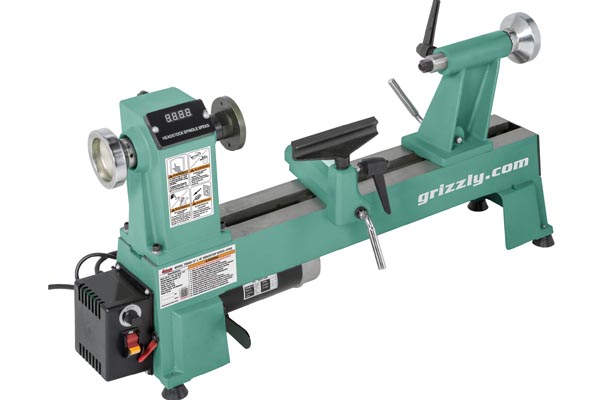
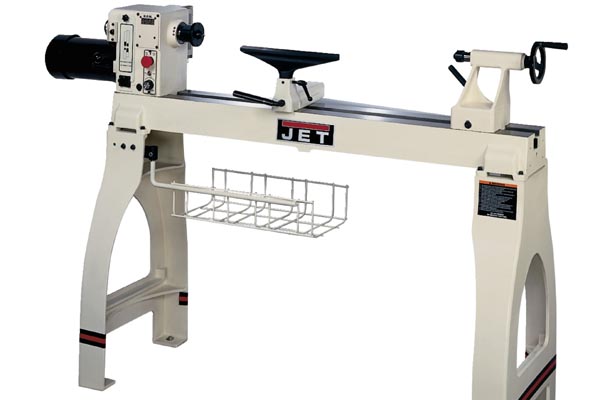
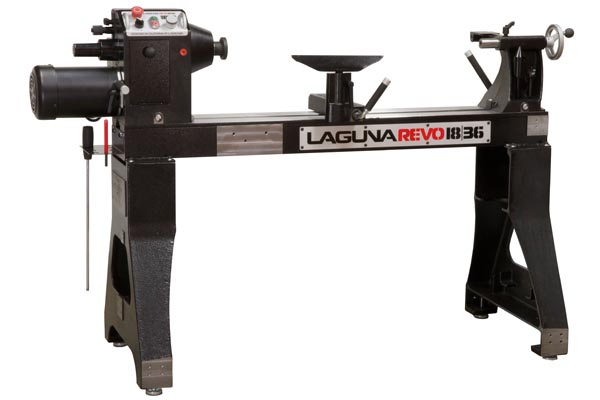
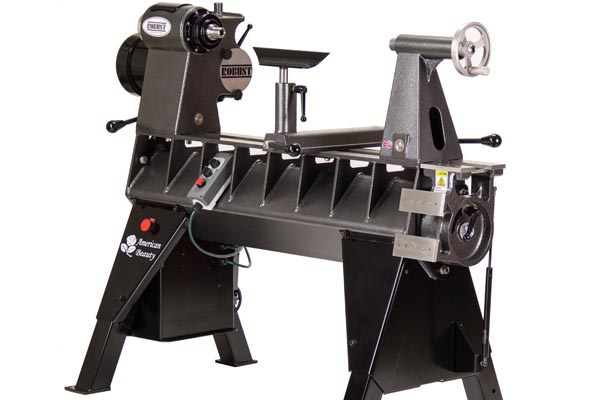
Selection of Wood Lathes on the Market