Sandpaper Grit (13 Essential DIY Tips and Tricks on Sanding)
Sandpaper grit – use these sanding Tips and Tricks to enhance your woodworking and DIY projects. Do you want to learn 13 quick and easy ways to improve your sanding?

If you have ever played golf, chances are you have heard the expression. “You drive for show and you putt for dough.” In other words, long drives from the tee box can be very impressive. However, your ability to make putts on the green might be more important in determining who wins a tournament.
Along these same lines, I use the following expression when teaching woodturning. “You turn for show and you sand for dough”. In other words, creating long, flying shavings might look impressive, but a well sanded finish might be more important in determining which piece brings the highest price. If a piece has not been sanded well, it will most likely never look great, regardless of the finish that you apply. Following are some essential sanding tips that will allow you to create pieces that will outsell your competition.
1. Understand what the term “sandpaper grit” means.
The term “grit” specifies the size of abrasive materials which can pass through a mesh screen. For example, a grit 16, specifies that the abrasive particles passed through a mesh screen with 16 openings as shown below. Whereas, a grit 64 specifies that the abrasive particles passed through a mesh screen with 64 openings. Consequently, the lower the grit number, the coarser the abrasive.


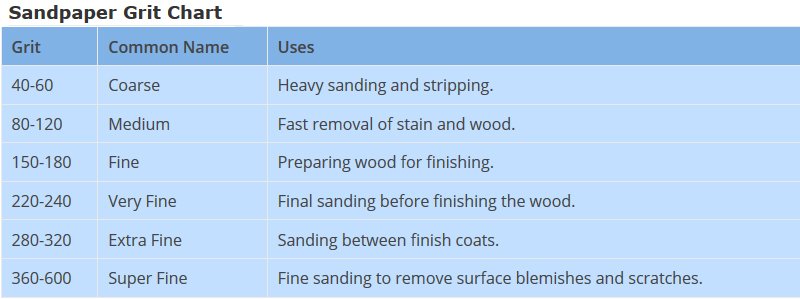
Sandpaper Grit Chart
| Grit | Common Name | Uses |
| 40-60 | Coarse | Heavy sanding and stripping. |
| 80-120 | Medium | Fast removal of stain and wood. |
| 150-180 | Fine | Preparing wood for finishing. |
| 220-240 | Very Fine | Final sanding before finishing the wood. |
| 280-320 | Extra Fine | Sanding between finish coats. |
| 360-600 | Super Fine | Fine sanding to remove surface blemishes and scratches. |
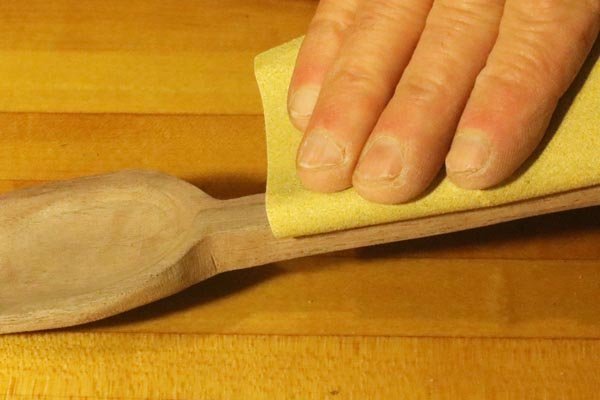
2. Make sure to start with a sandpaper grit that is coarse enough.
The first and most important step in sanding is to start with a coarse enough sand paper. This maybe one of the biggest mistakes beginners make. You will typically find it takes far more work to remove the initially tear-out and saw marks, than to remove the scratches left by a lower grit sandpaper.
3. Use a light held at an angle to help see scratches.
Typically, the best lighting for seeing scratches is when you hold a light at an angle. While light from any direction is helpful, a raking light (i.e., a light source at an oblique angle) is especially helpful in revealing grain tear-out, tool marks, and scratches (left from a previous grit). Even a flashlight held at an angle can help expose scratches not seen from a straight light. One of the key elements to creating beautiful work is good lighting.
4. Consider using water to raise the grain.
Nothing raises the grain of wood quite like water. By lightly damping the wood, you will raise the fibers that are laying down. The sandpaper will now cut them off cleanly resulting in a very smooth finish. This is especially beneficial to bowls, rolling pins, etc. that you will wash between uses.
5. Consider starting with a sandpaper grit “fine” to identify problem areas.
Some woodworkers will initially start sanding with a fine grit sandpaper such as 150-180. This fine grit sandpaper will quickly highlight scratches, blemishes, and grain tear-out. This allows you to know where the major flaws and imperfections are located. Now you can focus more attention on these areas as you start with a coarser grit sandpaper and work your way to finer grit sand paper.

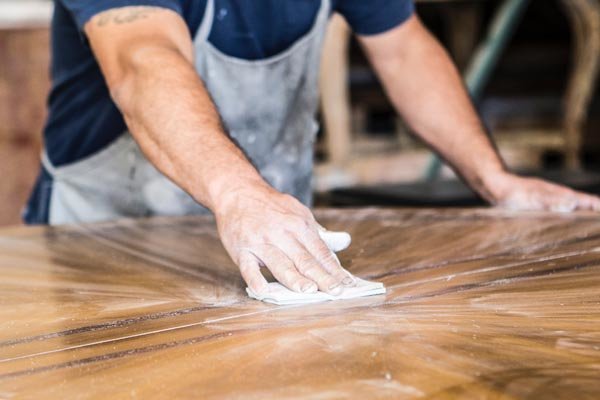
6. Consider using mineral spirits when sanding.
Some woodworkers apply mineral spirits during the sanding process to remove fine sawdust. This helps reveal scratches and flaws which are still present. The minerals spirits can also help show any glue squeeze out that is still present. Finally, if you apply mineral spirits you can get a good vision of what the final piece will look like. Until the mineral spirits have evaporated, the wood will look “wet” like a rich oil finish has just been applied.
7. Consider using a random-orbit sander when possible.
A random-orbit sander vibrates and spins simultaneously eliminating almost all swirl marks. These sanders use round pads which vibrate in tiny circles while also spinning in circles. These sanders make it virtually impossible to damage the workpiece, yet can create a flawless finish. Other types of power sanders include: palm sanders, belt sanders, and orbital sanders.
8. Clean the wood (blowing or vacuuming) between sandpaper grits.
This will remove abrasive “hitchhikers” from coarser grits that could cause wild scratches. Furthermore, the dust from sanding can stick in the scratches and grain tear out momentarily hiding these flaws.
9. Realize sandpaper quickly loads if you sand a piece that you have oiled.
This will essential ruin your sandpaper with the first pass.
10. Understand how aluminum oxide sandpaper operates.
This will help explain why you cannot use the same piece of aluminum oxide sandpaper for both rough and fine work. Aluminum oxide sandpaper is often referred to as self-sharpening. As you use it, small particles break off revealing new sharp edges. With use, the sandpaper will reveal fewer and fewer sharp edges. However, if a new sharp edge on a course sandpaper is revealed during the final sanding, then the sandpaper could leave deep scratch marks behind.
Note: sandpaper containing a garnet abrasive gets duller and duller with use. Some woodturners take advantage of this – using it first for rough sanding and then as it wears down, for finer work. It should be noted, you will typically save time by using a new piece of garnet sandpaper (e.g., 320 grit) with sharp edges to do your “fine” sanding as opposed to using a worn down piece of garnet coated sand paper (e.g. 120 grit).
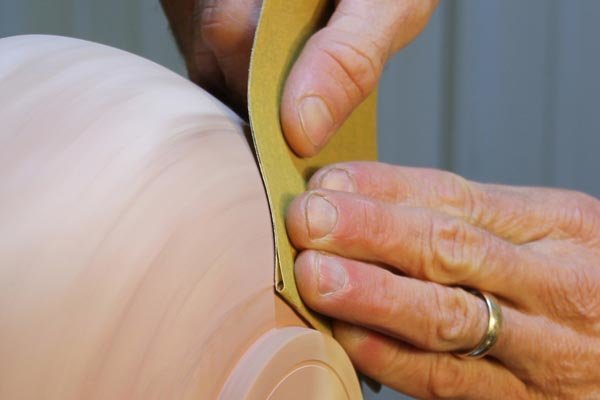
11. Sand spalted wood with care.
Spalted wood can easily produce an uneven surface when sanded because frequently it has hard and soft regions next to each other. I recommend using a firm pad between your hand and the sand paper when sanding spalted wood – since fingers tend to follow the soft spots digging in deeper in those areas.
12. Realize closed-grain woods typically benefit more from sanding with higher grits of sandpaper.
With closed-grain woods like cherry or maple higher grits of sandpaper typically reveal a smoother and smoother finish. On the other hand, open-grain woods like oak typically have coarse grain lines and a rough texture. Sanding these woods with very, fine sandpaper might give dimensioning returns.
13. Avoid heat cracks when sanding.
You can avoid heat cracks by 1) sanding at slower speeds, and 2) keeping the paper moving in a sweeping motion to minimize heat built-up. This is because, higher sanding speeds and sanding in the same location can result in excessive heat, which can lead to heat cracks.
Additional notes on sanding wood.
Going through the various grits in order, typically saves both time and sandpaper. However, it is not essential to achieving a perfectly sanded piece. Because 320 grit sandpaper can do no coarser than 320 grit, if you sand with care, the results will be the same regardless of whether you go through 80, 120, 180, 220, and 320 or start off with 320. Some woodworkers consider the phrase “Don’t skip a grit” as one of the many myths of woodworking.
Personally if sanding a piece with major imperfections and given the following choices of sandpaper grits (60, 120, and 320) or (180, 220, 240, 280, 320, 360 and 400), I would go with the earlier. The first and most important step in sanding is to start with a coarse enough sandpaper. This maybe one of the biggest mistakes beginners make. You will typically find it takes far more work to remove the initially tear-out, than to remove the scratches left by a lower grit sandpaper.
Sanding comments for Woodturners.
Consider using the reverse option on your lathe or purchasing a lathe with reverse.
1. Allows you to position your lathe against a wall.
With the lathe switch in the forward direction to sand a piece moving away from you would require you to hold a piece of sandpaper “up” against the rotating workpiece. Holding the sandpaper up can quickly become tiring. Consequently, many turners prefer to walk to the back of the lathe and sand on the top of the workpiece which is moving away from the turner. However, if your lathe is against a wall this is not possible. Therefore, many turners with lathes near a wall like to place the lathe in reverse, so they can sand on top of the piece, which is moving away.
2. Speeds up the sanding process.
Many woodturners claim they can speed up the sanding process by reversing the direction of the lathe rotation with each successive grit. At least in theory sanding in one direction will lay the fibers down in the direction the lathe is traveling. By reversing the lathe, these fibers will be cut off by the abrasive sandpaper. Note: while reversing the lathe between grits might speed up the sanding process, from my experience, you can get a finely sanded piece by doing all the sanding in the same direction.
3. Direct dust into a hood or dust collector.
Some turners like to sand at the top of a piece with the lathe running in reverse. This will throw the dust into a dust hood or dust collector located on the back side of their lathe. Finally, some left-hand woodturners prefer to operate their lathes in reverse to accommodate their lefty perspective. Note: when operating a lathe in reverse, faceplates and chucks can unscrew themselves. So if operating a lathe in reverse, use faceplates and chucks with a locking system.
Image Version of Sandpaper Grit Chart
Looking for more WoodWorking Tips and Tricks?

Looking for more WoodWorking Projects and Plans?

You will also find patterns of all 50 US States.