SVG Online Image Text Editor Guide (Adding Text)
1. This online image text editor can be used to either:
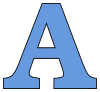
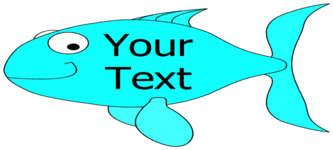
A. Create new
images with text and hearts.
B. Add text to
the thousands of free SunCatcherStudio.com
patterns, stencils, or designs. For example, try selecting a
pattern.
After you have selected your image, this editor will allow you to:
add text, change the font size, change colors, insert hearts,
and specify the format (PNG, JPG, PDF, or SVG) of the image
you wish to download.
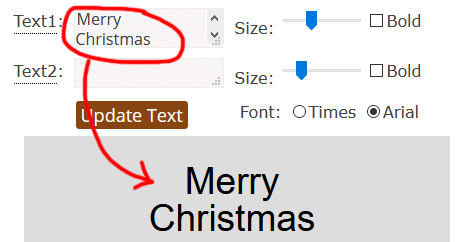
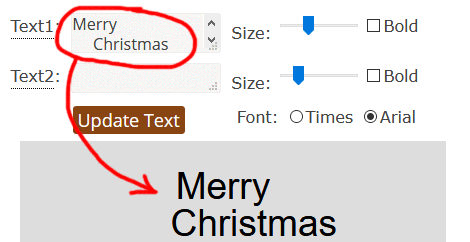
2. You can enter up to two different pieces of text. Both pieces of text can be multiple lines.
Adjust the font size as necessary.
After entering text make sure to press the "Update" button.
This is required for multi-line text. For single line-text it helps
to "precisely" specify the starting location.
3. You can move the
text in different locations using your finger or mouse.
4. If you plan on using your design on a cutting machine (e.g., Cricut), you might
find your design contains "unsupported elements." A couple solutions: 1) Save your
design in PNG or JPG format, or 2) Convert the editable text into paths.
For complete details, see
Cricut.
4. You can optionally add one or two hearts to your design.
Select the size of the hearts (small or large) or select "Hide" to make the hearts disappear altogether.
Next, you can specify the color of the text, and the color of the background pattern.
5. Text Alignment. To keep the interface as simple as possible, the default alignment
on multi-line text is "centered" as shown below.
To left or right align text, simply insert additional spaces as shown in the
image below.
6. Many patterns can be converted to coloring pages or sheets by selecting the
fill color "White".
7. Select the format PNG, if you want a transparent image.
8. If you wish to create word art by printing individual letters
(e.g., L, O, V, E) make sure to specify the
same height
for all letters. Also make sure "Preserve aspect ratio" is set to "Yes".
9. Some designs have a black border around the outside.
You can turn this border off by 1) changing the "black" to "white",
or 2) changing the "black" to match the same color as the design.
→
10. If "Preserve Aspect Ratio" is set to "Yes", then the "width" of your image is automatically
calculated. Changing the "height" will automatically change the "width". Your image
will be scaled proportionally. The size of your image may change, but the overall shape will not change.

Height: 100 pixels.
Height: 60 pixels.
If "Preserve Aspect Ratio" is set to "No", your new image will match the values entered
in the textboxes for "Width" and "Height."
Height: 100 pixels.
Width: 185 pixels.

Height: 100 pixels.
Width: 100 pixels.
Height: 100 pixels.
Width: 300 pixels.
11. Images can currently be sized to a maximum width or height of 3000 pixels
(or a minimum width and height of 10 pixels).
12. For images that will be used for print (e.g. coloring sheets), either
save the images in PDF format, or specify a large pixel value.
Keep in mind, most printers use a resolution of 300 dpi (dots per inch)
or ppi (points per inch). If you want your final image to
look sharp at 5 inches, then you would want to specify a pixel size
of at least 1500 pixels (5 inches * 300 ppi).
The PDF files are automatically saved at 300 pixels per inch (ppi).
SVG (Scalable Vector Graphics) can be scaled to any size without losing
quality.
13. For best quality, save images in SVG (Scalable Vector Graphics) format.
Once saved, you can open SVG files using a web browser (Chrome, Safari, Firefox) and print them.
SVG files can also be opened and printed using
Adobe Illustrator,
Adobe Photoshop,
InDesign,
CorelDraw, and the free programs
Inkscape and
Gimp.
14. See
resizing
and printing images, if you need help with printing images,
resizing images consistently, or printing images (on multiple pages).