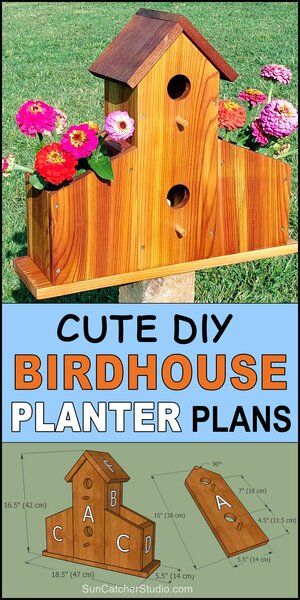
Bird House Planter Plans (Cute DIY Nesting Box)
Below is a bird house planter that combines a nesting box with planters on both sides. This decorative structure creates a functional and visually appealing piece for both birds and plants. Find more bird houses plans or discover more ideas on nesting boxes and bird feeders.

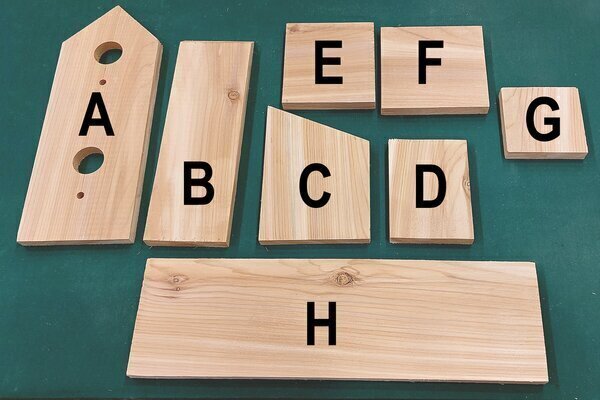
This woodworking project makes a great family activity. Let the kids help with installing screws, applying a finish, or painting the bird house. Below are the individual pieces used to create this bird house.
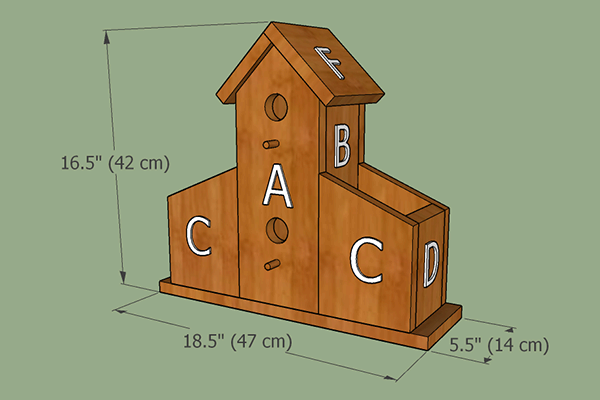
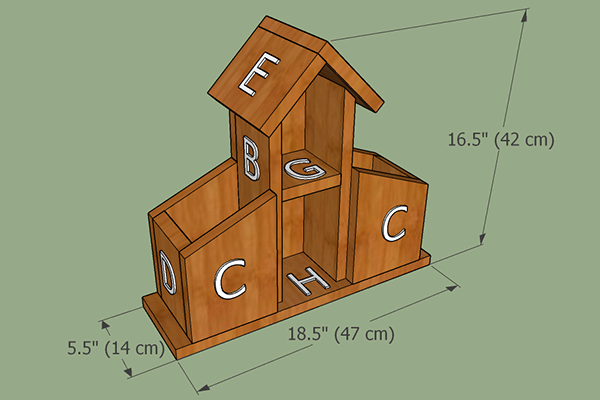
This bird house design can easily be mounted on a pole making it virtually impossible for most predators to climb. Below is a 3D model (showing two views) of this bird house.
Step 1. Prepare the Front and Back of the Bird House.
Cut two pieces of wood as shown below (Labeled “A”) using a miter saw, table saw, band saw, or some other saw. Personally, I am using cedar wood. Other naturally weather-resistant woods would include redwood, cypress, and pine. You can view larger images by clicking on the pictures below.
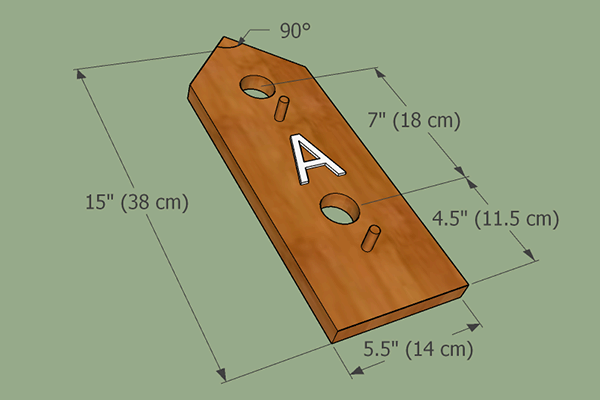
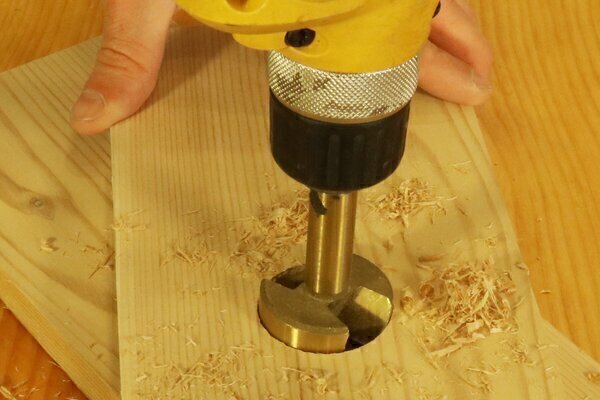
In one piece drill an entrance hole using either a spade bit or Forsnter drill bit. A 1.5″ (4 cm) entrance hole is the optimum diameter for bluebirds and tree swallows. However, chickadees, nuthatches, warblers, woodpeckers, and wrens will also gladly make this their home. See Bird House Hole Size if you want to attract a specific bird. Optionally add a Birdhouse Perch.
Step 2. Cut the Remaining Pieces for the Bird House Planter.
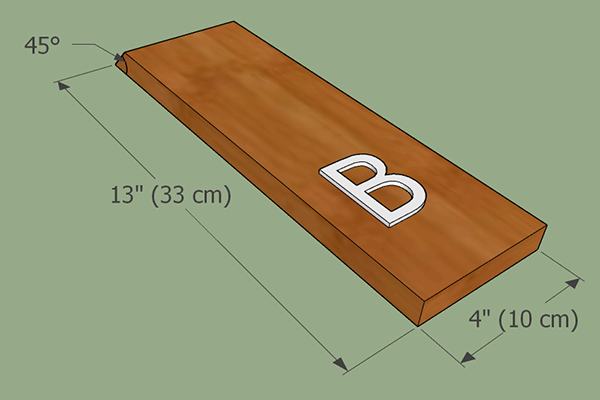
Cut two pieces of wood as shown below (Labeled “B”).
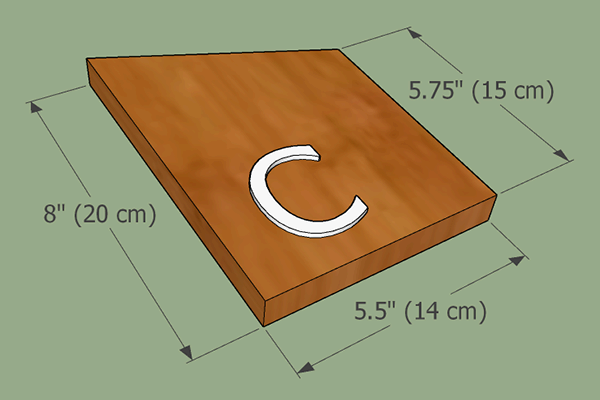
Cut four pieces of wood as shown below (Labeled “C”).
Cut two pieces of wood as shown below (Labeled “D”).

Cut one piece of wood as shown below (Labeled “E”).
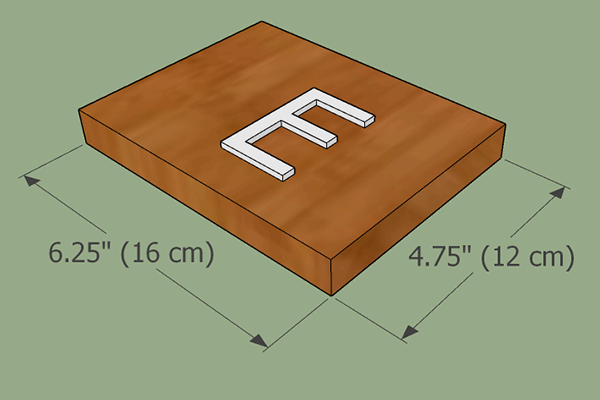
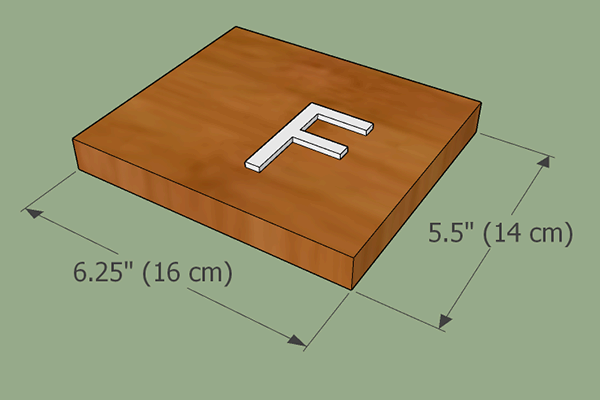
Cut one piece of wood as shown below (Labeled “F”).
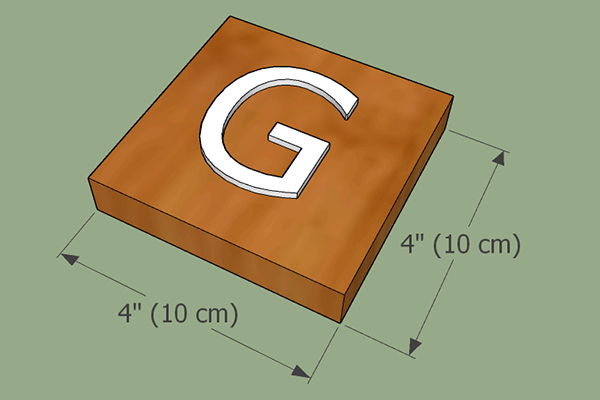
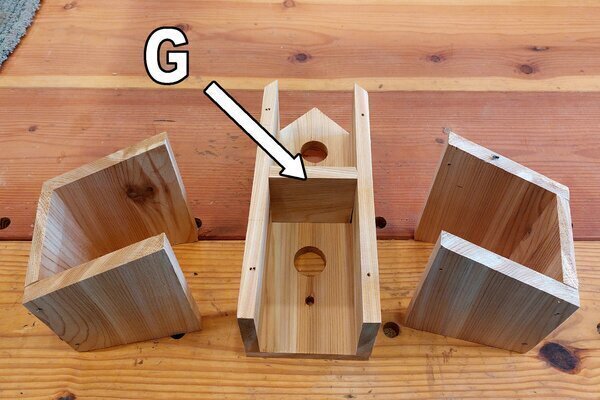
Cut one piece of wood as shown below (Labeled “G”). Drill several 1/4″ (0.5 cm) holes in this piece for drainage.
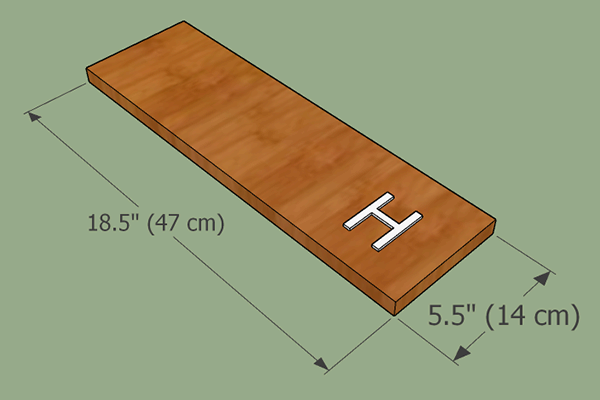
Cut one piece of wood as shown below (Labeled “H”). Drill several 1/4″ (0.5 cm) holes in this piece for drainage.
Step 3. Consider Adding a Cleanout Door to Your Birdhouse.
If you use screws to assemble your bird house, it can easily be cleaned out by removing a few screws. See Cleanout Door Ideas for other ways to add an access door for cleaning.
Step 4. Assemble Your DIY Birdhouse Planter.
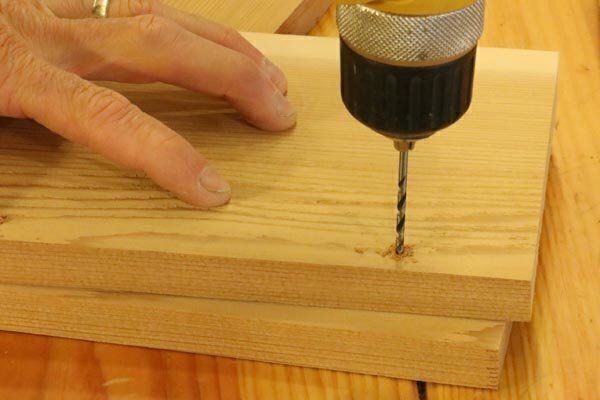
Use screws to attach the front, back, sides, roof, and floor together. Drill pilot holes to help prevent the wood from splitting. Ideally, the pilot holes should be at least as large as the screw’s minor diameter.
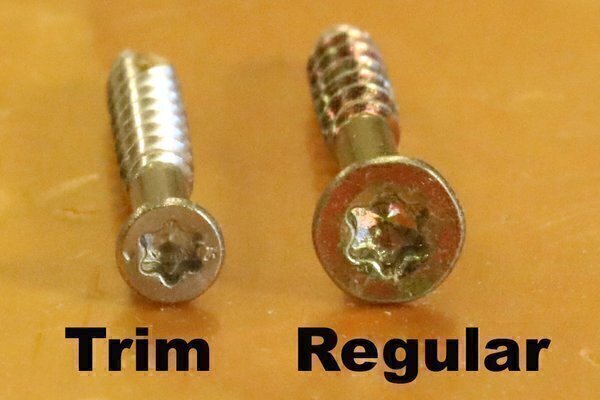
Personally, I recommend using stainless steel trim screws as shown below. The smaller screw head is less obvious and helps prevent the wood from splitting. If you pre-drill the holes, these screws will countersink themselves nicely because the head is not much larger than the pilot hole.
While you can assemble your bird house in various ways, just make sure to insert Part “G” before adding the back section!
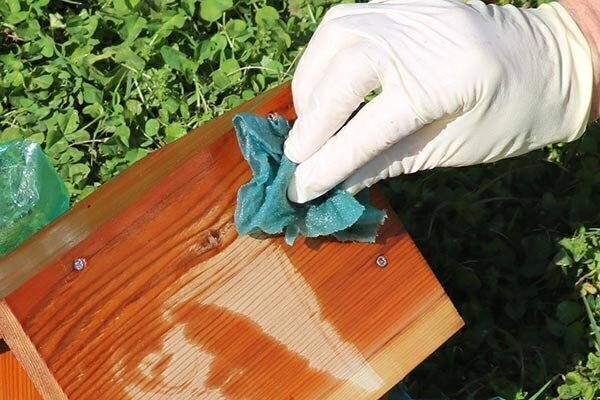
Step 5. Optionally paint or finish your birdhouse.
In our case, we applied a linseed-oil. This finish helps accentuate the grain and helps make the wood more resistant to damage.
Step 6. Hang or mount your birdhouse planter.
Mount your birdhouse and see which bird will call your habitat home. See How to Hang a Birdhouse for the recommended mounting height for various birds.
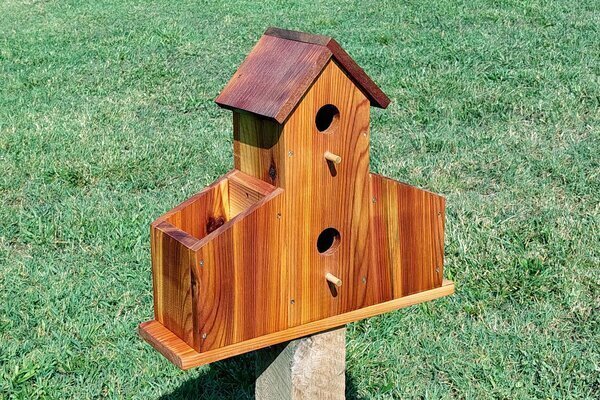
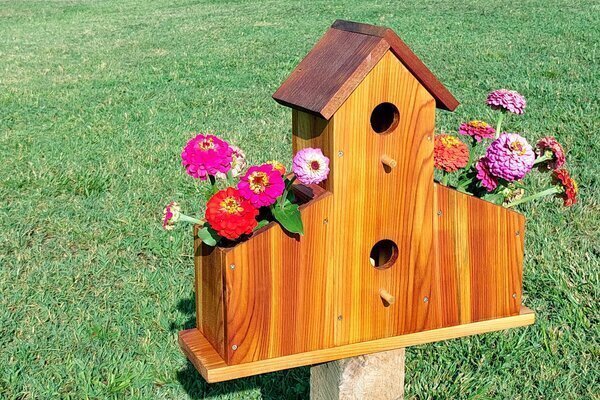
Your new birdhouse with a planter box for flowers should provide you excitement for many seasons to come. Building a birdhouse can be fun family project. Furthermore, a birdhouse will help encourage neighborhood birds to move in and raise families in your backyard. Hence providing you and your garden natural pest control. This birdhouse can be used to attract bluebirds, swallows, chickadees, nuthatches, warblers, woodpeckers, wrens, and other birds to your backyard or garden.
Pin for later!
Related Articles on Bird Houses, Bird Feeders & More


Use these free DIY bird house plans and bird feeder plans to attract bluebirds, chickadees, flickers, finches, house sparrows, hummingbirds, kestrel, nuthatches, owls, purple martins, swallows, thrushes, warblers, woodpeckers, wrens, and other birds to your garden.