Purple Martin House Plans (Free Printable DIY Directions)
Free DIY purple martin house plans to make a wooden nesting box. This birdhouse can be used to attract purple martins and other birds to your backyard or garden. Find more free bird houses plans or discover more nesting boxes and bird feeders.
Materials and Equipment Needed to Build this Birdhouse:
- Wood (cedar, redwood, cypress, and pine would make good choices).
- Screws: Approximately 1.5″ (4cm) long.
- Power drill.
- Saw (table saw or miter saw).
- Drill bit to match appropriate entrance hole size.
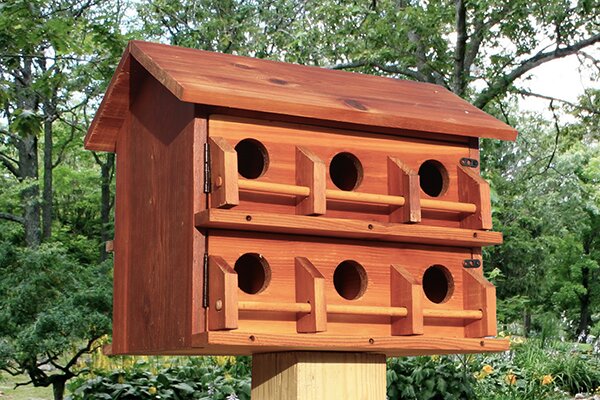
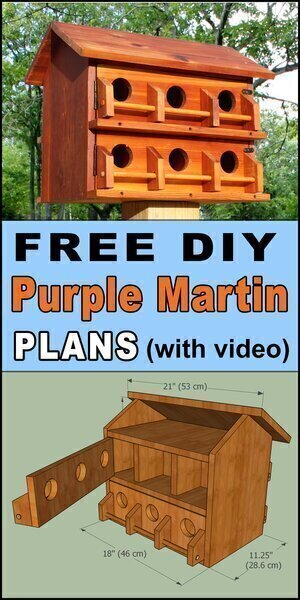
Making a birdhouse is an activity that you can do with your children. This guide will show you just how easy and affordable it is to make a purple martin birdhouse. By attracting these bug-eating birds to your backyard, you can make your summer pest-free. This design has 12 individual compartments that are easy to clean and access. Let’s get started.
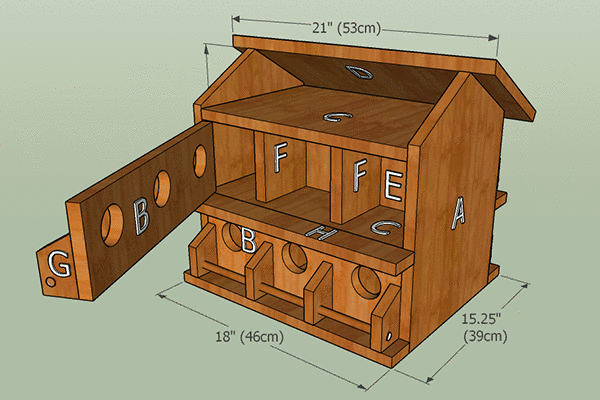
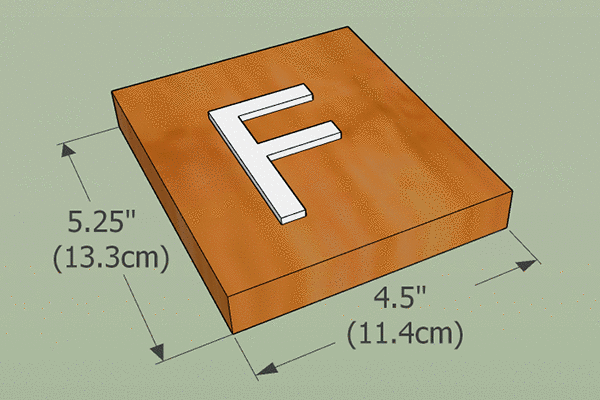
Apartment Size: 4.5″L x 5″W x 5.25″H (11.4cm x 12.7cm x 13.3cm)
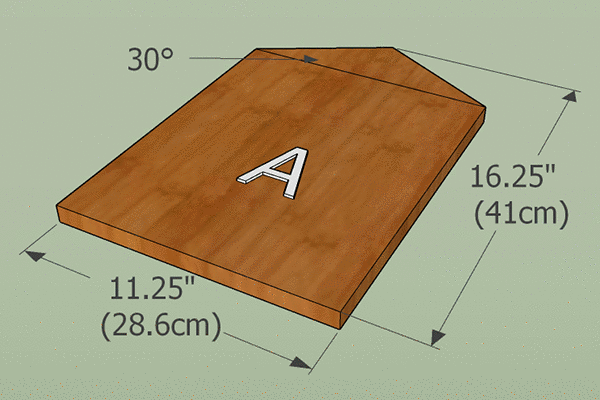
Step 1. Prepare the Sides of the Bird House.
Cut two pieces of wood as shown below. Personally, I am using cedar wood.
Step 2. Prepare the Side Doors for the Purple Martin Nesting Box.
Cut four pieces of wood as shown below.
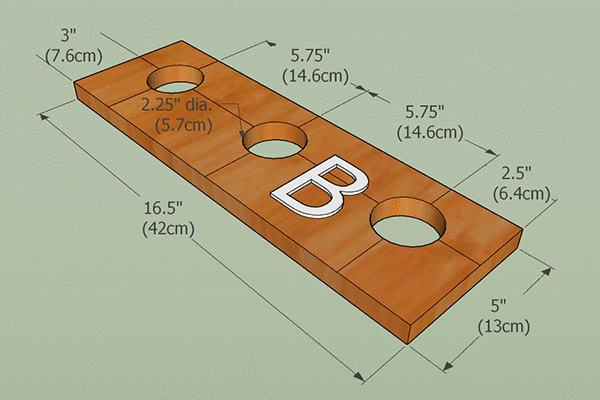
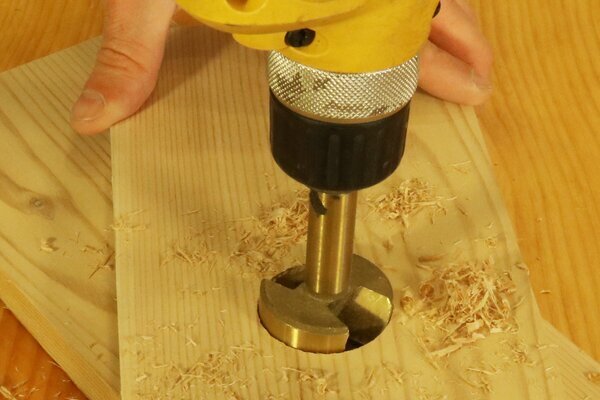
Drill three entrance holes in each piece using either a spade bit or forsnter drill bit. An entrance hole size between 2.25″ and 2.5″ (5.7cm – 6.4 cm) is the optimum diameter for purple martins. However, chickadees, nuthatches, warblers, woodpeckers, and wrens will also gladly make this their home. See Bird House Hole Size if you want to attract a specific bird.
FYI: If you plan on adding hinges to these doors, you will need to make the width slightly smaller based on the thickness and placement of your hinges.
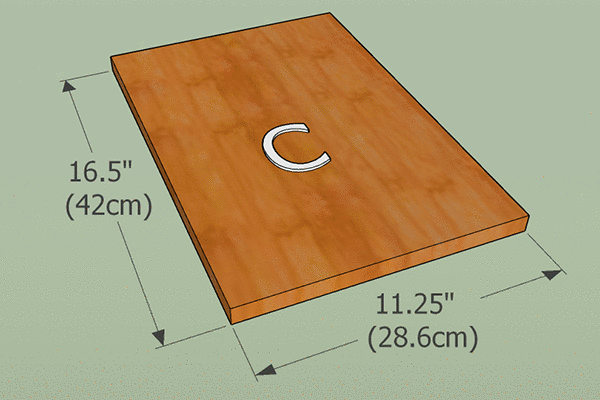
Step 3. Prepare the floor of the Bird House.
Cut three pieces of wood as shown below.
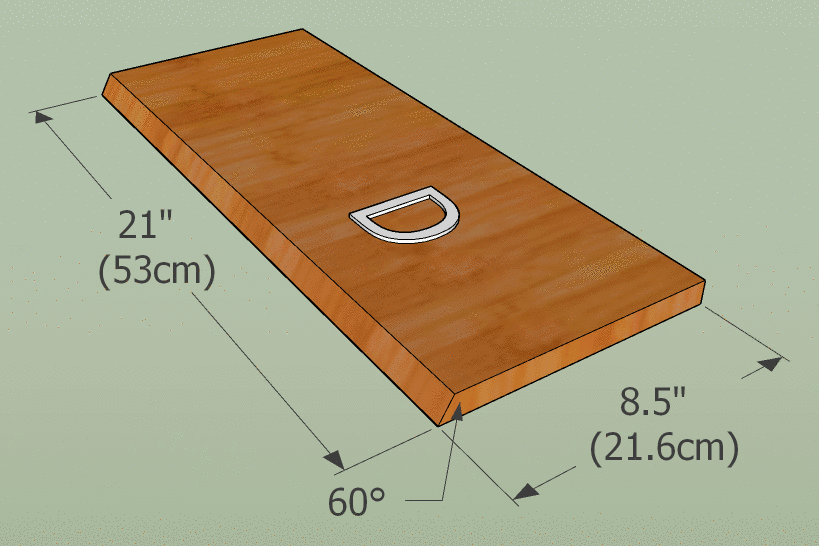
Step 4. Prepare the Roof of the Martin Bird House.
Cut two pieces of wood as shown below. By cutting one end at 60 degrees the two pieces will fit perfectly together to create a tight seal.
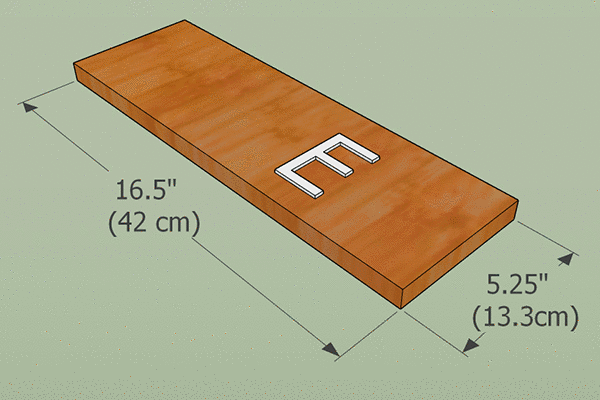
Step 5. Cut out the Long Apartment Dividers.
Cut two pieces of wood as shown below.
Step 6. Cut out the Short Apartment Dividers.
Cut eight pieces of wood as shown below.
Step 7. Create the Bird Perch Brackets.
Cut sixteen pieces of wood as shown below.

Step 8. Create the Bird Perches.
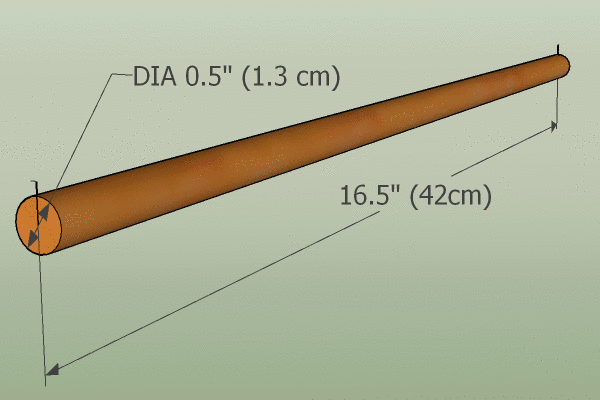
From a 1/2″ (1.3cm) diameter wooden dowel cut four pieces each 16.5″ (42cm) as shown below. Find the benefits and drawbacks of a bird house perch.
Step 9. Create the Bird House Platforms.
Cut four pieces of wood as shown below.

Step 10. Assemble Your Wooden Purple Martin Birdhouse.
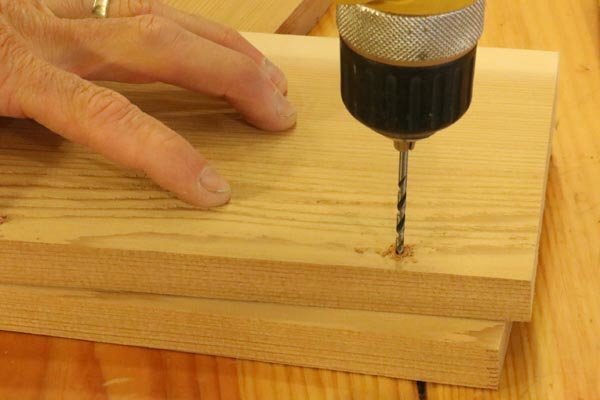
Now, use a combination of glue and screws to attach the sides, floors, roof, and bird perches together as shown in the image above. A waterproof wood glue is recommended to help extend the life of the birdhouse. Drill pilot holes to help prevent the wood from splitting. Ideally the pilot holes should be at least as large as the screw’s minor diameter.
Personally, I recommend using stainless steel trim screws as shown below. The smaller screw head is less obvious and helps prevent the wood from splitting. If you pre-drill the holes, these screws will countersink themselves nicely because the head is not much larger than the pilot hole.

If you want to make your bird house easy to clean and service use a combination of hinges and door latches to hold the side doors (labeled “B”) in place. While not as easy to service, the side doors can also be held in place using screws. Learn more about access doors and cleaning bird houses.
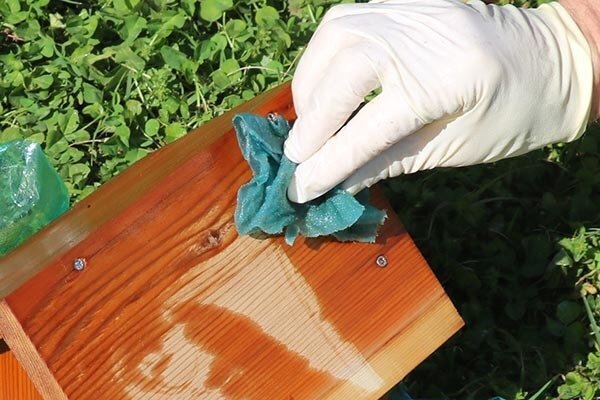
Step 11. Optionally paint or finish your birdhouse.
In our case, we applied a linseed-oil. This finish helps accentuate the grain and helps make the wood more resistant to damage.
Step 12. Hang or mount your birdhouse.
Mount your birdhouse and see which bird will call your habitat home. See How to Hang a Birdhouse for the recommended mounting height for various birds. Your new birdhouse should provide you excitement for many seasons to come.
Building a birdhouse can be fun family project. Furthermore, a birdhouse will help encourage neighborhood birds to move in and raise families in your backyard. Hence providing you and your garden natural pest control.
Pin for later.
Related Articles on Bird Houses, Bird Feeders & More


Use these free DIY bird house plans and bird feeder plans to attract bluebirds, chickadees, flickers, finches, house sparrows, hummingbirds, kestrel, nuthatches, owls, purple martins, swallows, thrushes, warblers, woodpeckers, wrens, and other birds to your garden.