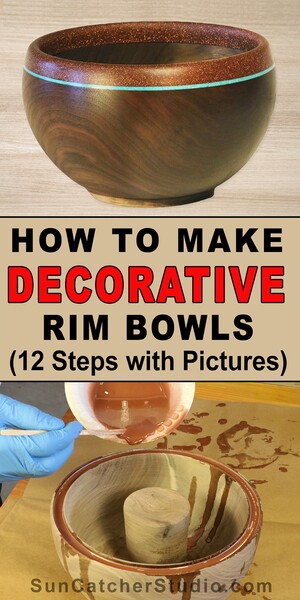
How to Make a Bowl With a Decorative Rim (Woodturning)
Learn how to create a decorative rim on a wooden bowl in this fun woodturning project. A decorative or embellished rim can help make a piece look distinguished and noticeable.
")
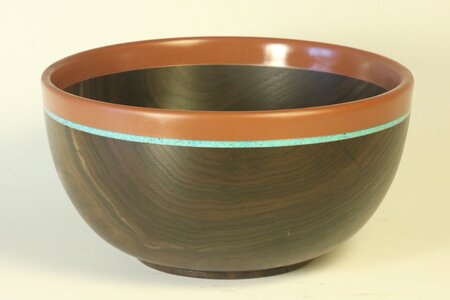
The approach discussed below will show you how to add a metal looking rim to a bowl without requiring any advanced metalworking skills or expensive tools. A clever trick will be used to create a metal looking rim by using an epoxy adhesive laced with copper, aluminum, metal powder, or your favorite inlay material.
Materials Used to Create this Bowl with a Decorative Rim.
- Wood: 8” x 8″ x 5” (20cm x 20cm x 13cm). I used walnut.
- Epoxy, penny copper powder, turquoise inlay (optional).
Written Instructions Follow Step by Step Images.
Written instructions for Turning a Wooden Bowl with a Decorative Rim.
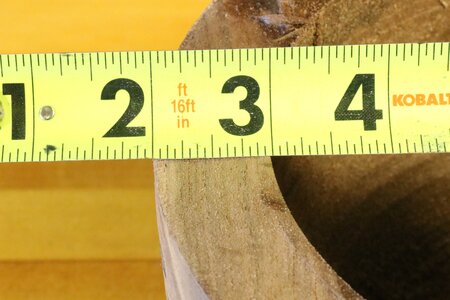
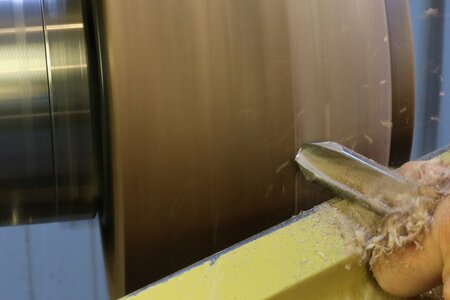
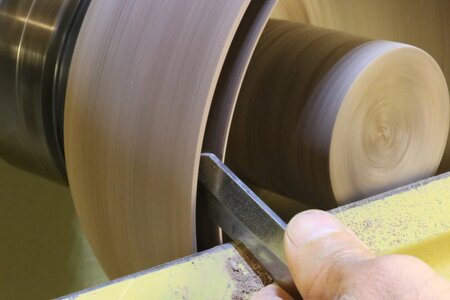
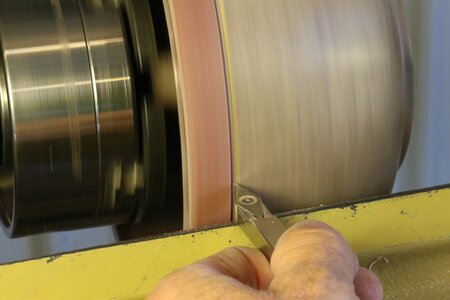
While there are numerous approaches to turning a metal looking rim, I typically take the following steps. I first find a roughed out dried bowl blank which has thick walls and has remained somewhat round during the drying process (Step 1). In the example shown, the diameter of the dried bowl was 8” (20cm) and had 1” (3cm) thick walls. Next I true up the exterior and interior using a bowl gouge (Step 2). This will make the piece perfectly round. I then use a parting tool to create a grove approximately 5/8” (1.5cm) deep (Step 3). The depth of this cut should correspond to the desired height of the decorative rim.
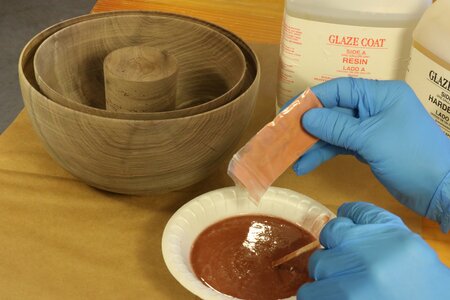
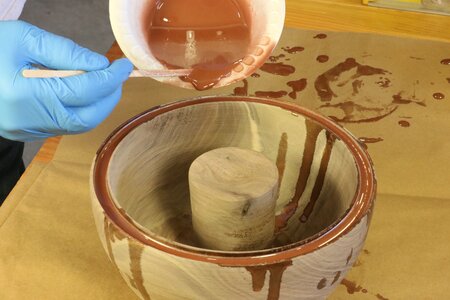
Next I mix a metal powder (e.g., copper, aluminum, brass, etc.) with an epoxy resin (Step 4). Once the inlay has been mixed with resin, I then mix in the epoxy hardener. I personally like to use a slow-drying epoxy when creating metallic looking rims (e.g., one which has a 15-20 minute working time before the product begins to harden). This way, I can always mix more and not worry about it adhering properly. Next I pour the mixed epoxy into the grove (Step 5).
Final Steps to Creating your Bowl with a Decorative Rim.
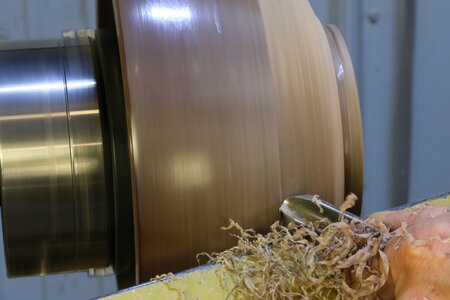
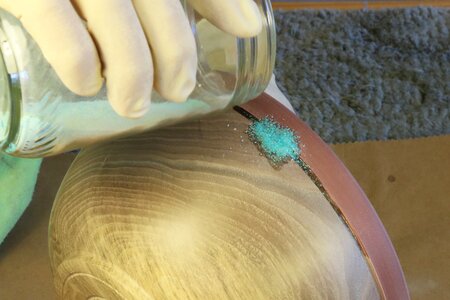
Once the epoxy has dried, I turn the outside and inside making sure to completely remove the thin layer of wood in the rim (Step 6). Depending on the wood type used, I may optionally create a groove for an additional inlay material (Step 7). For example, if using a dark wood like walnut and adding a dark rim like copper, an additional inlay material can help separate the body of the bowl from the rim.
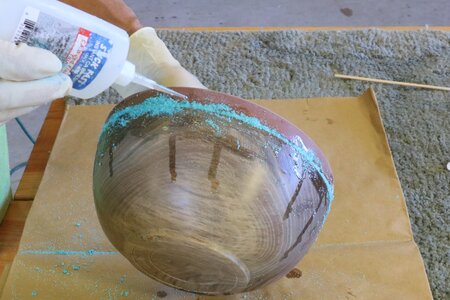
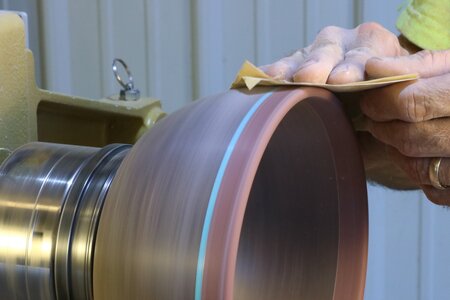
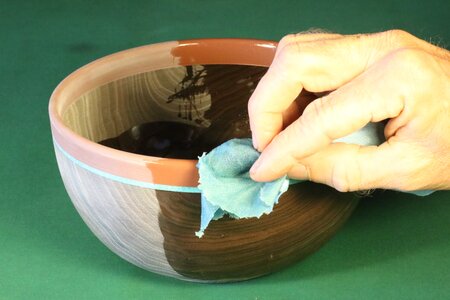
Subsequently, I insert a little turquoise powder and then apply a thin cyanoacrylate (CA) glue (Step 8). The thin CA glue will flow through the material, being absorbed, then wick to the bottom of the recess and securely hold the inlay in place. Yes, I try to be neat! However, inevitably the piece will be covered with glue and inlay material before I am finished (Step 9). Next I finish sanding the inside and outside of the piece (Step 10) and then apply a finish (Step 11). The finished bowl is ready for use (Step 12).
Pin for later.