Segmented WoodTurning (Secrets and Tips for the Beginner)
Segmented woodturning – is turning a workpiece composed of multiple glued together pieces. Many segmented turners enjoy the freedom that comes from assembling pieces together. This process allows them to combine different types of woods with contrasting colors to create striking patterns in the finished piece. Furthermore, segmented turners can create pieces larger than the size of the blanks they can purchase or cut from a log.
In addition to the enjoyment and challenges of turning, segmented woodturners also enjoy the challenging aspects of creating designs, and building jigs and fixtures to accurately cut and assemble the individual pieces together. Creating tight, seamless joints requires extreme precision and persistence and frequently requires innovative methods of assembling the pieces to get precise alignments. With segmented turning, the size, design, and wood selection are limited only by your imagination, skill, and patience. Following are some helpful tips for segmented woodturning.

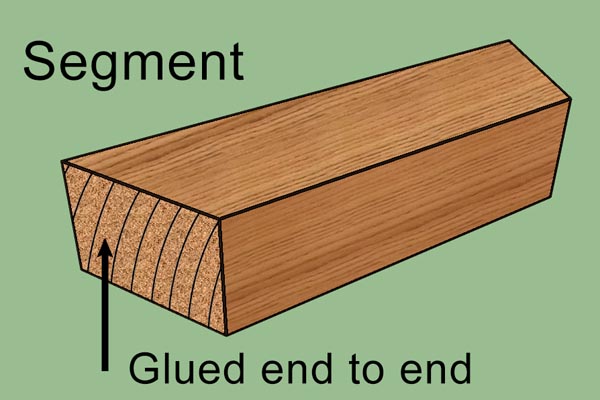
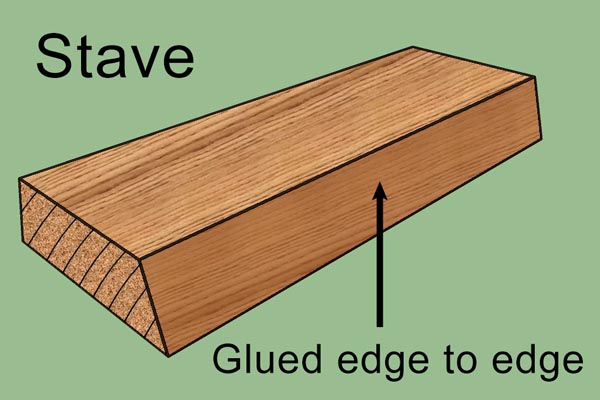
1. Know the difference between “segments” and “staves”.
In general, the grain in rings constructed from segments runs horizontally and the individual pieces are glued end to end. On the other hand, the grain in staves runs vertically, and woodturners glue the individual pieces edge to edge.
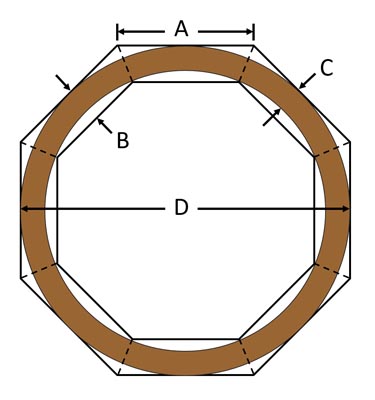
2. Be able to identify the parts of a segmented ring.
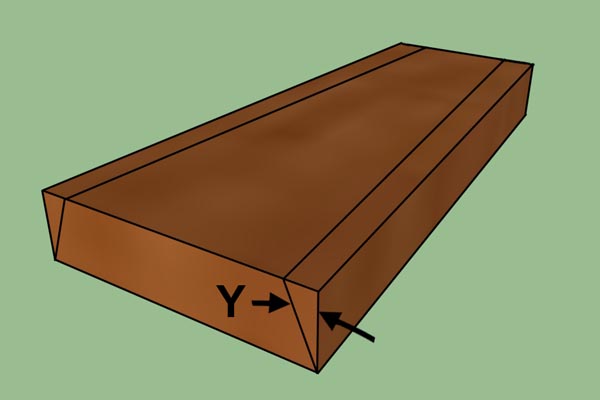
The segment length (A) is the outside length of the segment. The segment width (B) is the width of the segment. Many woodturners will add approximately 1/4” (6mm) extra width on both the inside and outside of each segment to account for errors or unanticipated circumstances. Woodturners call this additional wood the “fudge factor”. The ring thickness (C) is the final thickness of the vessel. Finally, the outside diameter (D) is the measurement from one outside edge of the vessel to the other outside edge passing through the center.
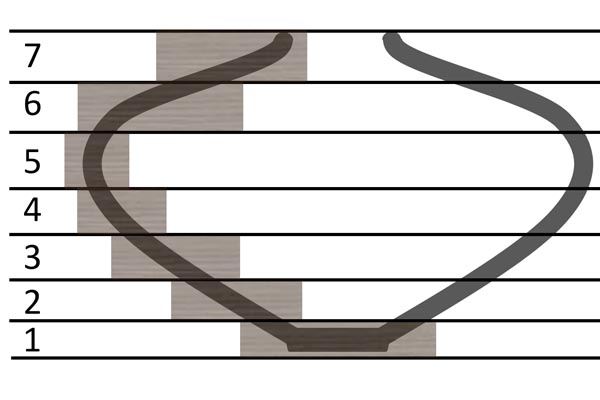
3. Realize the required “width” of some segments will vary.
For example, in the plan below the width of the segments for Ring #5 could be smaller than the width of the segments for Ring #7.
4. Keep the following formulas nearby for segmented woodturning.
A. Segment / Miter Angle = 360 ∕ (2 * Number of Segments)
B. Circumference = Diameter * 3.14
C. Segment Length = Circumference ∕ Number of Segments
D. Number of Required Segments = Circumference ∕ Segment Length
E. Diameter = (Number of Segments * Segment Length) ∕ 3.14
5. Know how to compute the miter angle for segments.
For example, if you want 8 segments per ring you would use formula “A” above to determine that the miter angle should be 22.5 degrees. Miter angle = 360 / (2 * 8) = 22.5 degrees.
6. Know how to compute the length of each segment.
For example, if you want to create a 10” (25.4cm) ring with 8 segments, you would use formula “B” and “C” above to determine that the length of each segment should be 3.925” (9.97cm).
Segment Length = (10” * 3.14) / 8 = 3.925”. [Imperial]
Segment Length = (25.4cm * 3.14) / 8 = 9.97cm. [Metric]
7. Know how to how to compute the diameter of a ring
If given the desired number of segments and the segment length, you should know how to computer the diameter. For example, if you have 12 segments 3” (7.62cm) in length, you would use formula “E” above to conclude the diameter would be 11.46” (29.12cm).
Diameter = (12 * 3”) / 3.14 = 11.46”. [Imperial]
Diameter = (12 * 7.62cm) / 3.14 = 29.12cm. [Metric]
8. Keep the following formulas or chart nearby.
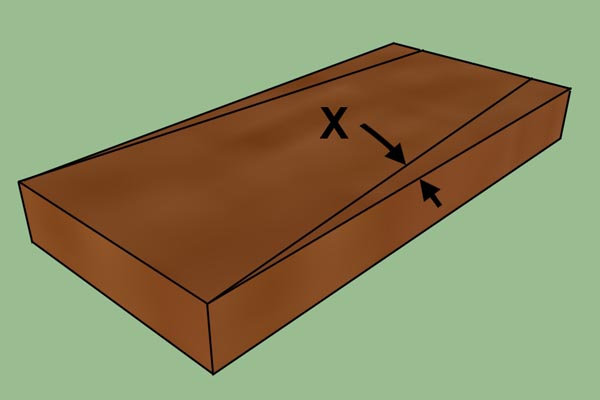
When computing the compound cuts for the staves on a segmented piece, the following formulas or charts can be very helpful.
Miter Angle = degrees (atan (tan(X) * sin (radians (Y))))
Tilt Angle = degrees (atan (tan(X) * cos(atan(tan(radians (Y)) / cos (X)))))
Where:
X = radians (360 / number of staves / 2)
Y= Outward tilt angle of staves (degrees)
To make it easier, the image below shows the calculated miter and tilt cuts for creating vessels with 4, 6, 8, 10, and 12 staves. The “Outward Tilt” angle (also known as the splay angle) indicates the angle of the staves – relative to the base. Chair legs frequently include a splay angle. For example on many chairs, the legs splay out. (PDF version)
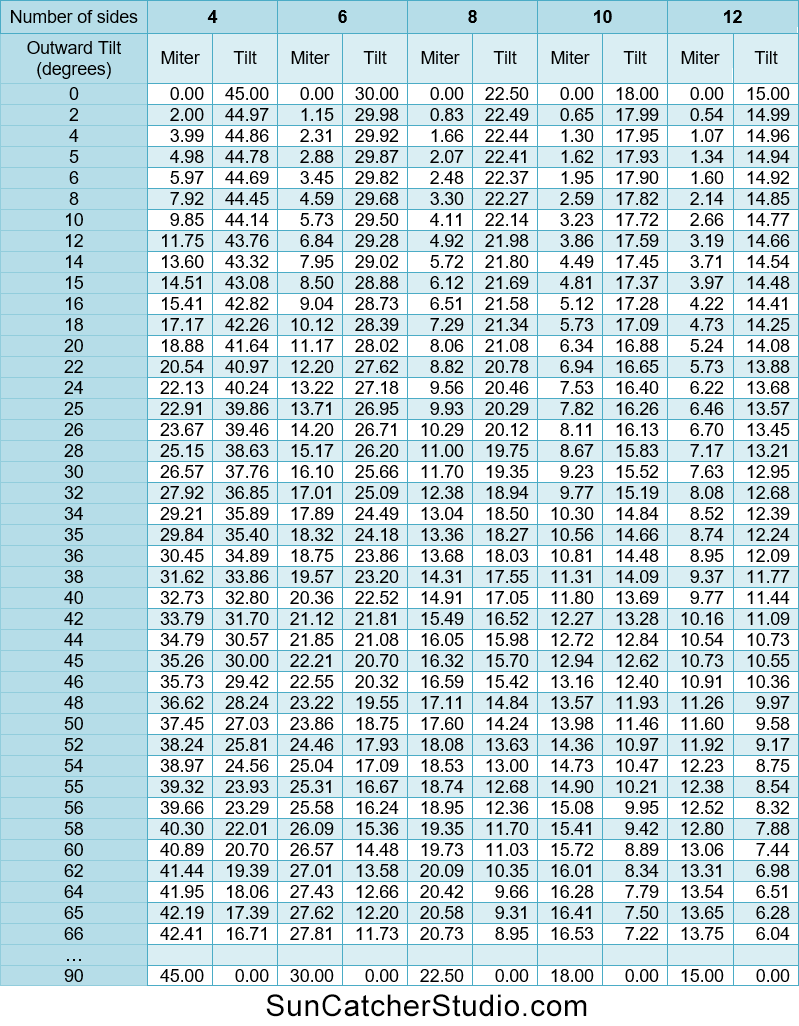
9. Know how to use either formulas or Table A to determine miter and tilt cuts.
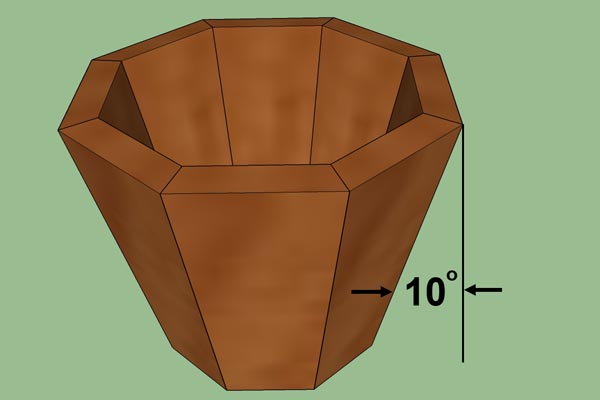
For example, assume you want to create a piece with 8 staves as shown below with an outward tilt angle of 10 degrees. By looking at the table above, the miter cut (X) would be set to 4.11 degrees, and the tilt cut (Y) would be set to 22.14 degrees.
10. Consider assembling segments in two half circles to achieve a perfect fit.
For example, if a ring contains 12 segments, many woodturners will glue segments 1-6 together and segments 7-12 together. Once these two halves are dried, lightly sand the surface on the two matching halves. By assembling the segments in two half circles, you only ever have to worry about 2 joints fitting perfectly. On the other hand, if you wished to glue all 12 segments at once, then all 12 joints would have to match perfectly to ensure a tight fit. By assembling the segments all at once, there exists more opportunities for gaps and misalignments in the joints between the pieces.
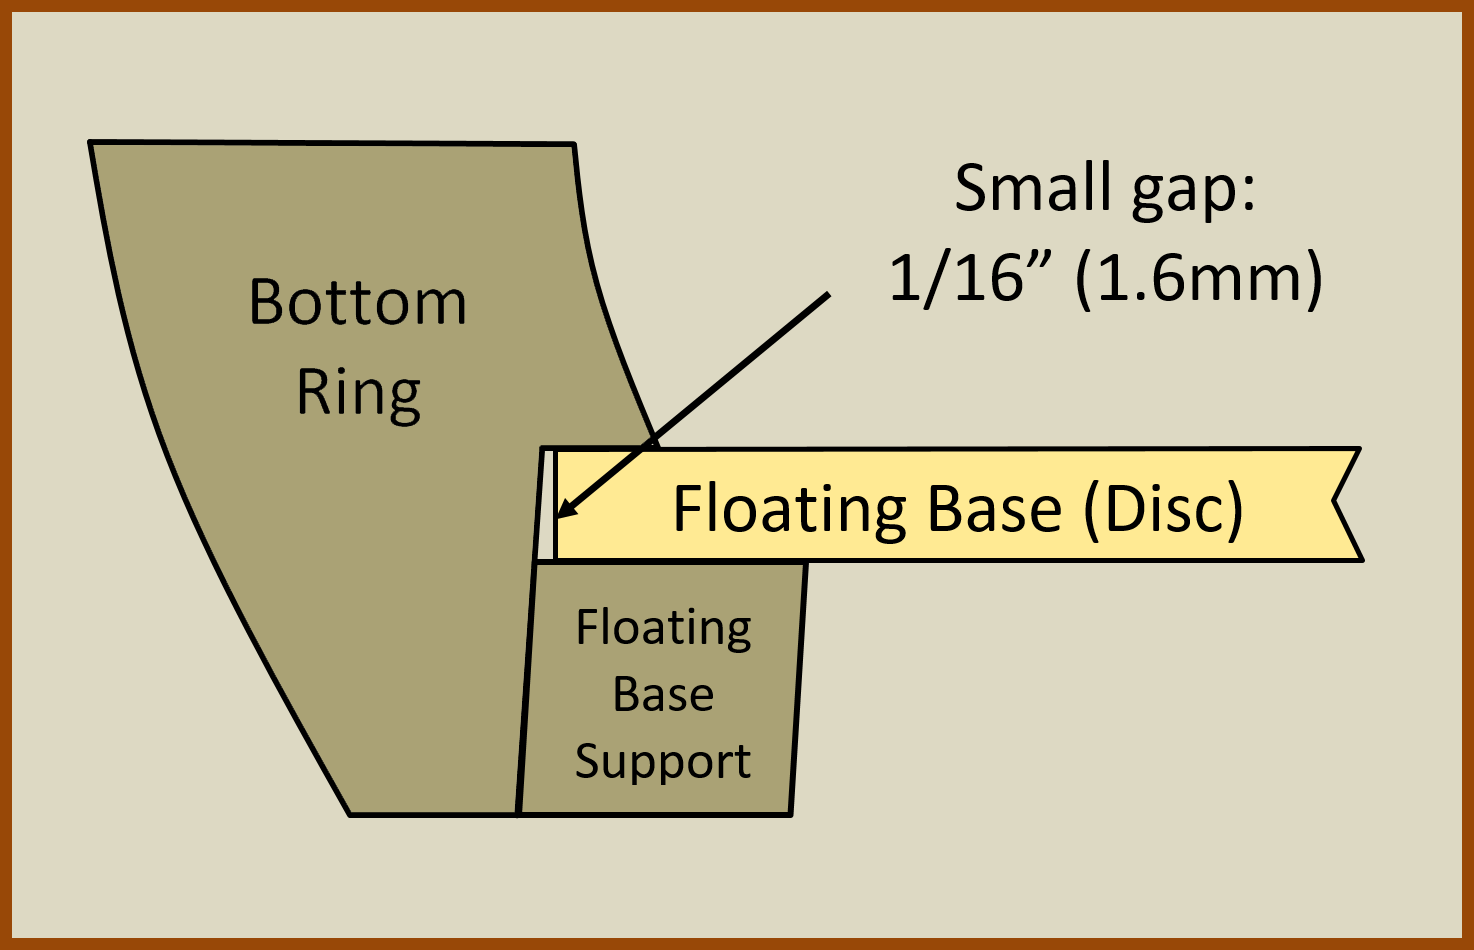
11. Know how to avoid base failures on larger pieces.
To minimize base failures, many turners will create a floating base – especially on larger segmented pieces. You can construct a floating base design by using a half-mortise joint. A solid disc that fits in this joint has a diameter, which is slightly less than the diameter of the half-mortise joint on the bottom ring. This creates a floating base, which allows the wood to move, hence minimizing stresses on the piece. Other woodturners will try to minimize base failures by using quarter-sawn lumber. Quarter-sawn wood is more stable (less likely to cup, twist, expand, or contract) than plain-sawn lumber. Still other segmented woodturners will keep the base as small as possible – preferably under 6 inches (15cm) to minimize base failures.
12. Don’t forget about the tailstock on your lathe!
As shown below, the tailstock on your lathe can be used for clamping pressure when gluing segmented rings together. See wood lathe for more tips on lathes.