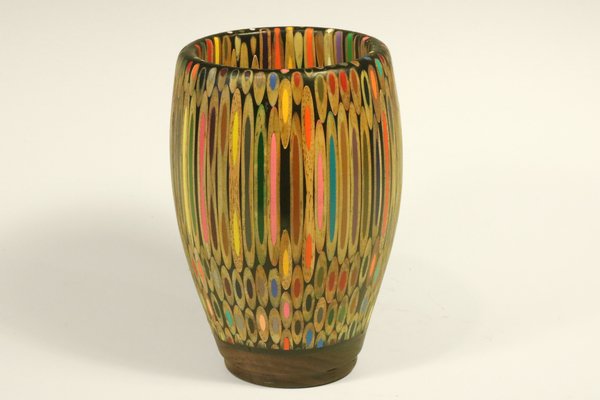
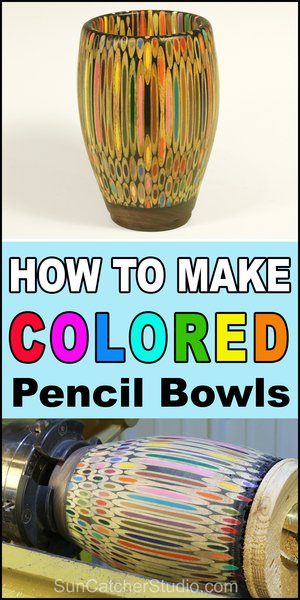
Colored Pencil Bowl (DIY Woodturning Project with Instructions)
Colored pencils are typically used to create art, but in this case the colored pencils are used as the art themselves. This fun project with directions and step by step instructions shows you how to convert colored pencils into a beautiful piece. These turned pieces not only make great conversation starters, but they also make excellent gifts. Artist especially enjoy them – providing them a decorative and clever way to hold their paint brushes, fine art pencils, and other tools.
Materials Used to Create a Colored Pencil Bowl.
- Slow-set epoxy (e.g., Glaze Coat).
- Black epoxy paste pigment.
- 300+ Crayola colored pencils.
- Empty plastic container.
- 5” x 5” x 1½” (13cm x 13cm x 4cm) piece of walnut wood.
While there are numerous approaches to turning a colored-pencil bowl or vase, I typically take the following steps.
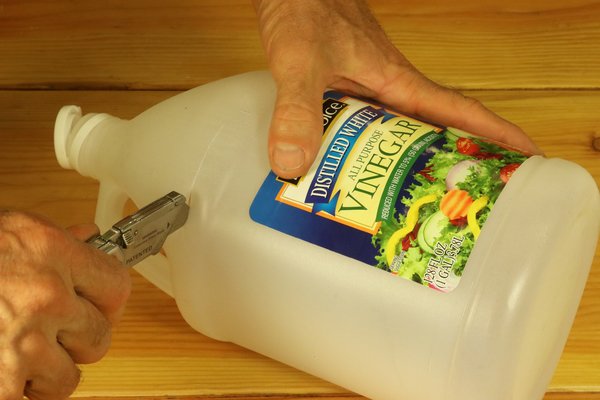
Step 1. Find a disposable container.
I first find a disposable container to match the size of the piece I wish to create. In this case, I found an old 1-gallon (3.8 liter) container which originally held vinegar. After rinsing the container, I cut off the top.
Step 2. Fill the container with colored pencils.
Next, I cut a round piece of walnut wood 1½” (4cm) thick and place it in the bottom of the container. I then fill the container with colored pencils.

Note: If you know in advance your desired shape, you may want to consider inserting a scrap piece of wood in the middle. The length of this scrap piece of wood should match the length of the colored pencils. In my case, the scrap piece of wood allowed me to use only 300 pencils instead of approximately 400 pencils (a savings of 100 pencils).
While any brand of colored pencils may work, I have had good luck with Crayola. I have read where some other types of colored pencils may easily melt and streak when sanding.

Step 3. Add a Slow-drying Epoxy Resin.
Next, I thoroughly mix a slow-drying epoxy resin, a black pigment paste, and the epoxy hardener. This mixture is then poured over the pencils.
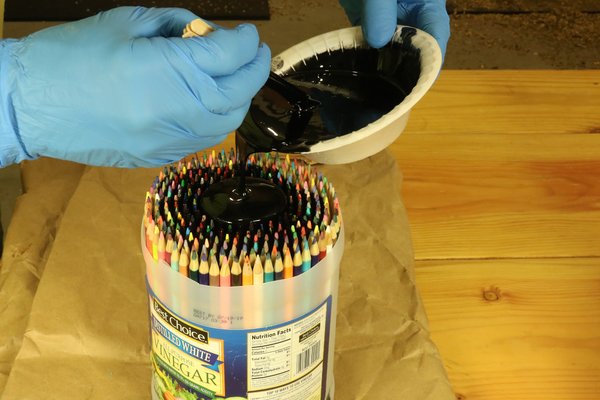
The epoxy which I used for this project (Glaze Coat) has a working time of 15-20 minutes, and a cure time of 72 hours. This long working time, allows me to add some epoxy, then lift and turn the pencils to make sure epoxy is getting into all of the cracks. Even if the pencils are packed into the container, some pencil will try to float up. To solve this problem, when I am finished adding epoxy, I will place a board and some additional weight on top of the pencils to prevent them from floating up. Inevitably, the board will stick to the epoxy.
To create this project required approximately 1 pint (0.5 liters) of resin, 1 pint of hardener (0.5 liters), and two table spoons (15 milliliters) of black pigment paste. The resin and hardener are mixed using a 1:1 ratio.
Step 4. Shape the Outside of the Colored Pencil Bowl using a Gouge.
After waiting the recommended 72 hours, I mount the container full of pencils on the lathe.
Notice, how the board which was used to keep the pencils from floating up is used to help mount the piece.
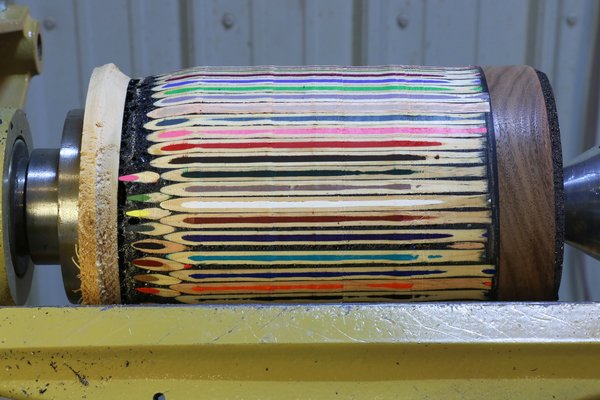
Using a bowl gouge, I then start to turn the outside of the piece. After just a few seconds, the plastic container is removed, and the pencils begin to show. When turning the outside, I turn a tenon on the bottom of the piece (i.e., in the walnut wood). This tenon is then used when re-mounting the piece.
Step 5. Remove the inside of the Bowl.
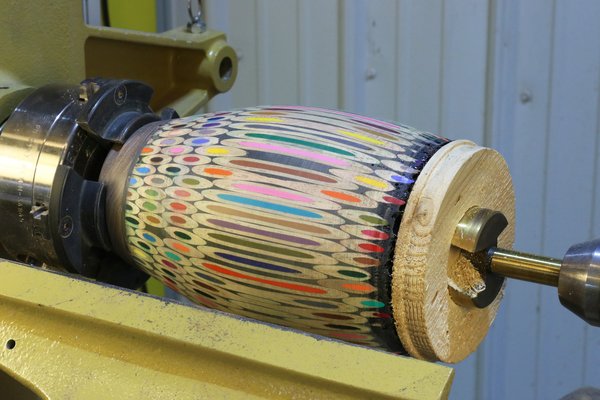
I now begin removing the inside of the bowl starting with a Forstner drill bit. Next I use a combination of a bowl gouge and carbide cutters to increase the size of the opening and remove additional material. When completed, the final wall thickness is approximately ½” (1.3cm).
Step 6. Sand and finish your Colored Pencil Bowl.
Finally, I sand and finish the piece. In the example shown below, linseed oil was first applied followed by two coats of lacquer. The final piece is now ready for display.