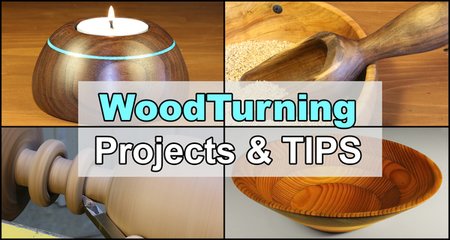
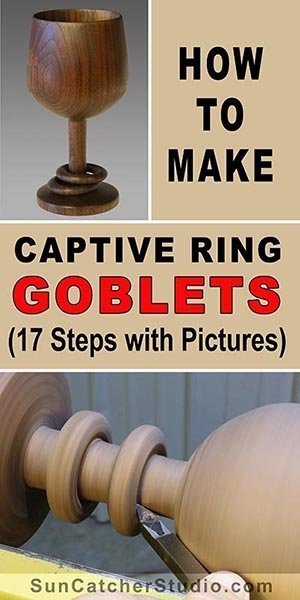
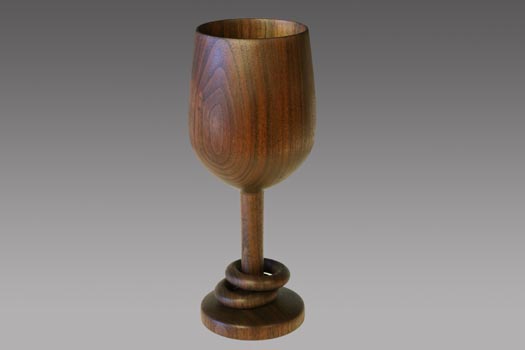
How to Turn A Goblet with Captive Rings (Woodturning)
A goblet with captive rings on the stem can be an interesting and fun project for people who enjoy woodturning. The captive rings can present a puzzle to those who do not know how they are created. These rings are loose yet remain captured by the work piece.
Parts of a Goblet
- “Bowl” is the rounded, upper part.
- “Stem” is the thin part which connects the bowl to the base.
- “Base” is the flat bottom upon which the wood rests.
Materials Used to Create this Goblet with Captive Rings
- Wood: 5″ x 5″ x 12″ (13cm x 13cm x 30cm).
- You can use smaller blanks to create smaller goblets.
When selecting wood, I would recommend using a fairly dry piece of wood. If you use wet wood, the goblet will become oval as it dries. While an oval shaped bowl can be attractive, an oval shaped goblet is less eye-catching.
Written Instructions Follow Step by Step Images.


Written instructions for making a goblet with captive rings (Woodturning Project).
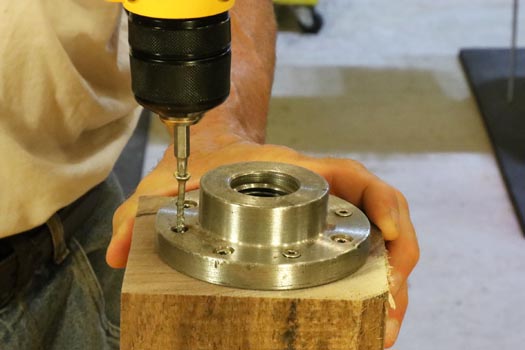
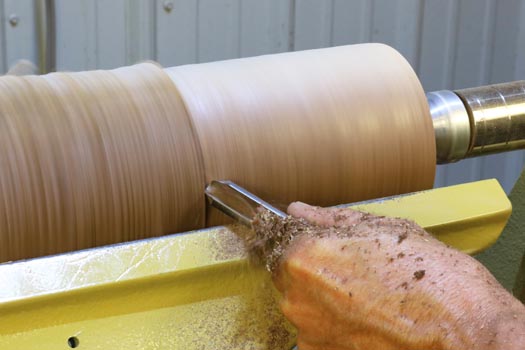
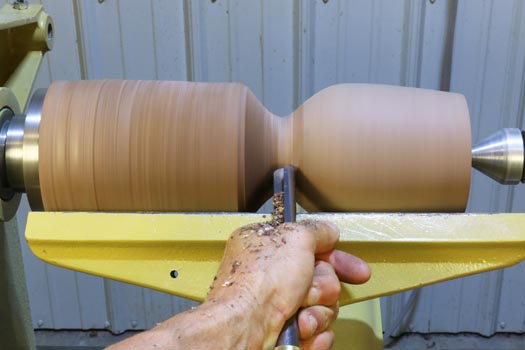
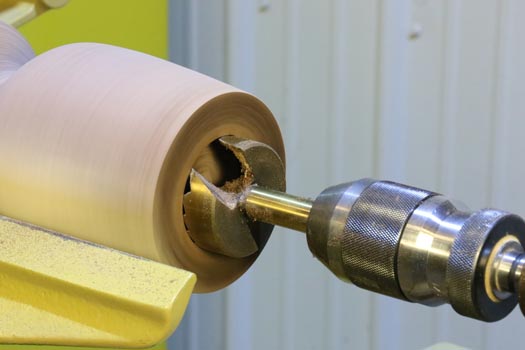
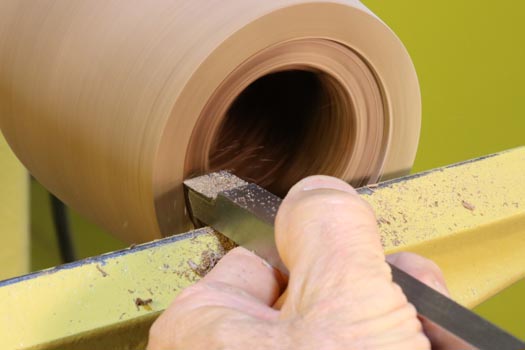
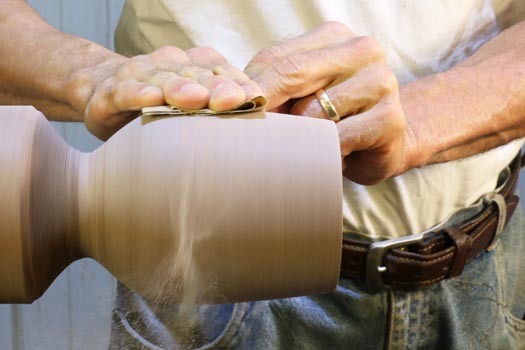
While there are numerous ways to turn a goblet, I typically take the following steps. I first attach a faceplate to a blank using screws (Step 1). Next, I mount the blank on the lathe using the tailstock for additional support (Step 2). Subsequently, I turn the blank into a cylinder using a bowl gouge (Step 3). I then continue using a gouge to shape the bowl of the goblet (Step 4). Next, I then use a use a Forstner drill bit to begin the hollowing process (Step 5). Frequently, I then use a carbide cutter to remove additional material (Step 6) until the wall thickness is around 1/8” (0.32cm). I then sand the outside (Step 7) and the inside of the bowl (Step 8).
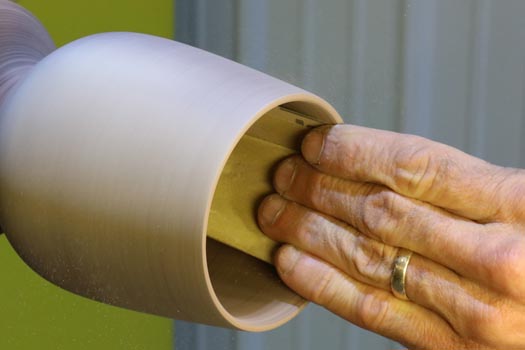
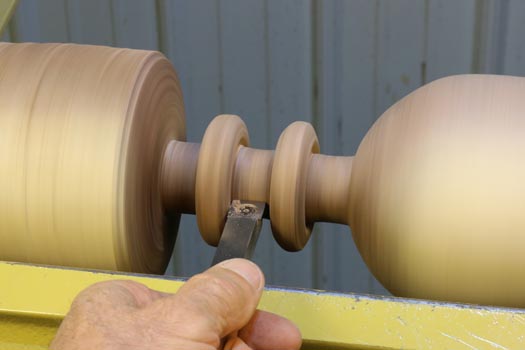
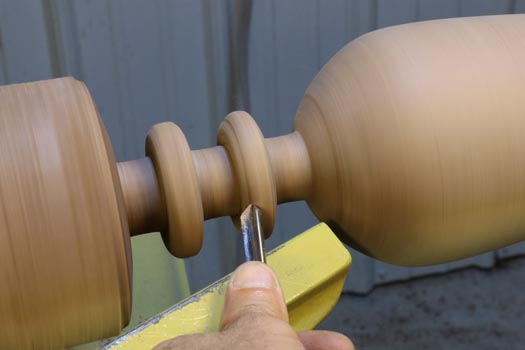
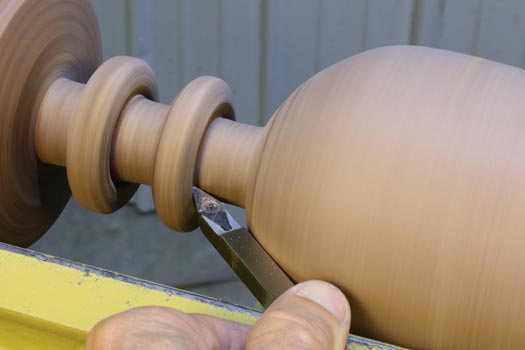
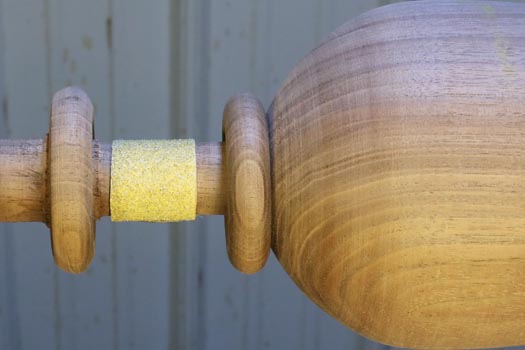
Begin working on the stem of the goblet.
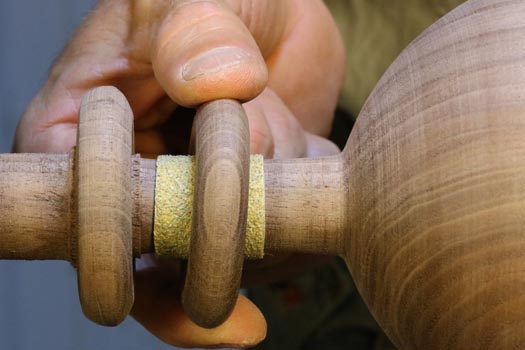
Next I begin working on the stem. I will use a combination of a carbide cutter (Step 9) and a detail gouge (Step 10) to help form the captive rings. I then sand the rings as much as possible (Step 11). Next, I use a detail cutter from both directions to separate the rings from the stem (Step 12). After I separate the rings, I stop the lathe and fasten a piece of sandpaper to the stem (Step 13). I will then turn the lathe on and move the ring on top of the sandpaper to sand the inside portion of the ring (Step 14).
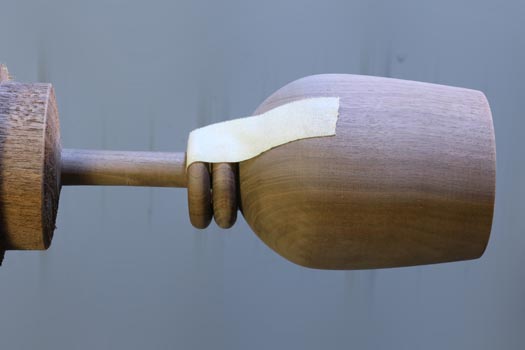
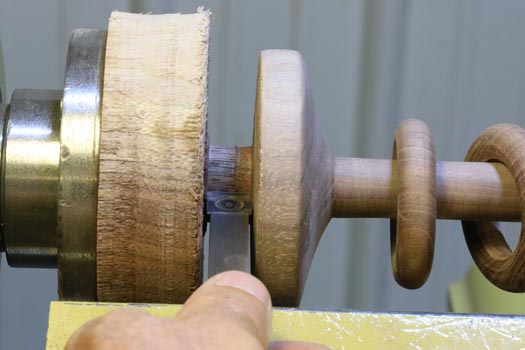
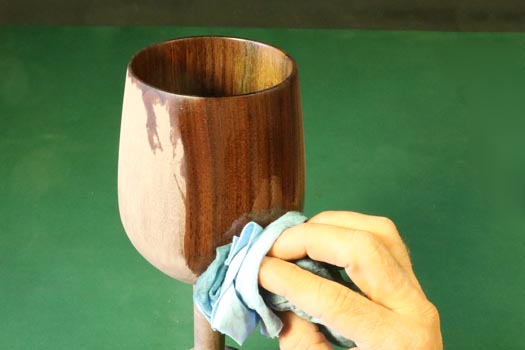
Together Steps 11 and 14 will result in a completed sanded ring. Next, I tape the rings out of the way (Step 15) and begin working on the base. Once the base is completed, I finish sanding the base and stem and then part the goblet from the waste material (Step 16). I then apply a finish to the entire goblet and rings (Step 17). The finished piece (Step 18) is ready to be given away.
The Legend of the Celtic Wedding Goblet – Wedding Present
Goblets are frequently given away as wedding and anniversaries presents. The two unbroken rings symbolize unity, strength, and everlasting love between a bride and groom. When giving a goblet away, it is often accompanied with a note similar to the one below:
——————————————————————————————-
The Legend of the Celtic Wedding Goblet
In 17th Century Ireland when a young man fell in love with a young woman he carved a goblet to present to her. He lovingly carved the goblet, with two captive rings, all from a single piece of wood. These two rings symbolized unity and eternity. At their wedding feast they both drank from the goblet and thereafter kept it in a safe place for, so long as the rings remained unbroken they would love each other for eternity. Name of person who hand turned the goblet.
——————————————————————————————-