How to Made a Segmented Bowl (Woodturning Project)
A great project to introduce woodturners to segmented turning is creating a segmented bowl from a single board on a lathe. By creating cuts at angles, you can create a bowl from a single piece of wood not much larger than the original board. This approach can minimize waste – allowing you to create economically priced bowls even when using expensive exotic woods.
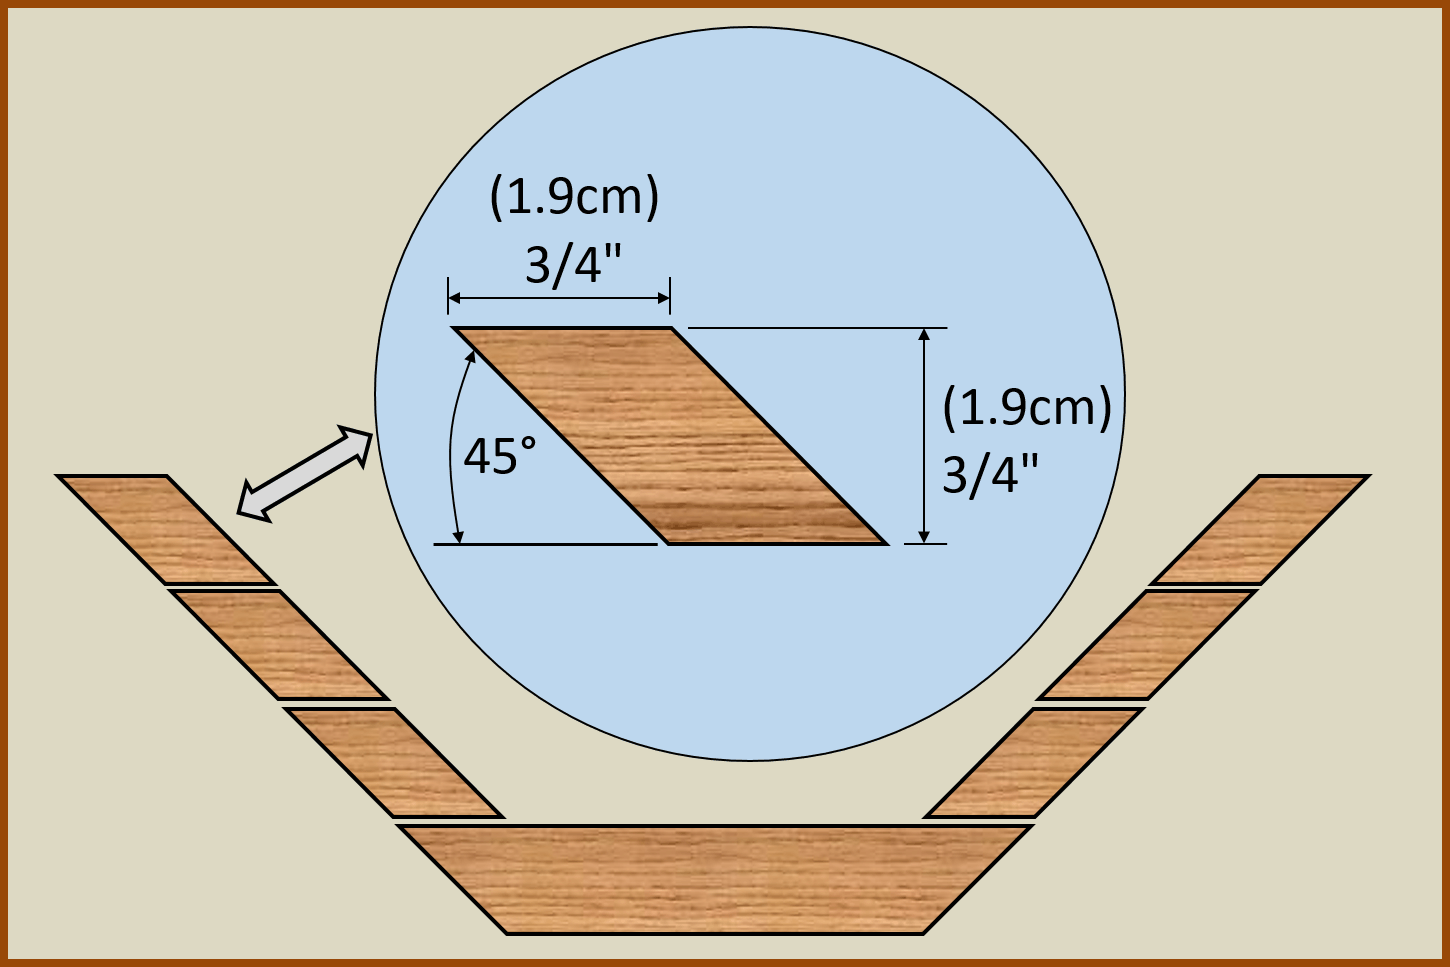
The approach discussed below is very low tech. It does not require any advanced math or computer software. In this approach, rings are cut at 45° on a bandsaw and then glued back together. This approach also allows you to create sizes which are not limited by the size of the blanks you can purchase or cut from a log.
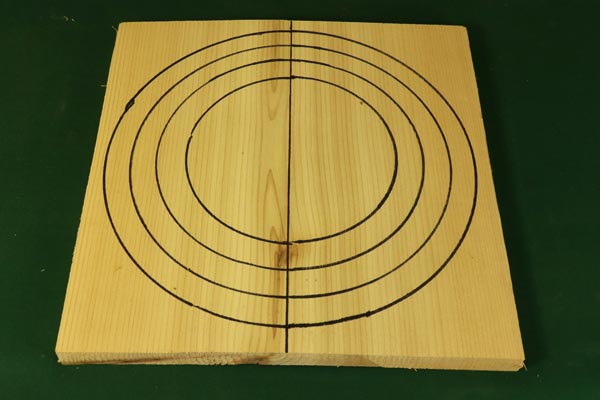
The major constraint to follow is that the thickness of the board determines the width of the rings. In the example, illustrated in this section, the thickness of the wood is 3/4″ (1.9cm) so the width of the rings also needs to be 3/4″ (1.9cm) as shown in Figure 1.
Materials used to created the Segmented Bowl:
- Wood: 11¼” x 11¼” x ¾” (28.6cm x 28.6cm x 1.9cm)
Written Instructions Follow Step by Step Images.

Written instructions for making a Segmented Bowl (Woodturning Project)
While there are numerous ways to create a blank from a single piece of wood, I typically take the following steps. I first mark the board in half and then mark circles with diameters increasing in increments twice the thickness of the board. Since the board is ¾” (1.9cm) thick, I could mark 6”, 7½”, 9”, and 10½” diameter circles (Step 1). This would result in rings ¾” (1.9cm) in width. After marking, I then cut the board in half.
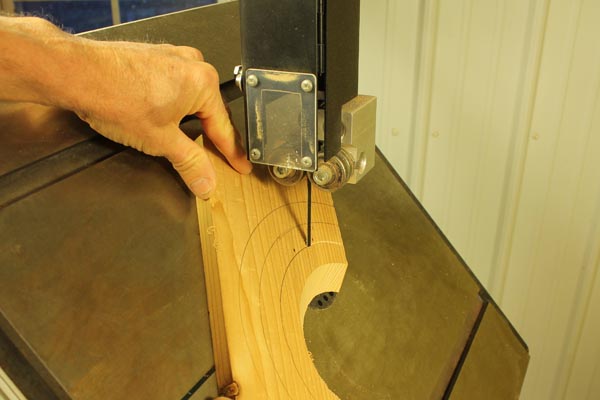
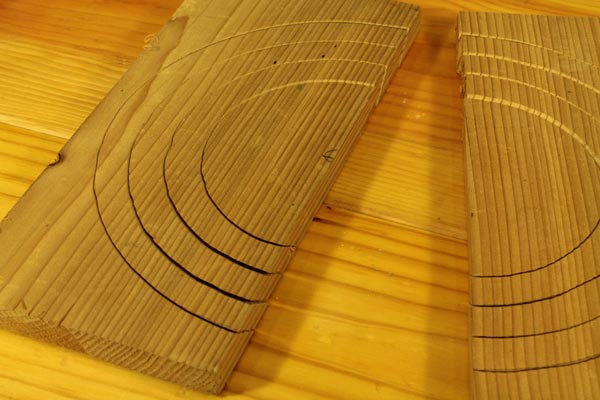
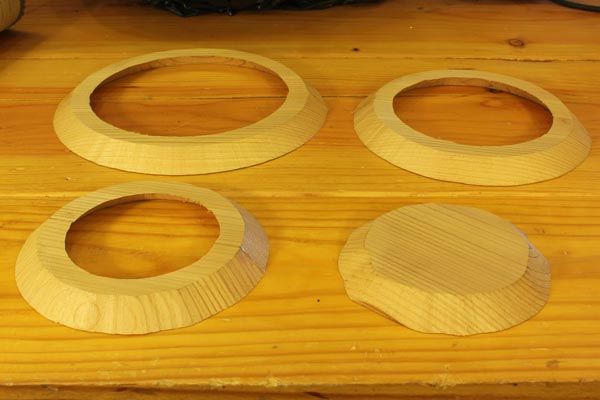
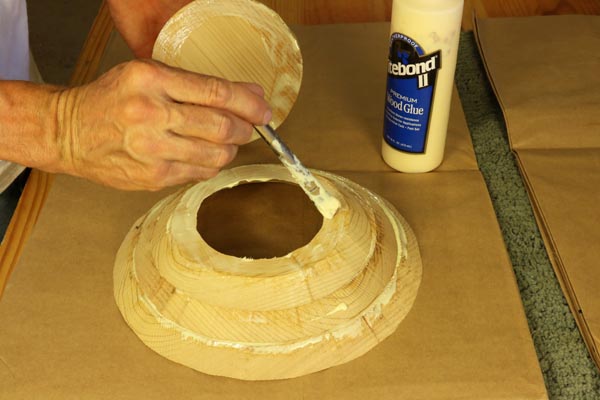
Next I tilt the bandsaw table 45° and cut along the circular lines (Step 2). The resulting cuts are shown in (Step 3). After this, I glue the ring halves back together (Step 4). Once the rings have dried, I glue the layers together (Step 5). In this case, I have also added a waste block, so the screw holes can be removed. I then clamp the rings together with the help of the tailstock on the lathe (Step 6).
Getting Ready for the Lathe.
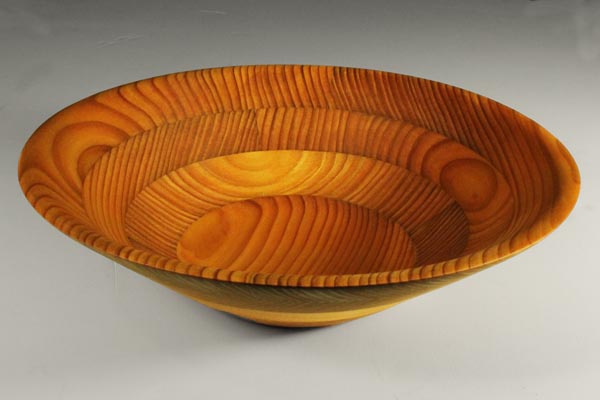
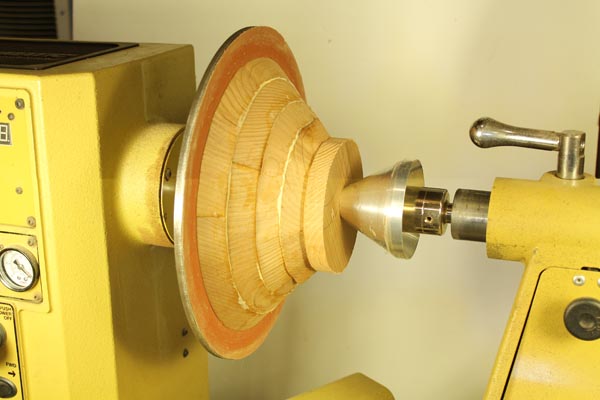
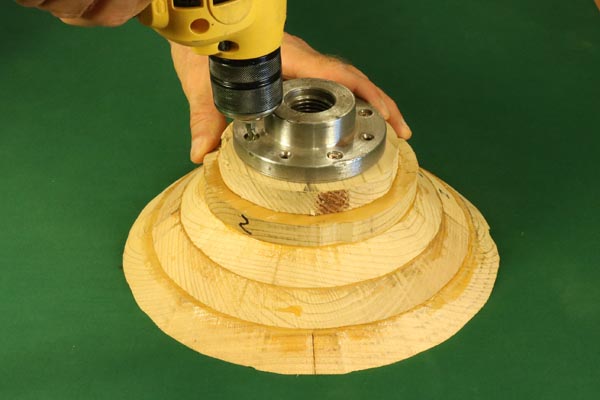
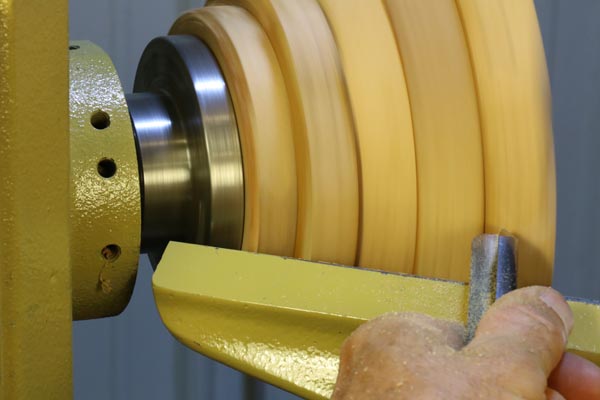
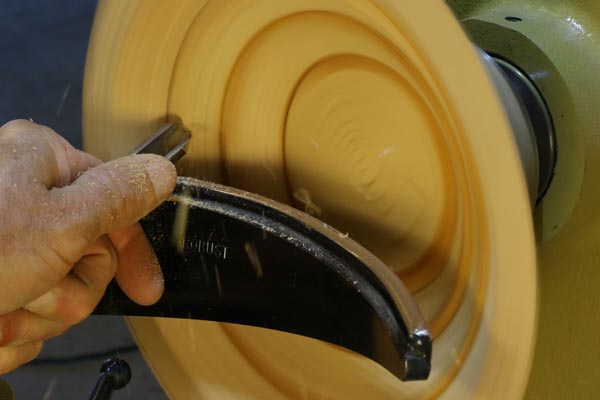
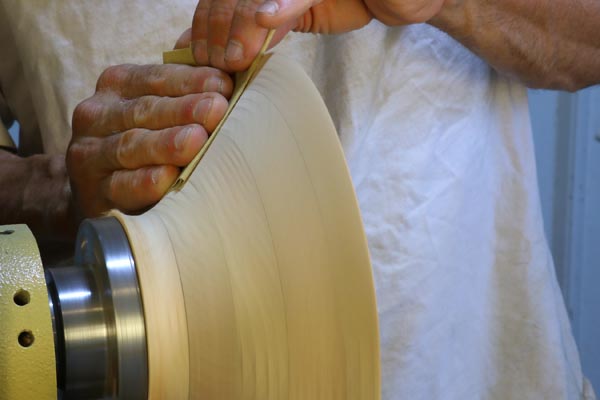
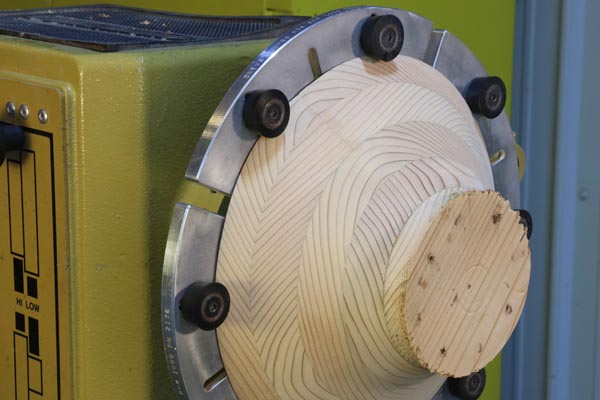
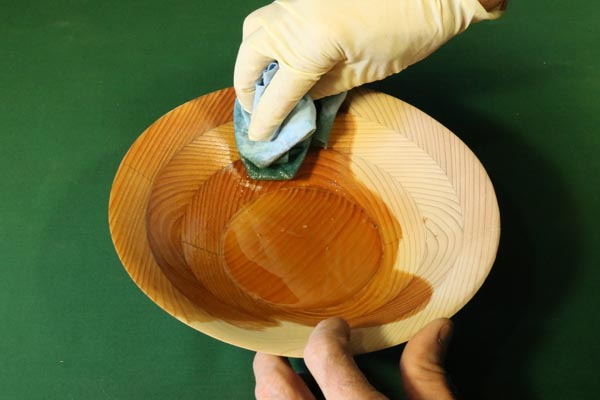
Next, I attach a faceplate for mounting the piece on the lathe (Step 7). I then begin turning the outside (Step 8) and the inside using a bowl gouge (Step 9). I then sand the inside and outside of the piece (Step 10). Next, I mount the bowl in a set of jumbo jaws (Step 11) and clean up the bottom and remove any screw holes (Step 12). You can clean up the bottom using a variety of tools including a bowl gouge, square carbide cutter, or even a power sander. I then apply a food safe finish (Step 13). The finished segmented bowl (Step 14) is ready for use.
In the example illustrated in this section, all the rings came from a single cedar board. However, you can use other types of woods. Better yet, combine different types of wood to create your own unique style.