Wood Carving Tools, Tips & Techniques
Woodcarving is the process of using either hand tools or power tools to remove wood from portions of a piece. It can be used to add texture, decorative elements or to create a final piece such as a wooden spoon. Some woodworkers combine carving and piercing. Piercing is simply going all the way through the piece. Knowing about the variety of carving and piercing tools available today, along with methods for the removal of material can save time and frustration. Following are some helpful wood carving and piercing tips.

1. Realize you can use a mallet on some wood carving tools.
Some carving tools can be used either by hand or with a mallet. Pushing tools by hand can be inefficient – especially when carving large projects and dense hardwoods. Consequently, you can use most full-sized carving tools 10” to 12” (25cm to 30cm) with two hands or driven with a mallet. In some cases, using a mallet can provide a more controlled cut.
2. Realize you can carve boards that you have glued.
It is typically necessary and acceptable to glue smaller boards together to create larger carved projects. By gluing wood, it is also possible to orient the wood so the more delicate parts of a design are arranged along the grain for increased strength. When creating carving blanks from numerous pieces of wood, it is helpful to plan the project. This helps avoid glue seams in highly visible locations (e.g., down the middle of a face).
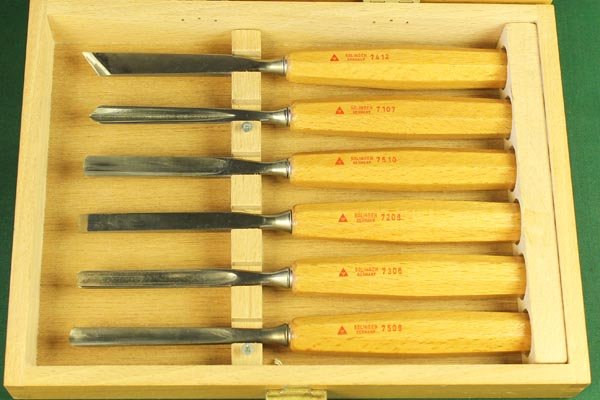
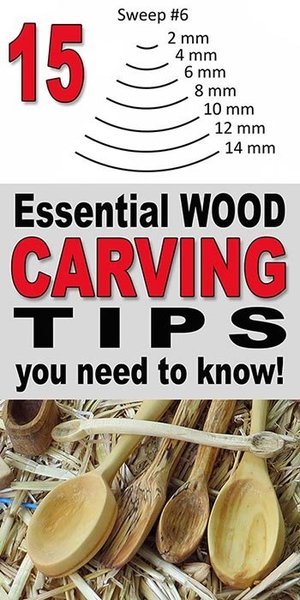
3. Understand the different types of gouges.
You can buy gouges in a wide variety of widths and curvatures. Some curvatures are nearly straight and some have a very tight arc. While the curvature may vary slightly from one brand to the next, in all cases low numbers indicate a shallower, flatter sweep. Whereas, higher numbers indicate a more pronounced, deeply curved gouge. Notice in the figure below that a gouge with a “Sweep 5” has less curve than a gouge with a “Sweep 6”. Gouges also come in a wide variety of widths. Depending upon the brand, the width of the gouges maybe specified in mm or inches. Regardless of the brand, the larger the distance across the gouge, the larger the width. For example, in the figure below, notice how the width (in millimeters) corresponds to the distance across the gouge.

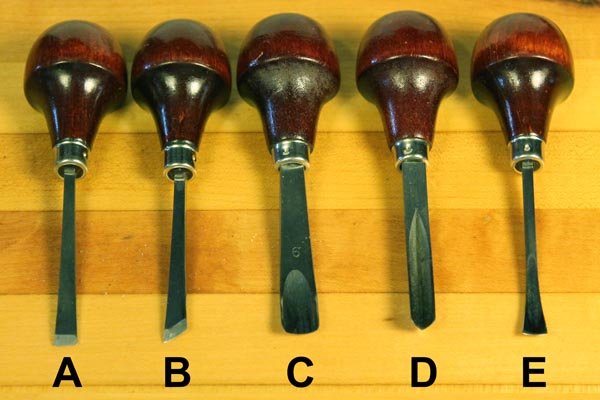
4. Be able to identify the hand wood carving tools below.
Chisel (A) has a straight cutting edge that is perpendicular to the side edges. Skew chisel (B) is a bevel-edge chisel with an angled tip. Gouge (C) is a chisel with a concave blade. V-tool (D) is essentially two chisels which have been joined together to create a “V”. Fishtail gouge (E) is a gouge that flares out at the ends to form a “fishtail” shaped tool.
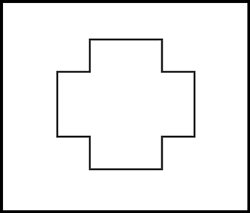
5. Understand negative and positive piercing.
In a “negative dominant piercing,” the design appears as an “outline” of wood within a background of pierced holes. The design is more difficult for you to see and may require a closer look to reveal the pattern. On the other hand, with “positive piercing”, the design appears as “solid wood” within a background of pierced holes. The final design is typically more easily visible. Assuming the cross is the desired pattern, you can see a negative and positive dominant piercing below.

6. Keep the tool perpendicular to the surface being pierced.
If this is not done, then the amount of wood left between holes will be thicker on one side than the other side and the cuts will appear to “lean”.
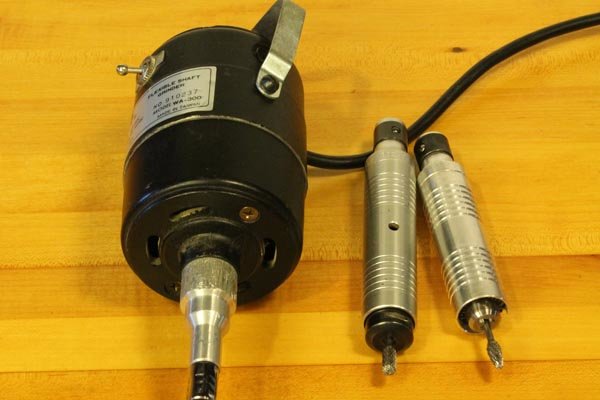
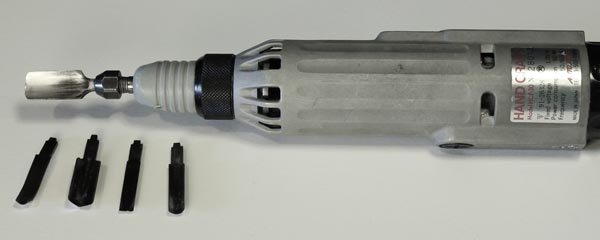
7. Realize that burrs work best at high speeds.
Burrs or rotary files typically work best at high speeds (thousands of RPM). High speeds help maintain the correct cutting conditions with regards to the surface speed. The burrs are typically held in a hand piece attached to a shaft grinder which uses a rotary motion (i.e., the bits revolve around a center or axis). The hand pieces shown below alongside the flexible shaft grinder can accept drill bits, abrasive cut-off wheels, sanding drums, rotary files, and carbide burrs for cutting, shaping, carving, and engraving wood.

8. Wear a safety glove when wood carving.
While it is a good idea to wear a carving glove on both hands, at a minimum, a safety glove should be worn on the hand which is holding the wood. This glove will help keep your hands safe from the sharp tools. If you find yourself switching hands frequently, you might want to wear a glove on both hands. For protection against accidental cuts, many wood carvers wear safety gloves typically made from a Kevlar and steel weave on both hands.
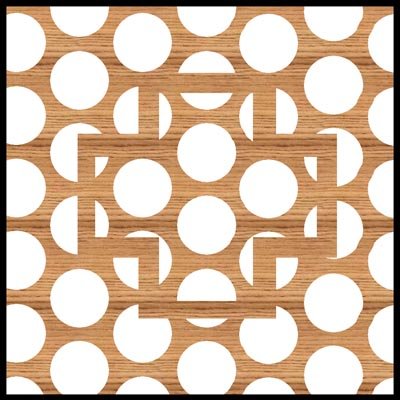
9. Understand the different types of patterns.
You create a “positive pattern” by removing the background and revealing the design, character, or scene.
The word “OAK” illustrates a positive pattern. On the other hand, you create a “negative pattern” below the surface of the wood.

10. Realize hardwoods are typically more difficult to carve.
For example, oak is a dense wood with a coarse grain which makes it very hard to carve. It also tends to break away at the edges when attempting very fine work. If you decide to carve oak, keep your hand tools super sharp or consider using power tools. On the other hand, woods like balsa, basswood, and pine are softer and easier to carve.
11. Use “relief carving” to raise a design.
With relief carving you remove the background. This makes it appear that you raised the foreground (e.g., the design, scene, or character). Some people call it “relief carving” because of the feeling felt when the piece is finished!
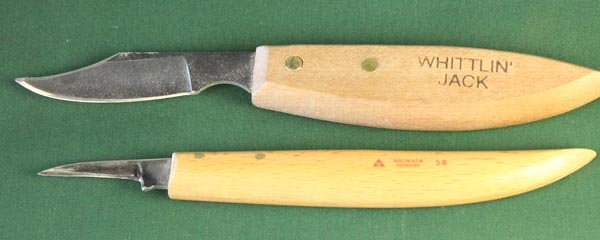
12. Realize “whittling” is a type of carving which only uses knives.
This action results in a surface with “knife strokes” clearly visible on the final piece giving it a rugged natural feel.
13. Use “carving in the round” to create 3D figures.
Carving in the round creates 3D figures that you can view from any angle. These figures frequently have “lifelike” surfaces and textures. The carver typically uses a variety of tools such as gouges, chisels, abrasive points, burrs, etc. to create a smooth surface.
14. Use “chip carving” design or geometric pattern.
Chip carving uses knives and chisels to remove “chips” of wood to form a design or geometric pattern. Typically, chip carvings have two levels. One level is the wood surface, and the second level is the point beneath the surface of the wood where the cuts meet.
15. Consider using a power wood carver when working with hard wood.
The reciprocating motion (moving backward and forward in a straight line) makes it easy to drive even large gouges into hard wood.
Below are some helpful links on sharpening carving tools and a fun project.
Woodturners
Most woodturners typically perform carving or piercing after the piece has been turned and sanded to satisfaction. Some woodturners might only carve or pierce the rim of a bowl. Whereas, the next woodturner may decorate the entire piece (rim, body, and base) through carving and piercing. The possibilities with carving and piercing are endless. Together, with carving an piercing you can create beautifully turned pieces.
Keep vessel walls thin when piercing. Using thin walls 1/16” to 3/32” (1.5mm to 2.5mm). Thin walls:
A. Give a piece a more delicate, light feeling.
B. Result in breaking fewer bits.
C. Save time and tools since many of the tools used for piercing have very little torque.
Pin for later!
Looking for more WoodWorking Tips and Tricks?

Looking for more WoodWorking Projects and Plans?

You will also find patterns of all 50 US States.