How to Make Wind Spinners: DIY Woodworking Project with Plans
Learn how to make wind spinners in this easy, beginner, DIY woodworking project with plans. Wind spinners are fun to watch and build and make great additions to your yard or garden. They turn in a fascinating, spiraling motion whether the wind is blowing from the north, south, east, or west. They make for an easy and fun weekend project. You can build a wind spinner in as little as one to two hours. Wind spinners make great presents, and they have a good profit margin at craft fairs. When finished you can even paint your wood spinner to give it your unique “spin!”
Typical wind spinners are between 6″ to 10″ (15cm to 25cm) in width and 20″ to 30″ (51cm to 76cm) in length. For this article, I will be making a wind spinner 7″ (18cm) wide and 24″ (61cm) tall. The wood is cedar.
Materials Needed for Wind Spinners:
- 65 – 3/4″ x 1/4″ x 7″ (2cm x 0.6cm x 18cm) pieces of wood.
- 1 – 1/4″ (0.6cm) threaded steel rod 36″ (91cm) long.
- 2 nuts.
- Nylon cord, fishing line, or light chain.
- Drill, hacksaw, table saw or circular saw.
- Optional: fishing spinner, eye bolt, coupling nut.
Step 1. Rip a board into strips.
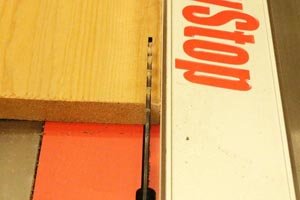
Rip a 3/4″ (2cm) piece of board into strips that are 1/4″ (0.6cm) in width.
Step 2. Cut the strips to length.
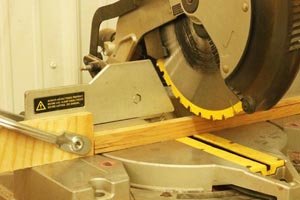
Cut the strips to 7″ (18cm) in length. A miter saw can be used to speed up this process. Notice how a stop block is clamped to the miter saw below. This allows me to cut multiple pieces at once without stopping to measure.
Step 3. Drill holes in all strips
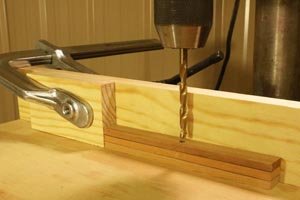
Drill a hole 1/4″ (0.6cm) or slightly larger than the threaded rod in the middle of all 65 pieces of wood. Make sure the holes are drilled in the center of the board. This will help ensure the spinner is balanced and will spiral properly. I am using a drill press with a stop block to speed up the process. This will also help ensure all the holes go through the center. Notice in the image below, how I can drill holes in more than one piece at a time.
Step 4. Prepare the top of the threaded rod.
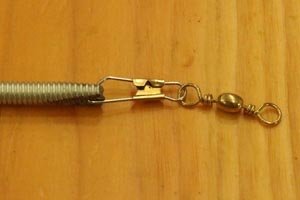
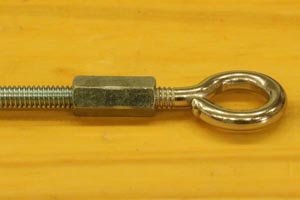
Prepare the top of the threaded rod so you can hang your wind spinner. Option #1. Smash the end of the threaded rod with a hammer and drill a small hole in this end. Insert a fishing swivel into this small hole. Option #2. Connect the threaded rod with an eye bolt using a coupling nut as shown below. Use epoxy or thread sealant (Loctite) on the threads to prevent them from loosening.
Step 5. Insert the threaded rod through all strips of wood.
Insert a nut and washer on the top of the threaded rod. Then insert the rod through all strips of wood. Finally, place a washer and a nut on the bottom then lightly tighten the nut.
Step 6. Cut off excess threaded rod.
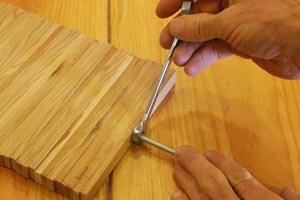
Use a hacksaw to cut off excess threaded rod.
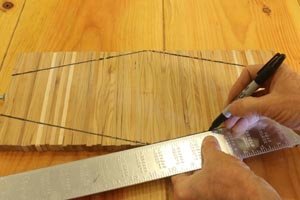
Step 7. Mark the profile of the wind spinner.
Step 8. Cut out the profile of wind spinner.
Below I am using a band saw to cut out the profile of the wind spinner.
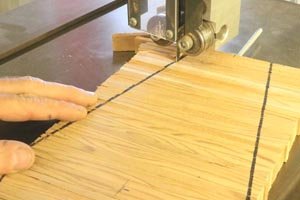
Step 9. Apply a finish to your wind spinner.
Optionally paint or apply a finish to your wind spinner. Shown below I am applying a protective linseed oil to the final piece.
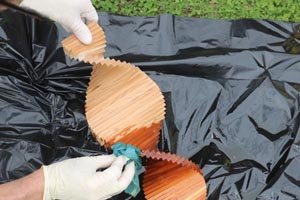
Step 10. Rotate the strips of wood.
Rotate or “fan out” the strips of wood until the corners just touch from strip to strip. Tighten the nuts when finished so the strips stay in place.
Step 11. Hang up your wind spinner and enjoy!
Place your wind spinner on your porch, in a tree limb, on in your backyard. You can use fishing line, nylon cord, or a light chain to hang it up. You might consider using a fishing swivel or a swivel hook if your wind spinner keeps getting tangled.
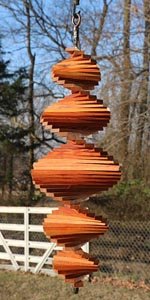
What to do if Your Wind Spinner is not Spinning.
- Make sure your holes are centered. If your holes are not centered (Step 3), try rotating every other strip of wood 180 degrees. This might make your spinner less out of balance.
- Use strings or cords rather than chains. Chains require more effort to spin than strings or cords. A fishing string or nylon cord has less resistance and can also store energy. Strings will tend to spin in one direction, momentarily stop, then reverse directions as the string “unwinds.” This back and forth motion, helps keep your wind spinner moving even when the breeze momentarily stops blowing.
Pin for later!
Looking for more WoodWorking Projects and Plans?
You will also find patterns of all 50 US States.
