How to Make a Homemade Wooden Dough Bowl (Instructions & Video)

Learn how to make an old fashioned homemade wooden dough bowl. To make an affordable dough bowl, I like to use a combination of power tools and hand tools. In particular, I will be using a chain saw, an adze, and a carbide shaping tool to create an antique looking dough bowl.

How to make a homemade wooden dough bowl.  Written instructions and video will walk you through creating a handmade, DIY, antique, old fashioned, bowl using a chain saw, adze, and a carbide shaping dish.

Wood working activities which use sharp tools and powered machines are inherently dangerous. It is your responsibility to follow all chainsaw safety guidelines and manufactures recommendations. The author assumes no responsibility for any injury or accidents. Enjoy this woodworking project, but keep safety in mind.

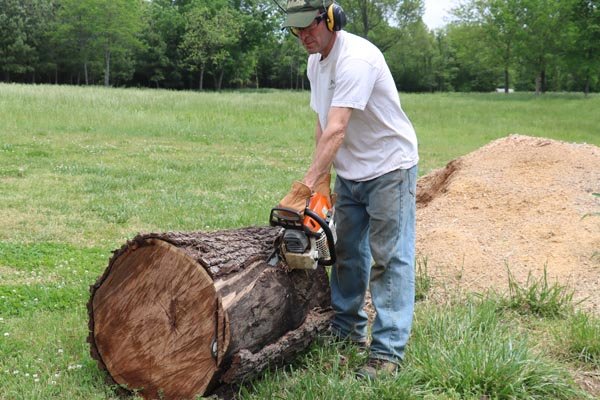
Step 1: Create a slab from a log using a chain saw.

Using chainsaw to create straight edge on log for dough bowl.
First, I create a straight edge on a log. This log is bigger than necessary.
Using chainsaw to create a slab 3
Next, I create a slab 3″ to 4″ (7cm 10cm) thick.

Step 2: Mark the outline of the dough bowl on the wood.

Mark outline of dough bowl on wooden slab.
I then mark the outline of dough bowl.

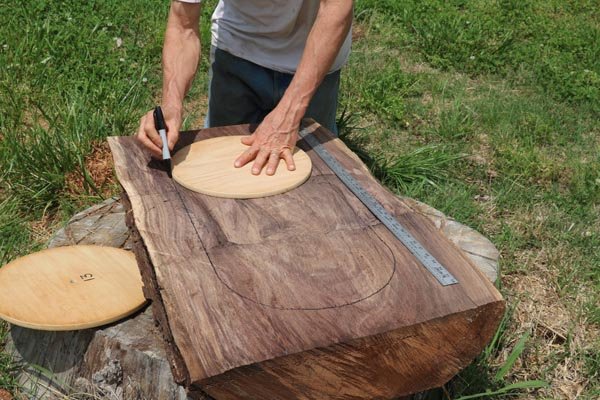
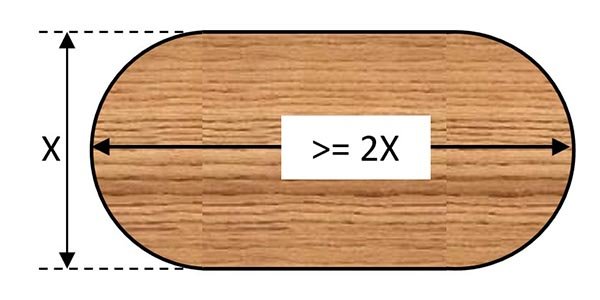
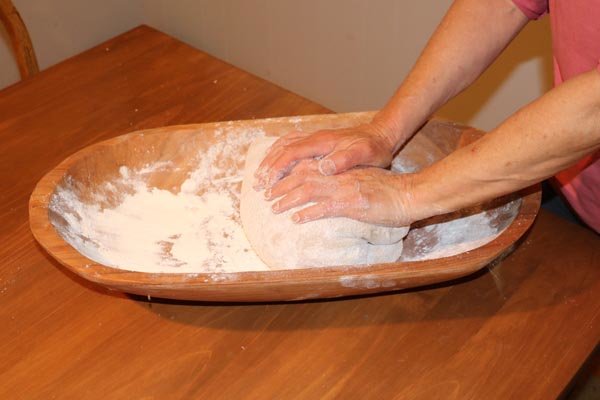
Personally, the dough bowls which I make are at least twice as long as they are wide as shown below.

Dough Bowl Dimensions.

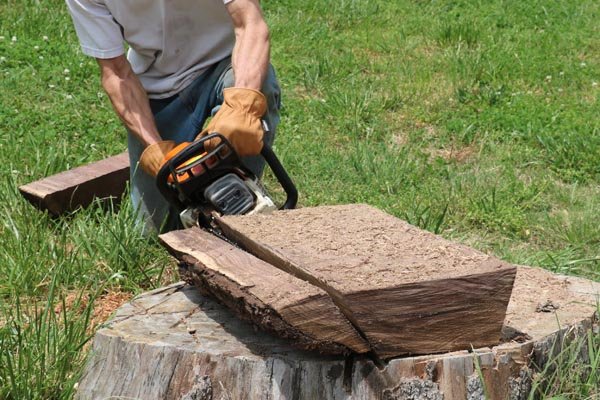
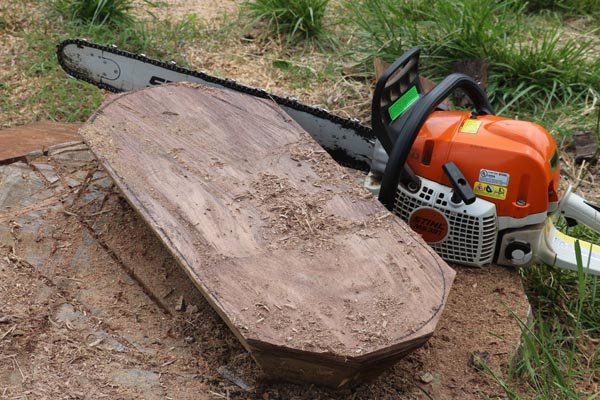
Step 3: Cut out the wooden dough bowl using a chainsaw.

Remove sides of dough bowl using chainsaw at slight angle.
Next, I remove the sides.

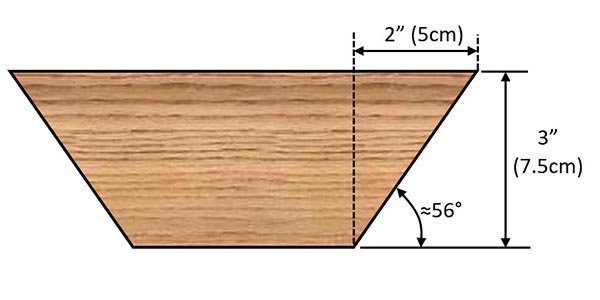
While not exact, I aim for a 50 to 60 degree slope on all the sides as shown below.

Angle for sides of dough bowl.
The angle on the sides of the dough bowl.
Dough bowl blank.
Dough bowl blank.

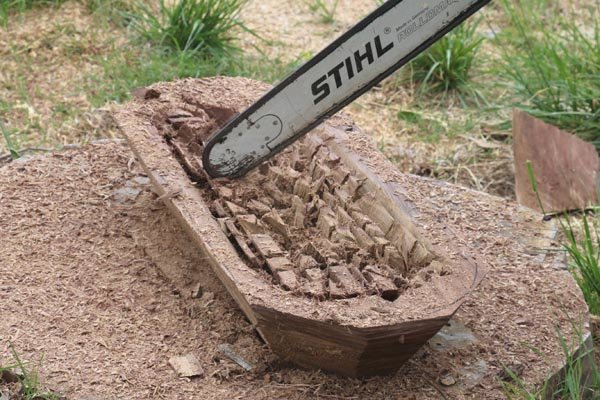
Step 4: Begin working on the inside of the dough bowl.

Using chainsaw to create relief cuts for inside of dough bowl.
I then use a chainsaw to create relief cuts. A smaller chainsaw bar would come in handy now!
Using curved adze to remove inside of bowl.
Next, I use a curved adze to remove the inside of the bowl.

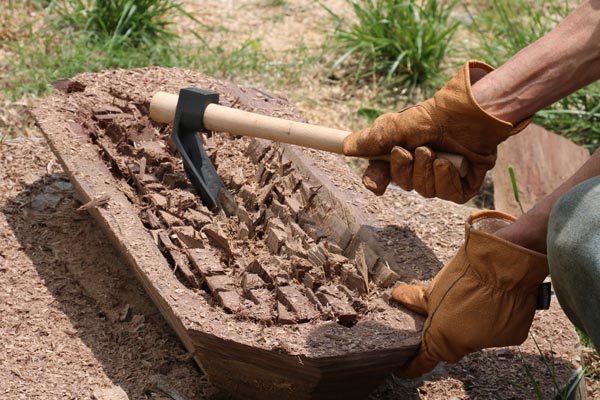
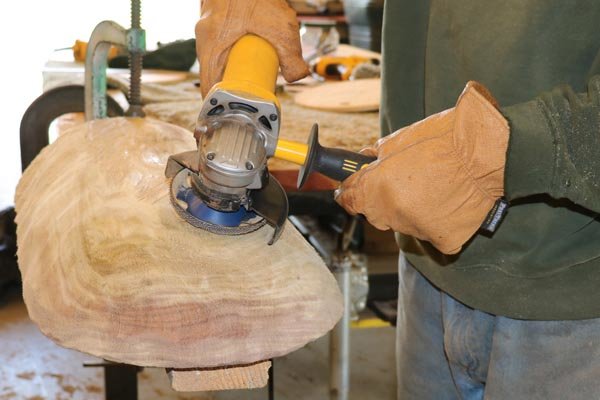
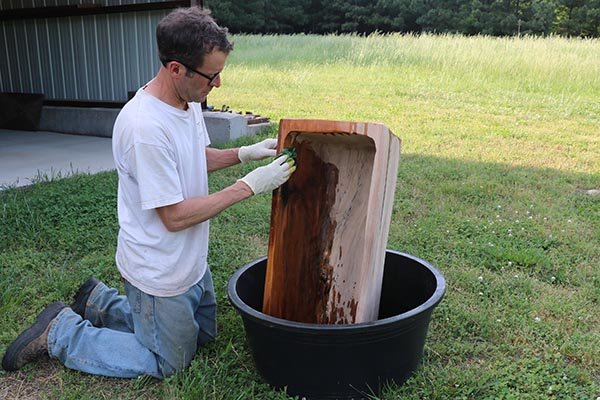
Step 5: Finishing shaping the outside and inside of the dough bowl.

Using tungsten carbide shaping dish to round the outside of the dough bowl.
I then take the bowl inside the shop and use a tungsten carbide shaping dish to round the outside.
Using a carbide shaping dish to finish the inside.
After the outside is finished, I then use the carbide shaping dish to finish the inside.
Using a calipers to achieve a consistent wall thickness.
Occasionally, I use a calipers to help achieve a consistent wall thickness.
Applying an end-grain sealer to prevent cracking.
If using wet wood, I will applying an end-grain sealer to prevent cracking.

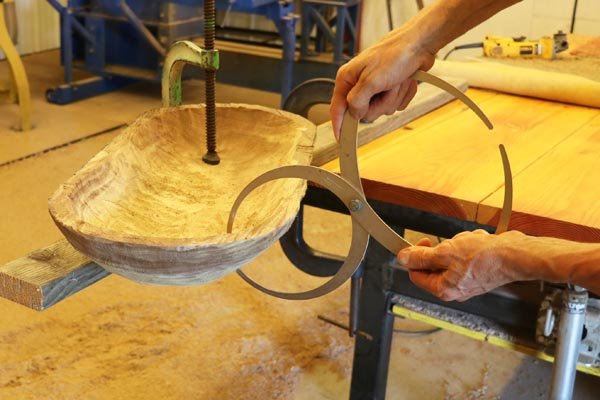
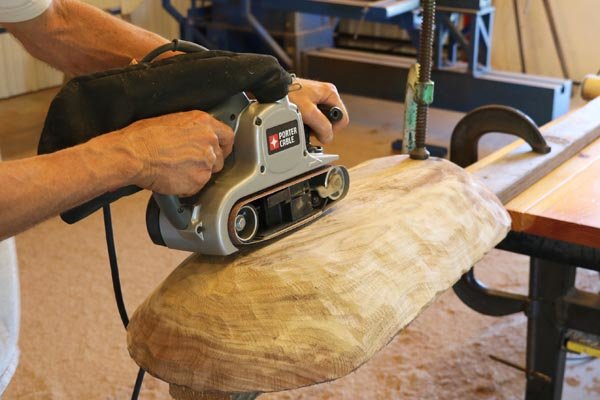
Step 6. Sand the inside and outside of the wooden dough bowl.

Power sanding the inside using an electric drill.
After drying for several weeks, I sand the inside using an electric drill.
Using a belt sander to smooth the outside of the dough bowl.
I then use a belt sander to smooth the outside of the dough bowl.

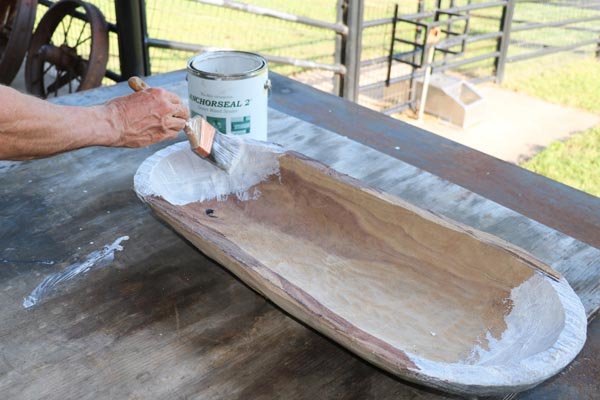
Step 7. Finish your dough bowl.

Finishing a dough bowl with linseed oil.
Decorate your finished dough bowl.
Kneading dough in the finished bowl.

Pin for later!
How to make a homemade wooden dough bowl.  Written instructions and video will walk you through creating a handmade, DIY, antique, old fashioned, bowl using a chain saw, adze, and a carbide shaping dish.

Related Links

Chain Saw Tips.
Essential Chain Saw Tips. The ultimate guide to chainsaw safety, sharpening, etc.


Looking for more WoodWorking Projects and Plans?


Looking for more WoodWorking Tips and Tricks?