Pyrography – Wood burning Tips and Tools
Pyrography comes from the Greek word “pyro” meaning fire and “graphy” meaning writing. Today, many woodworkers, woodturners, and hobbyist are using pyrography or woodburning to provide surface enhancements to their work. This might include detailing the rim on a bowl, adding Native American symbols, or creating textures and patterns on a piece. Many people combine wood burning with carving, coloring, and other techniques to create a variety of surface textures. The creative possibilities quickly become endless. Following are some helpful wood burning tips and trade secrets.
1. Consider purchasing a wood burning tip/pen combination woodburner.
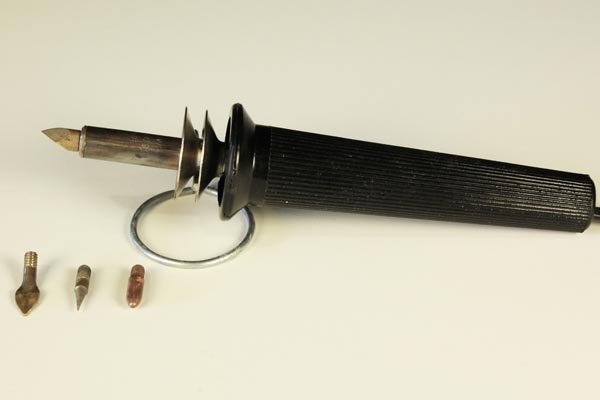
If you plan to switch tips frequently, a tip/pen combination woodburner can save you time. Pyrography burners can reach temperatures of 750 to 1050 degrees Fahrenheit (400 to 565 Celsius). Burners that use the screw-style, solid point tips, typically use soft brass metal. This metal can take five minutes or more to cool down to a temperature where you can remove the tip safely with just your fingers. While you can reduce this time by using pliers, this is not recommended since you can easily strip the threads on this soft metal if you try to remove the tip when it is still hot.
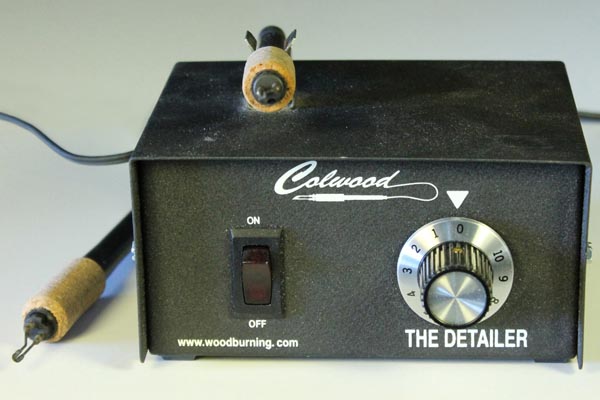
However, on wire-nib burners that use a tip/pen combination, you can replace the entire handle even when the tips are hot. You do not need to wait until the tip cools. This can be a big convenience if you need to use different tips on one project.
2. Realize that smaller gauge tips typically take longer to heat up.
When it comes to wire gauges, the general rule is the smaller the gauge number, the thicker the wire. With pyrography tools, you should notice it takes longer to heat a thicker wire. For example, a 16-gauge tip would take longer to heat up than a 20-gauge tip.
3. Be able to identify the following “wire-nib” woodburning tips and best uses for these tips.
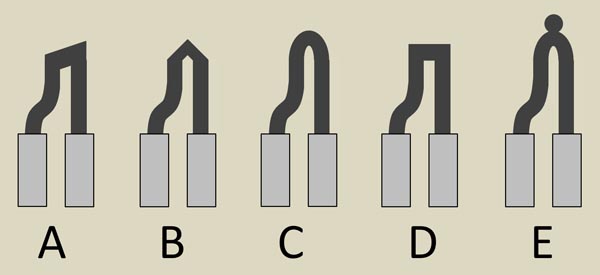
Skew tip (A) has an angled or slanted burning tip. Many people frequently use this tip for long running lines, like burning large feathers. Spear tip (B) – has a pointed edge. Many people use this tip for getting into tight places and for burning fine details. Round tip (C) – has a circular point. This tip is desirable when a depression is not wanted. Chisel tip (D) has a burning edge that is perpendicular to the side edges. Many people use this tip for running quill lines. Ballpoint tip (E) – has a tiny ball welded to the tip end. Many people use this tip when a natural writing motion is wanted.
4. Be able to identify the following “solid-point” woodburning tips and best uses for these tips.

Many people use the all-purpose (universal) tip (A) for burning the outline of designs and for creating straight lines. The calligraphy tip (B) is good for curved lines and for natural writing. The extra fine tip (C) is typically used for detailed work, straight lines, and creating tighter curves. Many people use the shading tip (D) for filling and shading large areas and adding shadows.
5. Realize that softer, lower density, woods such as basswood tend to burn faster
and require less heat than harder, denser woods. See Appendix A and B for a list of woods and their densities. Basswood is also a popular wood for burning because it has very little grain, and the burning creates a sharp contrast between the original wood and the deep color of the burning. On the other hand, hard woods like ash, maple, and oak tend to require more heat and burn slower.
6. Avoid stroke marks when shading an area with a gradient fill
– by working on medium heat using circular movements. This will slowly darken in an area. Burning a gradient fill is more difficult than simply filling in black. It takes less heat and more patience.
7. Consider following the sequence that most woodburners use.
Most woodburners first prepare the piece by sanding the wood to a smooth finish. Next they transfer or draw a design on the wood – possibly using graphite paper, carbon paper, or a soft pencil. Next, they burn the outlines, and finally adding filling and shading.
8. First burn the outline of the design when staining.
By burning the outlines, the wood is “somewhat” sealed off from the rest of the wood. Now you can apply stain without worrying about stain bleeding into the surrounding areas.
9. Burn with the grain when possible for an easier operation.
Most woodburners find it easier to go with the grain than trying to work against it. Burning against the grain typically offers up more resistance.
10. Avoid pressing down too hard on the workpiece with the woodburning tip.
Contrary to what many beginners feel, a lot of pressure is not necessary to successfully burn wood. In fact, light pressure allows you to guide the pen carefully to create graceful strokes. The light pressure also results in fewer errors and less accidental burns. Let the woodburning tips do the work, rather than forcing them. Furthermore, keep in mind, too much pressure can bend hot tips.
11. Avoid fumes when burning wood.
Burning wood can create fumes that can cause serious health problems. To help avoid inhaling fumes, work outside or in well-ventilated area. If working in a non-ventilated area, a smoke capturing/extracting device is recommended similar to the GourdMaster Woodburning Buddy II.
12. Use a round wood burning tip when burning if you want to change directions easily.
Round tips or ball tips do not sink as deeply into the wood as other types of tips. This gives you more freedom of movement and allows you to change directions easily. These features make these tips excellent for writing and signing. On the other hand, chisel tips, skew tips, and spear tips are more difficult to change directions.
13. Avoid pressure-treated wood, Medium Density Fiber (MDF), and wood which has been stained or finished when burning.
Pressure-treated wood contains chemical preservatives which help protect the wood from termites, fungal decay, and insects. Similarly, Medium Density Fiber (MDF) boards contain unsafe chemicals and formaldehyde. Finally, stains and finishes are also likely to contain chemicals that when burned can emit harmful fumes. However, most experts consider the outer layer of plywood safe for woodburning. Plywood is composed of three or more thin layers of wood bonded together using an adhesive. If burning only the outer layers of plywood (avoiding the adhesive), then it is safe material for woodburning.
14. Realize that most 110-volt electric branding irons will take 15-20 minutes to reach operating temperature.
Once this temperature has been reached, the branding iron should be able to make a good, dark impression in wood in about 2-4 seconds. Non-electric branding irons (typically heated with a propane torch) can reach operating temperatures in 2-3 minutes. However, unlike electric branding irons, non-electric branding irons require reheating between impressions.
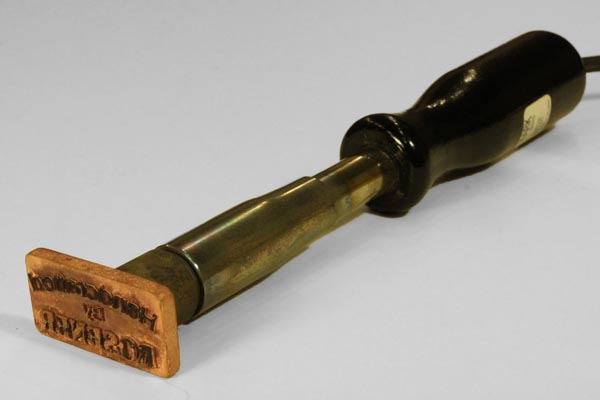
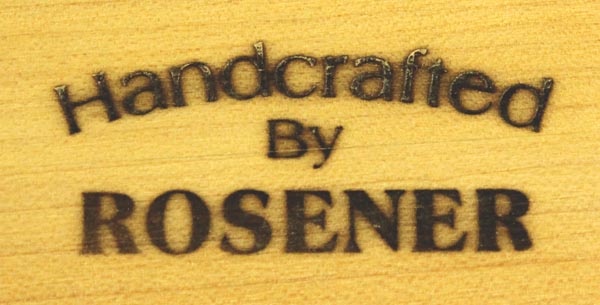
15. Realize that for a branding iron to work, the area has to be dead flat.
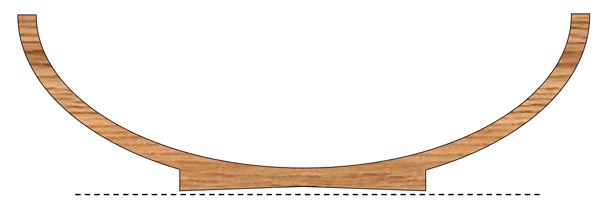
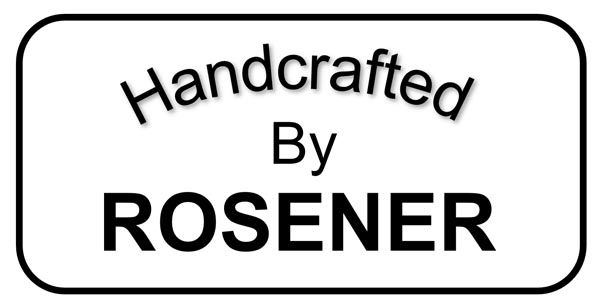
When creating an impression on the bottom of a bowl, a smaller design typically works better. This is because instead of creating a “perfectly flat” bottom, many woodturners create a shallow undercut from the rim of the base to the center of the base. This undercut ensures that the piece will sit only on the rim and will stand without wobbling even if the wood slightly moves over time. If given the choices shown below, a woodturner would more likely find a flat spot on the bottom of the piece using the smaller branding iron “Design #2”. This smaller design could also be “rocked” back and forth easier on the wood to help create the impression.
In addition to personalizing your artwork through woodburning, check out Tips for Selling Homemade Artwork for other ways to help generate more sales.
Wood burners: Burnmaster, Colwood, Dremel, Everglades, Nibsburner, Optima, Razertip, TRUEArt, Wall Lenk, Walnut Hollow.
Looking for more WoodWorking Tips and Tricks?
Looking for more WoodWorking Projects and Plans?
You will also find patterns of all 50 US States.

