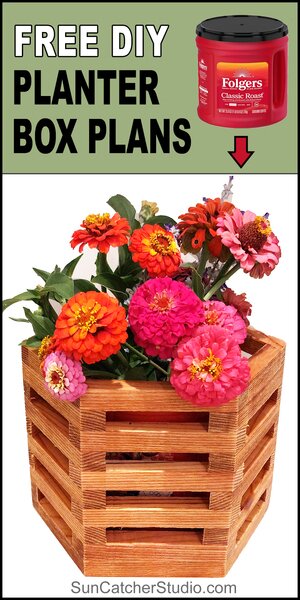
DIY Planter Box Flower Pot Plans (with Video)
Learn how to make a DIY Planter Box (Flower Pot) from recycled materials. This homemade wooden planter box can be used indoors or outdoors for holding plants. See bird house planter for more ideas.

Materials needed:
• One piece of wood approximately 8″ x 4′ x 3/4″ (20cm x 122cm x 2cm). Personally, I am using cedar which is a weather-resistant wood. Other naturally rot resistant woods would include redwood, cypress, and pine.
• One recycled coffee canister. Other round containers such as a paint can also be used. However, the dimensions may need to be slightly changed.
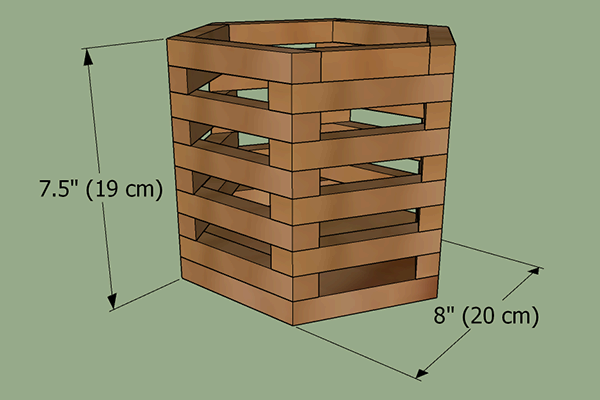
Depending upon your skills, you can create this project in about one or two hours. Below is a 3D model of this planter box. A video is also provided below to help you with construction.
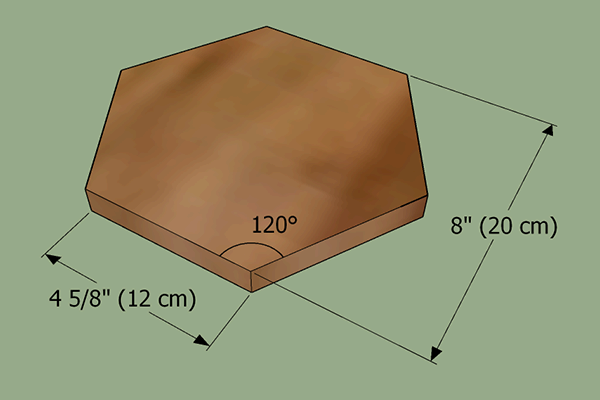
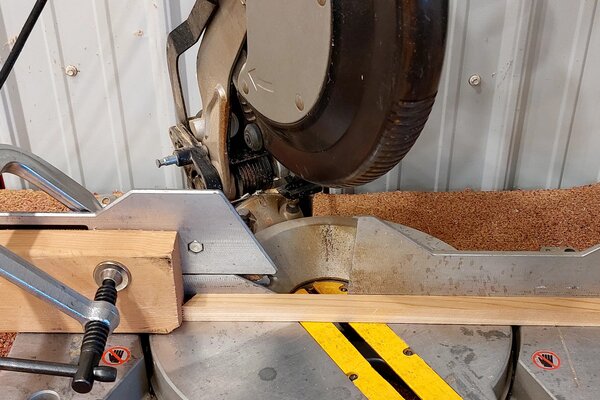
Step 1. Cut the base of the Planter Box.
Cut one piece of wood with the dimensions below using a miter saw, table saw, band saw, or some other saw.
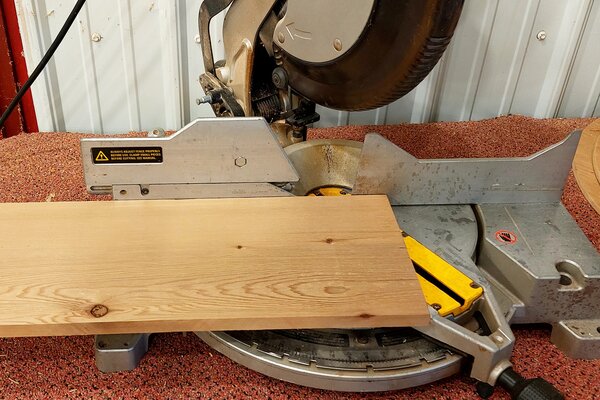
Using a miter saw to cut the base.
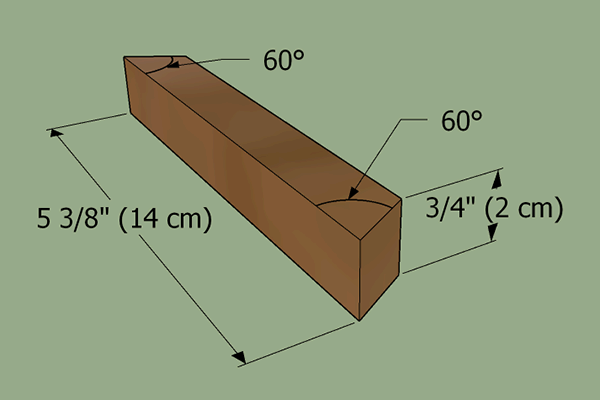
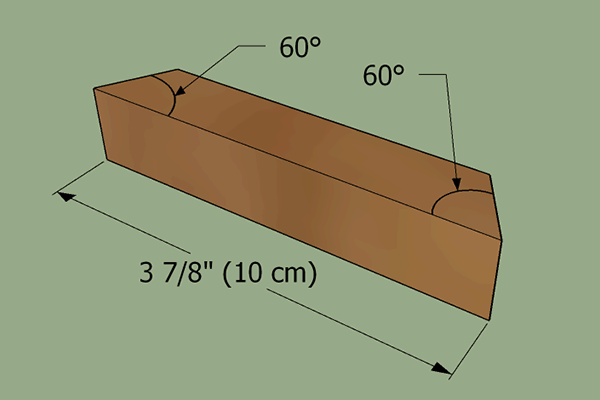
Step 2. Cut the sides of the Flower Pot / Planter Box.
Cut 27 pieces of wood with the dimensions shown below.
Using a stop block on the miter saw can help speed up cutting the pieces.
Step 3. Cut the top pieces of the Flower Pot / Planter Box.
Cut 3 pieces of wood with the dimensions shown below.
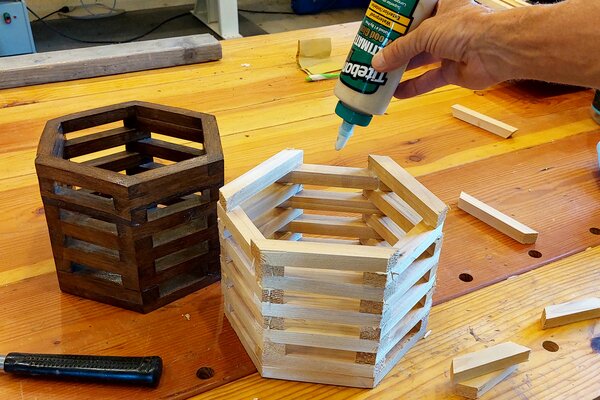
Step 4. Glue the wooden planter box pieces together.
Use an exterior or waterproof glue to bond the pieces together. If you’re using wood glue, apply a thin, even layer to one of the surfaces you’re joining. Spread the glue using a brush, roller, or your finger, making sure to cover the entire surface.
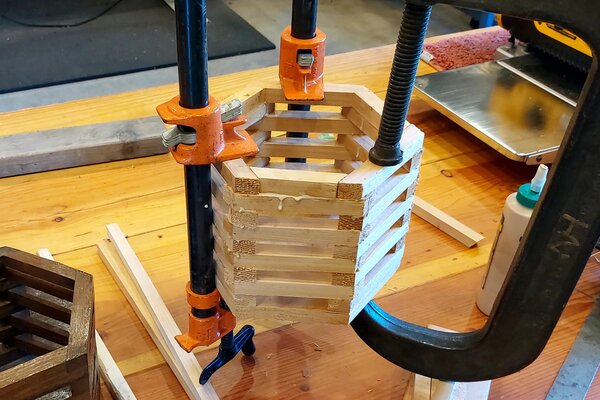
Step 5. Clamp the pieces together.
Once the pieces are aligned, use woodworking clamps to apply pressure and hold them firmly together. Tighten the clamps. Start tightening the clamps gradually, applying even pressure across the joint. Alternate tightening each clamp to distribute the pressure evenly. Be careful not to overtighten, as it could squeeze out too much glue or damage the wood. As you tighten the clamps, some glue may squeeze out from the joint. Use a damp cloth or a sponge to wipe away the excess glue before it dries.
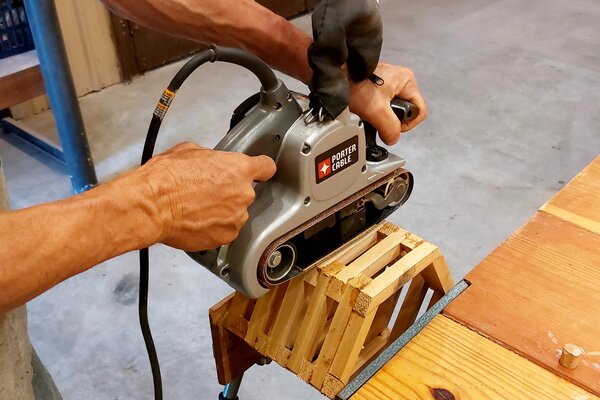
Step 6. Sand the wooden flower pot to create smooth sides.
Allow the glue to dry. Follow the manufacturer’s instructions on the wood glue for the recommended drying time. Typically, it takes at least a few hours for the glue to set, but it may vary depending on the type of glue used. A belt sander makes sanding the outside of the planter box much easier!
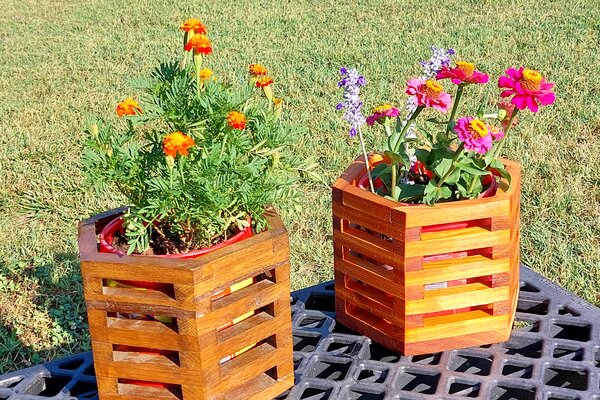
Enjoy your finished wooden planter box.
Wooden planter boxes can be a great addition to both indoor and outdoor spaces. A wooden planter box can add a touch of natural beauty to your indoor spaces. You can place it on a windowsill, shelf, or even a coffee table. Plant some vibrant flowers, herbs, or small houseplants to bring life and color to your interior. Wooden planter boxes are also commonly used in outdoor gardens and patios. They provide a charming way to display your favorite flowers, vegetables, or herbs. You can place them along walkways, on your porch, or create a beautiful focal point in your backyard.
Pin for later!
Looking for more WoodWorking Projects and Plans?

You will also find patterns of all 50 US States.
